In this article:
- Where is it?
- How does it work?
- Selecting records to filter
- Removing the selection
- Example 1: Identifying part of a group
- Example 2: Running a complex filter
Where is it?
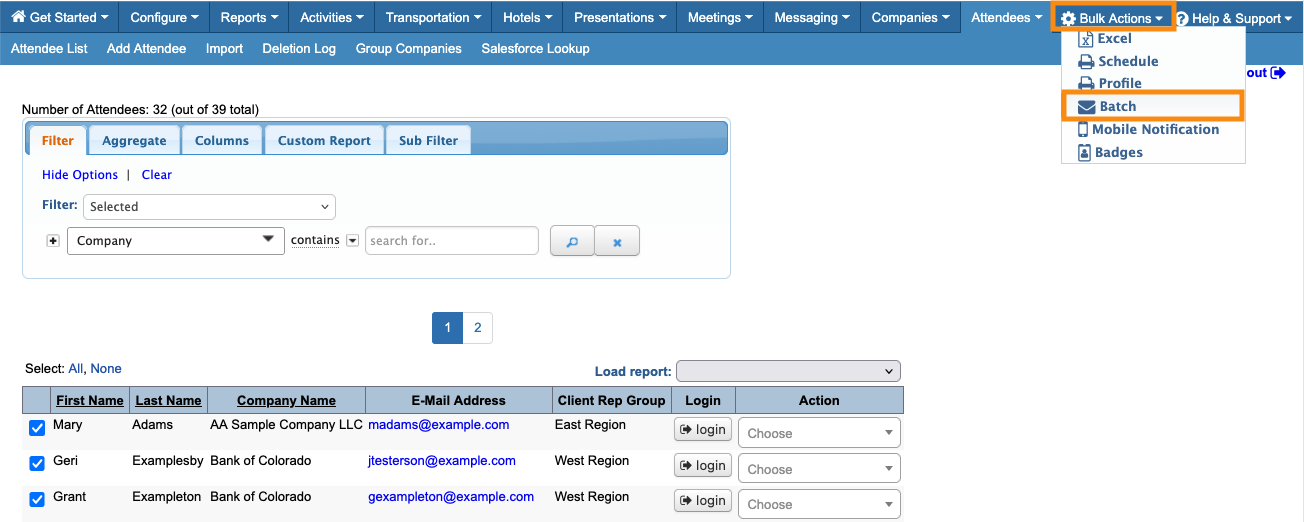
You'll see this special option here:
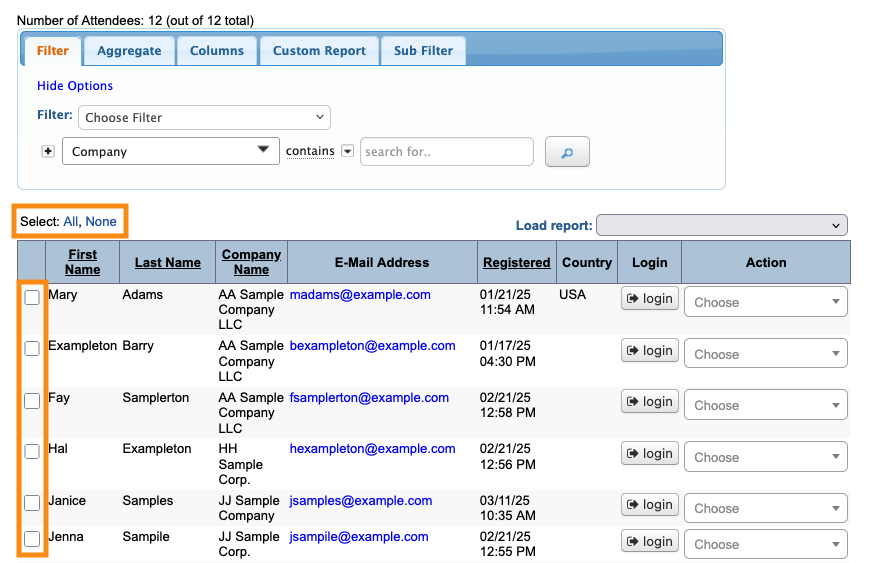
On these pages, you’ll see a checkbox next to each record, and a Select All/None option at the top:
How does it work?
MeetMax’s filter tools are extremely flexible, and customized to your event. But sometimes, you might need to isolate a very specific group of records that your filters can’t easily reach.
The Selected filter is especially useful for large events with many participants.
Here are some things you can do with the Selected filter:
- Run one filter on your entire list. Then select all records in the result. Then you can run more filters only on this selected group.
- Run a filter on your list, then select all records in the result. You can then clear the first filter and run others. Your selected records will remain marked in the subsequent filters.
- You can manually select certain records in your list. Then you can apply filters only to those records.
You’ll see more examples below.
Selecting records to filter
You can use the Selected filter in several ways, which you’ll mix and match for different situations.
Selecting specific records
Click the checkbox next to any record to select it.
If your list has multiple pages, you can select some records on one page and then go to another page to select more:
Selecting All or None
Any time you need to select all records in a list, click the Select All link.
Deselect all records with the Select None link:
| If your list has multiple pages, you’ll need to Select All or Select None on each page. |
Isolating selected records
When you select a group of records, you can then apply more filters to your entire list.
Filter results will include all of the records that apply, but anything you’ve previously selected remains checked, as shown below:
Sometimes it’s useful to see selected and unselected records together. But at any time, you can narrow the new list down to see only the selected records.
Use the top menu to apply the Selected filter:
Removing the selection
When you’re done with your search, you can dismiss your selections.
Head to the top left corner of the list and click the Select None. Then Clear the filter:
![]()
You can take these steps in either order.
| Remember, if your list of selected records has more than one page, you’ll need to click Select None on each page. |
Example 1: Identifying part of a group
In this example, we’ve sent 200 Attendees an email, inviting them to submit meeting requests. Only 25 people have actually submitted requests. The other 175 need a reminder email.
- Step 1. We’ve already exported a report of Attendees with pending meeting requests. So we know who to exclude from this second email.
- Step 2. Now, head to the Attendee List:

- Step 3. The Attendee List contains all 200 Attendees, who received our first email. Click Select All.
- Step 4. Now, we can use our report to uncheck the Attendees who’ve already made requests.
- Repeat these two steps on each page of the list:
- Step 5. Use the top filter to choose Selected. We now have a list of everyone who needs a reminder email:
- Step 6. Head to the top right corner of the page. Click on Bulk Actions, then choose Batch.
- We’ll send a batch email only to our selected group:
-
Another way to use this kind of filter is when you want to flexibly assign your Client Reps to different events.
Example 2: Running a complex filter
Sometimes, you might need to filter in layers. It’s easy with the Selected filter.
In this more complex example, we have a hybrid event - some Attendees and Company Reps will be there in person, others are joining virtually.
- Many Companies will have both Company Reps and regular Attendees at this event.
- The event has three Client Rep Groups. Both Attendees and Company Reps are assigned to these groups.
You need to check on your virtual meeting room capacity. So you need to know which virtual Attendees still have unfilled meeting requests. And then you want to compare how many unfilled requests there are in each of the Client Rep Groups.
- Step 1. Head to the Attendee List:

- Step 2. We’ve already adjusted the Columns on this list to show the data we need.
- Set the Role filter to Attendee. Now this list excludes Client Reps, and we’re only seeing Attendees:
- Step 3. Click Select All. That way, Attendees will stay marked and we can easily see them as we proceed.
- Step 4. Now, change the filter. Set Attendance Status to Virtual:
- Step 5. Use the top filter to choose With Unfilled Requests. Then we can see which virtual Attendees still need to have meetings scheduled:
- Step 6. For an even more detailed picture, we can add another filter for the Client Rep Group.
- Now we can compare how many meetings are still needed for each group: