Setting up Stripe (Payment processor)

Here’s how to connect your Stripe and MeetMax accounts to process payments at your event.
In this article:
Where is it?
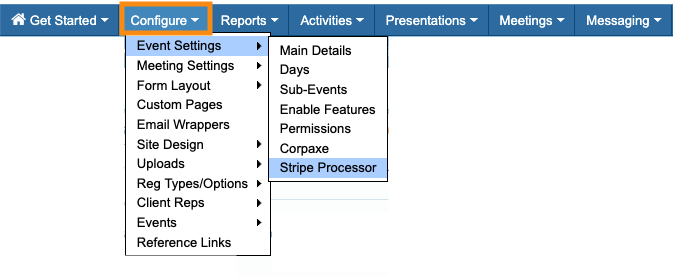
Once enabled, you’ll find your MeetMax + Stripe settings in the Configure tab:
Connecting the accounts
We’re assuming here that you’ve already created a Stripe account. Log into that account before you begin these steps.
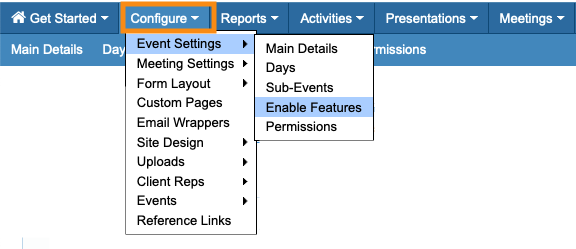
- Step 1. In MeetMax, head to the Configure tab. Choose Event Settings, then Enable Features:
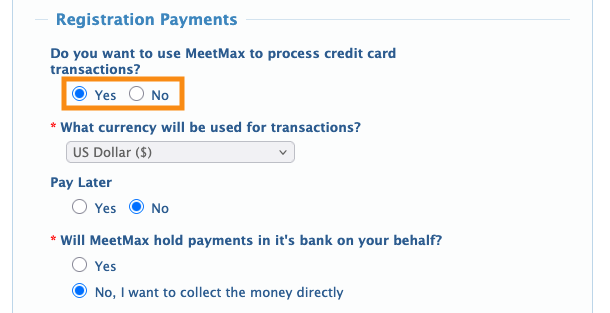
- Step 2. In the Registration Payments section, choose Yes to have MeetMax process credit card transactions for your event.
- That opens up several new fields:
- • Set your currency for transactions
- • Choose whether to use Pay Later, or not
- • Under Will MeetMax hold payments on your behalf, choose No:
- Step 3. In the payment processor menu, choose Stripe:
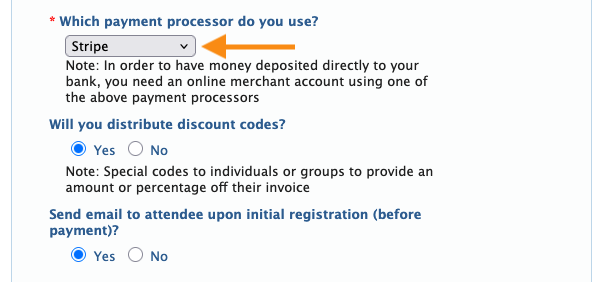
- • If you plan to use discount codes at your event, choose Yes.
- • If you want participants to get a registration confirmation email before they pay, choose Yes.
-
Our Support team is happy to help you with these settings. - Step 4. Scroll to the bottom of the page and click the Save button:

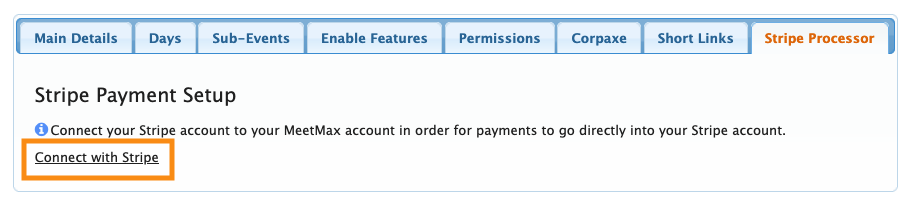
- Step 5. In the Configure tab, you’ll now have a Stripe Processor option. Head to that page now:

- Step 6. Click the Connect with Stripe link:
- Step 7. You’ll be prompted to log into your Stripe account. Enter your Stripe email address and click Submit:

- Step 8. After clicking Submit above, you’ll be prompted to log into your Stripe account.
- Once you do that your Stripe account will prompt you to connect with MeetMax:
-
You can toggle your Stripe account to Test Mode and run test transactions. Our Support team will help you set up to run test transactions through MeetMax.

What’s next?
Once this integration is connected, you can:

