
In this article:
- Step 1. Your email domain name
- Step 2. Get DNS additions from MeetMax
- Step 3. Your IT team adds CNAME records
- Step 4. Get a dedicated IP address from MeetMax
- Step 5. Send a test email from MeetMax
Step 1. Your email domain name
Reach out to our Support team, and give them the domain name you want to use for sending emails from MeetMax.
It should, of course, be a domain that your organization controls.
Step 2. Get DNS additions from MeetMax
Our Support team will give you three values, which will look something like the example below.
Your IT team will use these to create CNAME records in your domain account:

Step 3. Your IT team adds CNAME records
Your team will add three CNAME records to your domain's DNS.
Below, we’ve linked CNAME instructions for several popular domain services. If you’re not using one of these, reach out to your domain provider for help with this step.
| Your IT team will also need to add a DMARC record to your domain at this point, if they haven’t already. MeetMax isn’t part of this process. Learn more about DMARC records here. |
When your team has installed the CNAME records, reach out to our Support team. They’ll verify that everything’s correct.
Step 4. MeetMax assigns you a dedicated IP address
Once our Support team has verified your CNAME records, they’ll assign a dedicated IP address for you on our email server.
Step 5. Send a test email from MeetMax
At this point, you’ll want to send a test email from MeetMax.
The easiest way to do this is to send it from a test user on your Attendee List. You can create one, or use one you’ve already created.
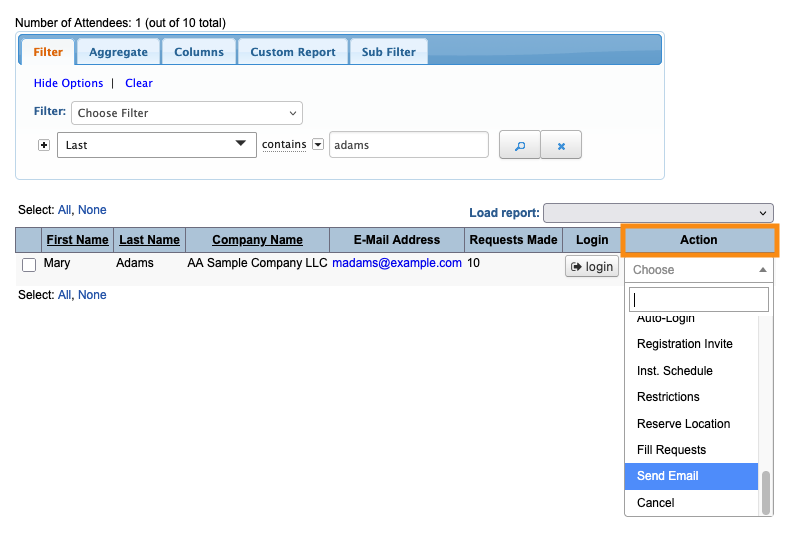
- Step 1. Change the email address of this test user to one you can receive.
- Step 2. Filter the Attendee List to display only that test user.
-
Step 3. Use the Action menu to choose Send Email:
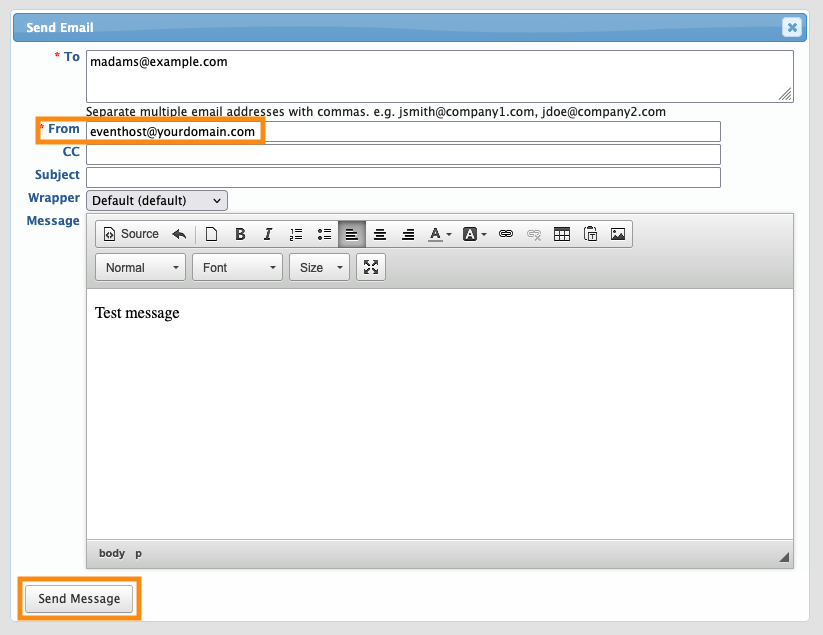
Step 4. In the email form, make sure the From address is on the domain you gave to MeetMax.
Then click Send Message:
If you don’t have a successful send, reach out to our Support team.

