Resending a registration confirmation

The method you'll use depends on the user role. Choose the process below that meets your needs.
In this article:
| Your event might have slightly different names for these user roles. |
Attendee confirmation
- Step 1. Head to the Attendee List:

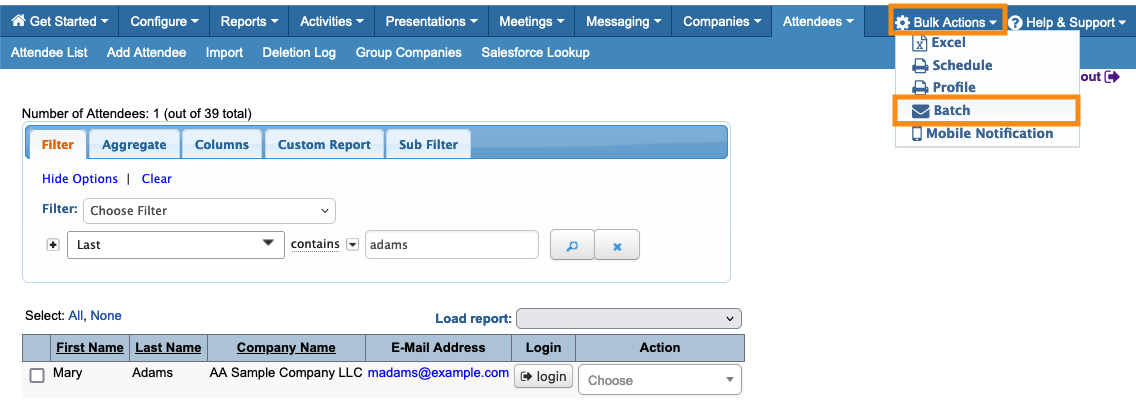
- Step 2. Filter the list to find the Attendee who needs another confirmation:

-
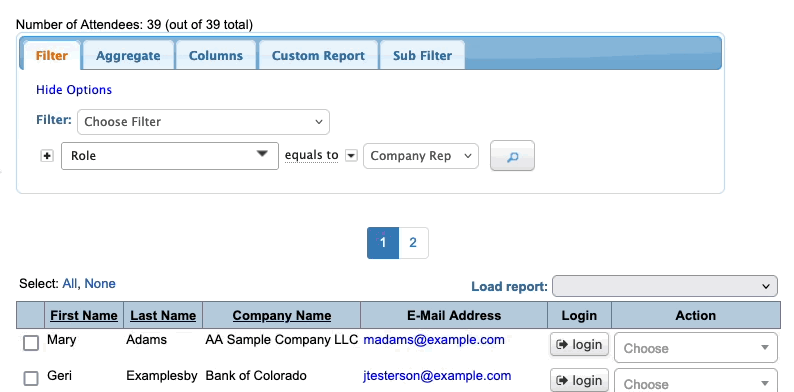
You can also resend confirmations to multiple Attendees at once. Filter the list to show those people. - Step 3. Head to the top right corner of the page. Click on Bulk Actions, then choose Batch:
- Step 4. You’ll now be in the batch emailer. Head to the Attachment menu, and choose Registration Confirmation:

- Step 5. The Attachment is all you need. Click Continue to Preview:

- Step 6. If all looks well, click Begin sending emails:

Company confirmation
- Step 1. Head to the Company List:

- Step 2. Filter the list to find the Company that needs another confirmation:

-
You can also resend confirmations to multiple Companies at once. Filter the list to show those organizations. - Step 3. Head to the top right corner of the page. Click on Bulk Actions, then choose Batch:

- Step 4. You’ll now be in the email editor. Head to the Attachment menu, and choose Registration Confirmation:

- Step 5. The Attachment is all you need. Click Continue to Preview:

- Step 6. If all looks well, click Begin sending emails:

Company Rep confirmation
- Step 1. Head to the Attendee List:

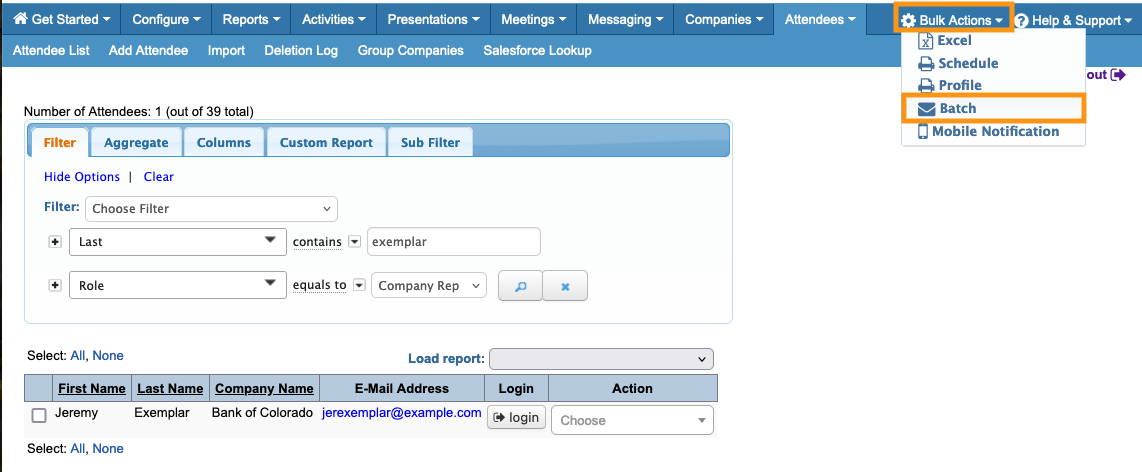
- Step 2. Filter the list to locate the Company Rep who needs another confirmation.
- It’s usually easiest to set the Role filter to Company Rep, and then add a filter for the last name, as shown below:
-
You can also resend confirmations to multiple Company Reps at once. Filter the list to show those people. - Step 3. Head to the top right corner of the page. Click on Bulk Actions, then choose Batch:
- Step 4. You’ll now be in the batch emailer. Head to the Attachment menu, and choose Registration Confirmation:

- Step 5. The Attachment is all you need. Click Continue to Preview:

- Step 6. If all looks well, click Begin sending emails:


