
In this article:
- Where is it?
- How is it used?
- Adding a Registration Option: Admission
- Adding a Registration Option: Add-on item
- Adding a Registration Option: Item with inventory
- Using Suboptions
- What participants see
- Monitoring sales
Where is it?
Once payments are enabled for your event, you’ll add and manage Registration Options from the Configure tab:
How is it used?
As we covered in the Registration Types article, different kinds of events have different pricing structures. Registration Options let you assign one or more prices to each of your event’s Registration Types.
In addition to paid registration, an event might offer any of these add-ons:
- You might sell a directory of conference attendees, in both print and digital formats.
- You might offer your event’s Exhibitors paid options for extra lighting, sound equipment, or more booth space.
- Your event might have an array of break times and meals, where a Sponsor could purchase name sponsorship.
- Your event might have added charges for specific Activities, like golf outings.
With Registration Options, you can offer paid products or services to the specific participants who’d be interested.
Registration Options vs. Registration Types
Registration Options are interdependent with Registration Types:
- Registration Options represent pricing - both for admission tickets, and for add-on options like the ones above.
- Registration Types are the admission tickets your participants choose when they register. Common examples are Early Bird or General Admission.
You can set up Registration Options for Attendees, Companies, Exhibitors, Sponsors - whoever needs to pay for parts of your event.
Adding a Registration Option: Admission
Our Support team will help you create your initial Registration Types and their Registration Options.
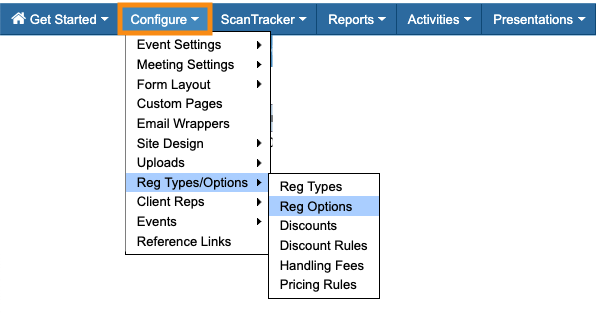
- Step 1. Head to the Configure tab. Choose Reg Types/Options, then Reg Options:

- Step 2. Since we’re creating a Registration Option for admission prices, we’ll edit the default Admission entry:

- Step 3. The Add Registration Option form has these fields:
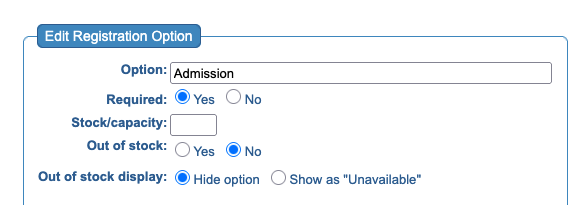
- • Option: The name of the option. It will be visible on participant invoices.
- • Required: If all participants must use this option, choose Yes. (Admission is a required option, but most add-on items won’t be.)
-
We’ll cover the Stock/capacity, Out of stock, and display settings in the sections below. For your admission prices, you won’t need these fields. - Step 4. Below these fields, you’ll see a list of all the current Registration Types for your event.
- Enter the price you’re charging for each one. Then click Submit:

- Now, the Registration Options page shows the price for each of your Registration Types:

- You can also edit or delete any Registration Options from this page.
Adding a Registration Option: Add-on item
In this example, we’ll offer an extra item for sale: a PDF directory of all event participants.
- Step 1. Head to the Configure tab. Choose Reg Types/Options, then Reg Options:

- Step 2. Click Add Registration Option:

- Step 3. In the Add Registration Option form, use the menu to choose Add Option. Then give the item a name - this will appear on participant invoices.
- Next, indicate whether this item is Required for everyone to buy, or not.
- Step 4. In the Prices section, you’ll see all of your Registration Types. Enter the price of this item for each type.
- Here, we’re not charging our Free registrants for the directory, but everyone else will pay the same price:
- Step 5. Click Submit to save.
Adding a Registration Option: Item with inventory
Inventory settings will appear once you save a new Registration Option. In this example, we’re selling a lapel pin, which will be the same price for all participants.
- Step 1. Add a new Registration Option and set its pricing, using the process in the section above.
- Step 2. After you’ve saved the new Registration Option, click the Edit button:

- Step 3. The form now shows the settings for inventory:
- • Stock/Capacity: Enter the quantity of this item you have on hand.
- • Out of Stock: Once you’ve sold through the Capacity amount, MeetMax automatically changes this status to Yes and stops offering the item. You can also use this field to manually set an item as out-of-stock any time.
- • Out of Stock Display: Choose whether you’d like MeetMax to hide the sold-out item, or display it as unavailable.
- Step 4. Click Submit to save the changes.
-
What if your item for sale comes in different sizes, or different colors? See the Suboptions section below.
Using Suboptions
In this example, we’ll offer an event T-shirt for sale. It will need a Registration Option with some Suboptions, because we’re offering this item in three sizes.
- Step 1. First, add a new Registration Option for the base item.
- Add a zero in each of the pricing fields. We'll add the actual pricing in the Suboptions:
-
When you add a zero to the price field, that makes it visible to that Registration Type, but at no price. Alternatively, if you want to hide a Registration Option from a particular Registration Type, leave the price field blank. - Step 2. Click Submit to save the base item.
- Step 3. Now we’ll create a suboption for the Small size of this item.
- Click the Add Registration Option button to get started:

- Step 4. Use the menu to choose the base option. That causes MeetMax to create a suboption:

- Step 5. Give the Suboption a name, as shown above. It will be visible on participant invoices, listed under the base option.
- Step 6. Add the price each of your Registration Types will pay for this item. Then click Submit to save.
- Step 7. If your Suboptions will have an inventory, click the Edit button to reopen each item and add the inventory settings, as shown in the section above:
- The new suboption is now visible in your list of Registration Options. Here’s what it looks like once we’ve added the other two t-shirt sizes as Suboptions:
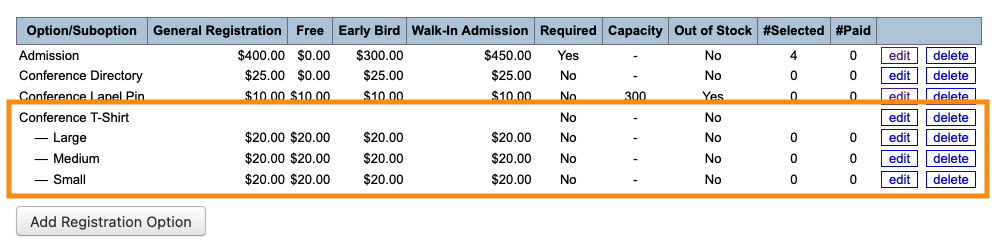
-
Suboptions can be different prices, and you can even charge different prices for different Registration Types. Each participant will only see the price that applies to their type of registration.
What participants see
During registration, participants will use the Registration Options tab to select their Admission, plus any add-ons:
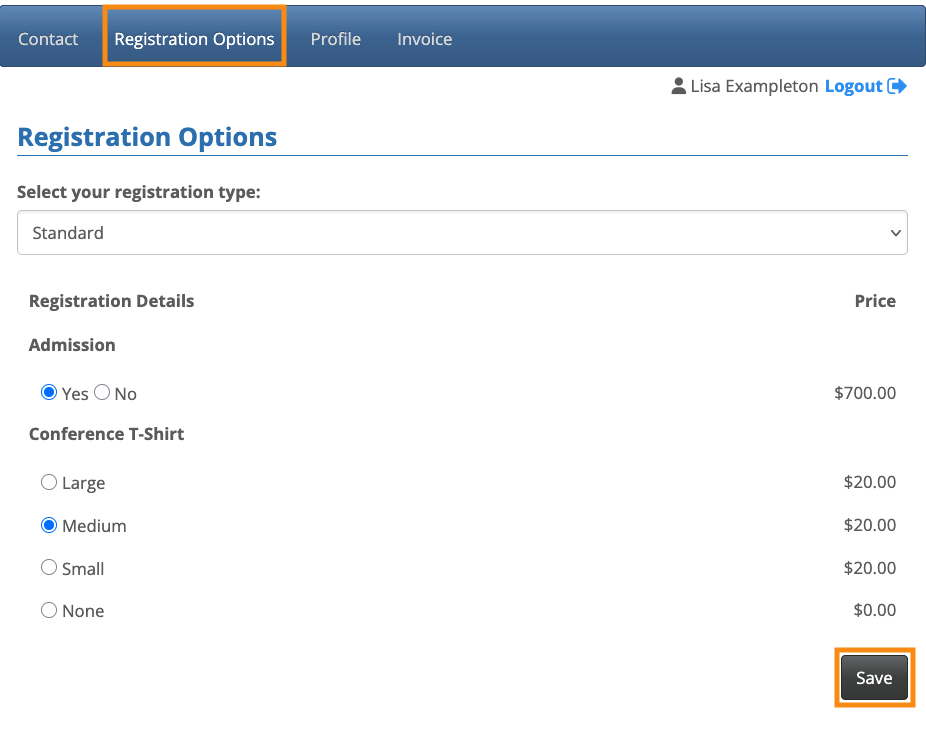
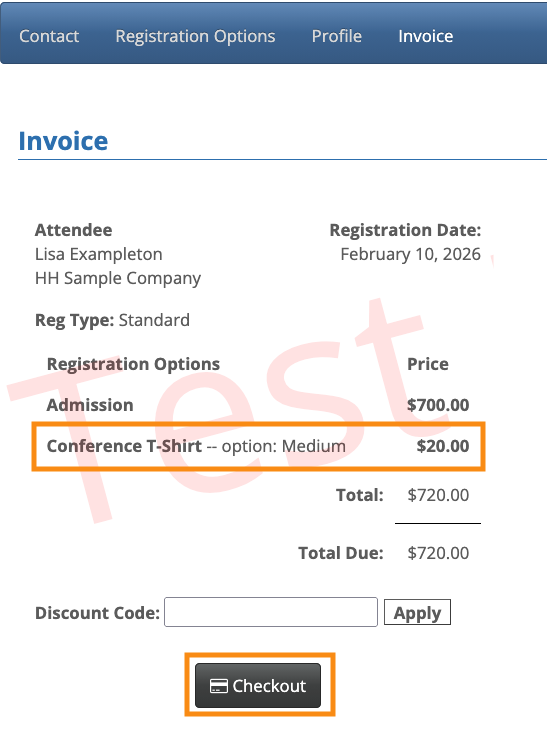
Their invoice will then show the choices they've made:
Monitoring sales
The Registration Options page has columns that track how many of your participants have chosen each item, and how many have paid for it:

You can also see the original Capacity of any items with inventory, and each item’s current stock status.
During your event, you can compare the Capacity and #Selected columns to see when you’re getting close to selling out.

