
In this article:
- Where is it?
- What the participant can access before paying
- Optional: purchase options on the registration form
- Registration Options page
- Paying the Invoice
- What the participant sees after paying
Where is it?
Once a participant completes your event’s registration form, they’ll see two payment-related pages in their MeetMax account:

| We’ll show a general registration and payment flow here, but payment options in MeetMax are very customizable. Our Support team is happy to help you set things up. | |
| Want to see the Admin’s view of this process? Check out this article. |
What the participant can access before paying
Once the participant has completed registration, they’re taken to their MeetMax account. What they can see there before paying is up to you. Learn more about how an Admin sets up pre-payment access.
In this example, before a registrant pays, they can see only their Contact info page, their Profile form to fill out, and the payment tabs:

| Participant pages will be branded for your event, and you can customize the names of the menu tabs. |
Optional: purchase options on the registration form
Paid registration is extremely flexible in MeetMax. You can offer paid options in multiple ways to fit your event’s needs.
For example, you might have one or more fields in your event registration form that are purchase options, like this:
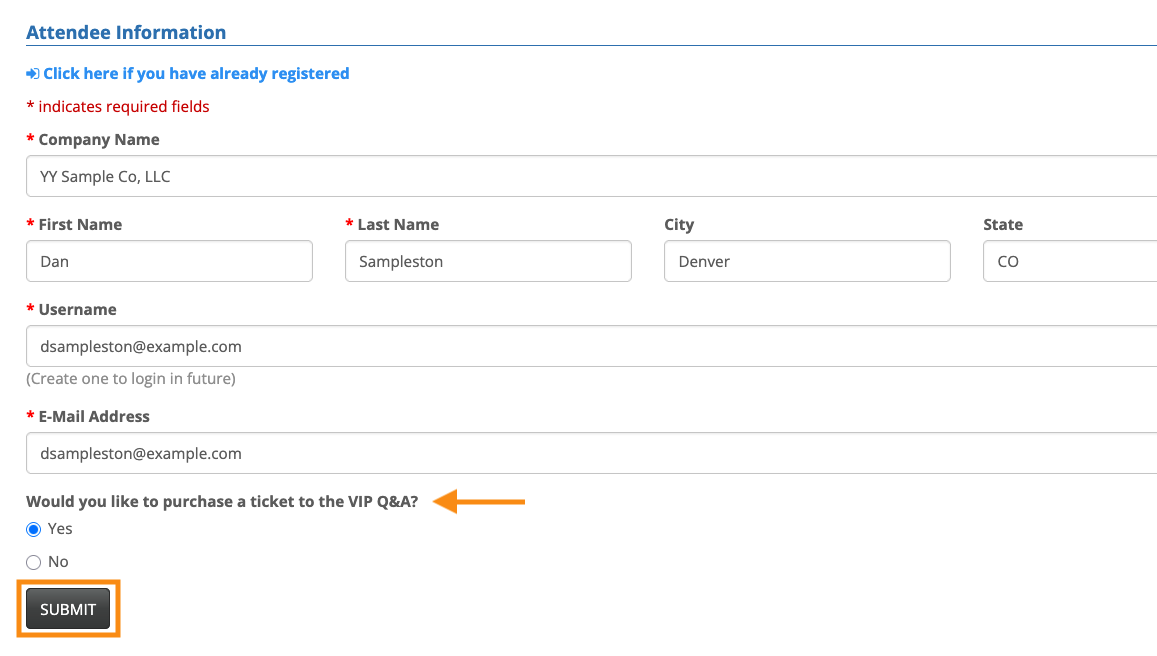
Learn how to set up form fields with attached pricing here.
Alternatively, your registration form might have no paid fields at all, and participants will see the paid options only after completing this form.
Registration Options page
After completing registration, a participant heads to their Registration Options tab. Depending on how your event is set up, they’ll either:
- Choose from a menu of your event’s admission tickets
- Type in a registration code you’ve given them
If you’ve created any add-on items for your event, they’ll also display here. That way the new registrant can choose or decline them:
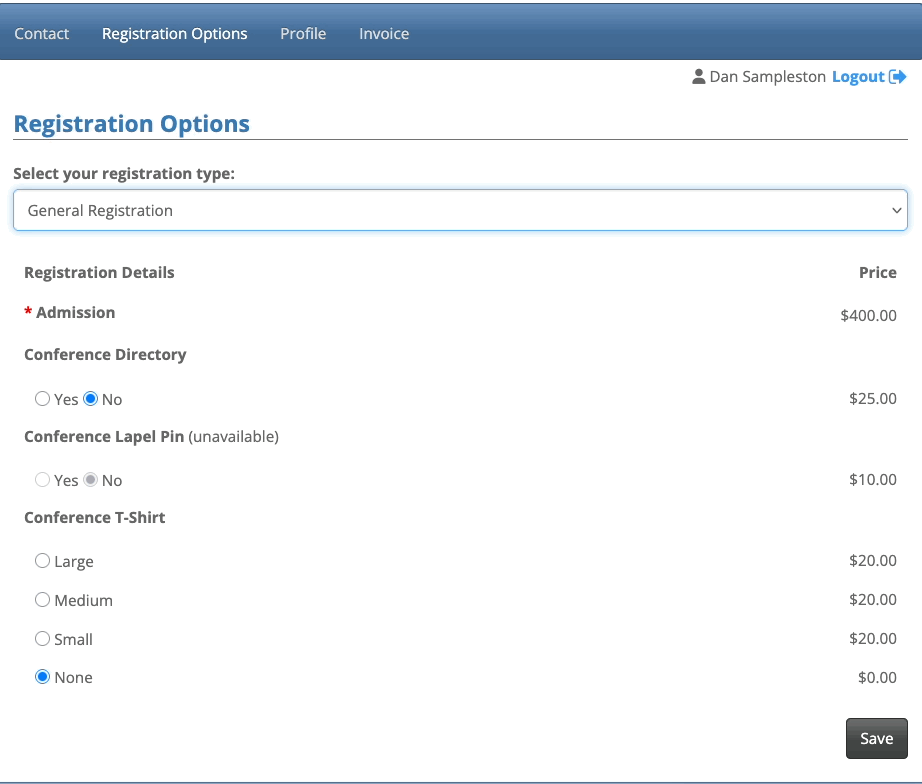
Once they’ve made their choices and clicked Save, the participant’s Invoice page updates automatically:
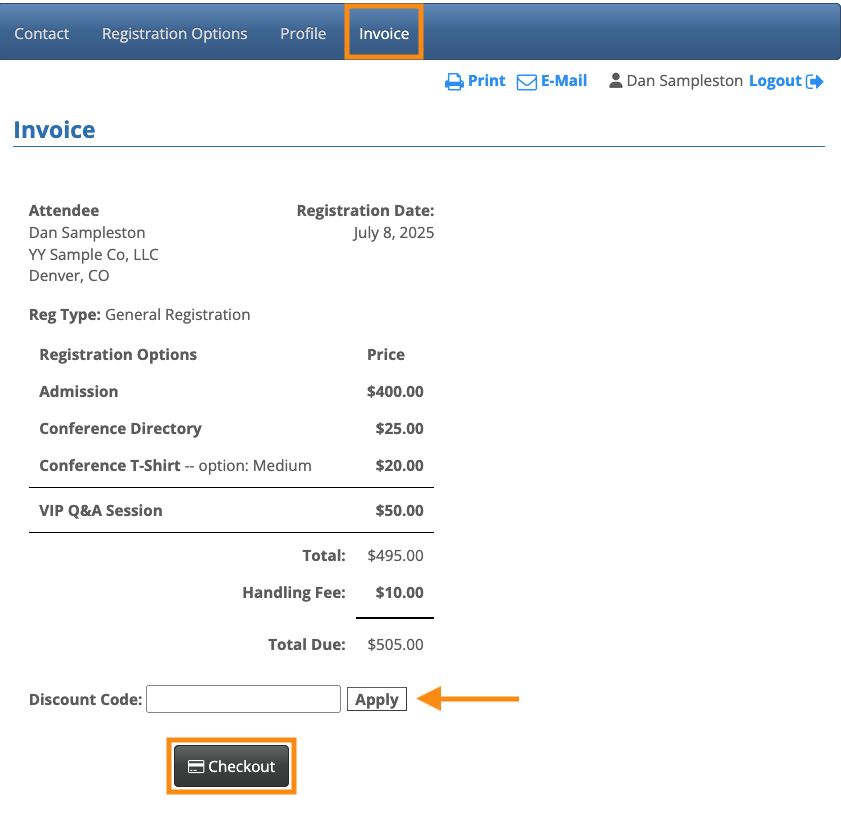
In the example above, we can see:
- The registration price and add-on options the participant chose from the Registration Options page
- Any paid items the participant chose on the registration form, if you're using these
- A Handling Fee, if you’ve enabled one for your event
- A space to enter a discount code, if your event is using them
Paying the Invoice
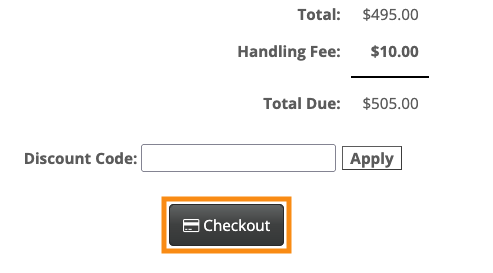
On the Invoice page, the participant clicks the Checkout button to start payment:
They’re then taken to the Credit Card form to add their payment details:
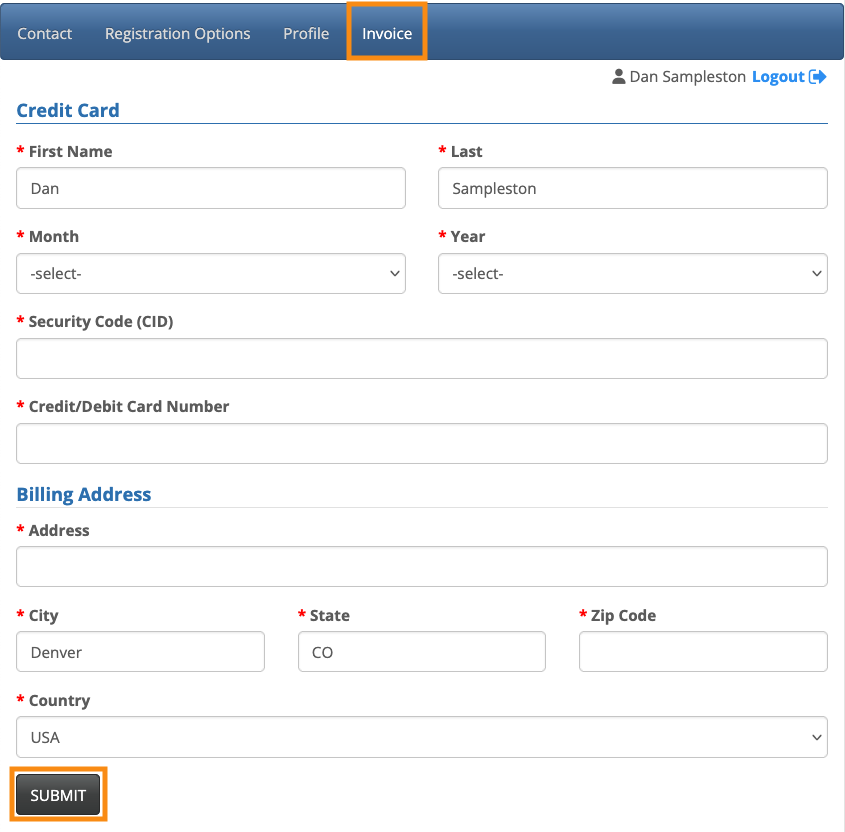
| MeetMax doesn’t store any credit card information, only general transaction data. That data is subject to our data storage policy and data privacy policy. | |
| If you’re accepting payment by check or money order, see this article. |
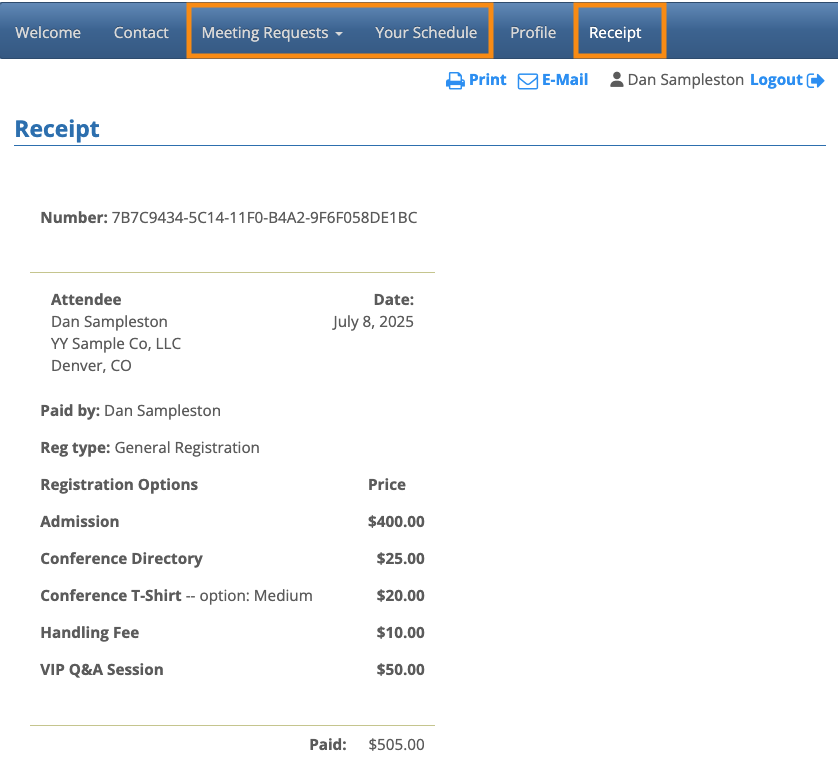
What the participant sees after paying
Once payment is processed, the Invoice page becomes a Receipt page.
The participant now has access to all of the menu options you’ve made available in their MeetMax account:
What’s next?
Now that this participant has registered and paid, you can:

