
In this article:
Where is it?
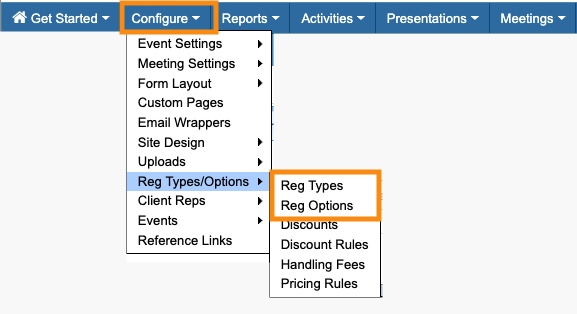
You’ll set up the pricing from the Configure tab:
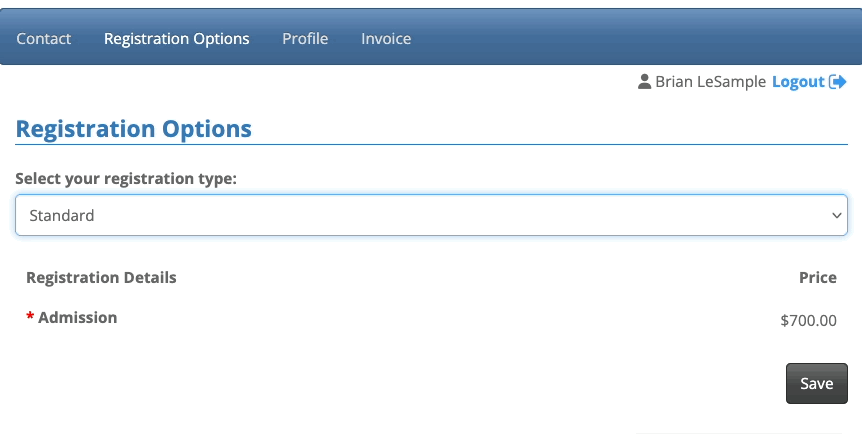
After that, new VIP registrants will access MeetMax, and head to the Registration Options page. They'll enter their registration code to get the discounted price:
| Before they pay, an Attendee can only see the MeetMax features you’ve granted access to. You’ll configure that in the Menu Editor. |
Setting up
For this example, we have two registration levels:
- VIP registration: A discounted price, only for specific invitees we’ve chosen.
- Standard registration: The regular price, which everyone else will pay.
Creating the Registration Types
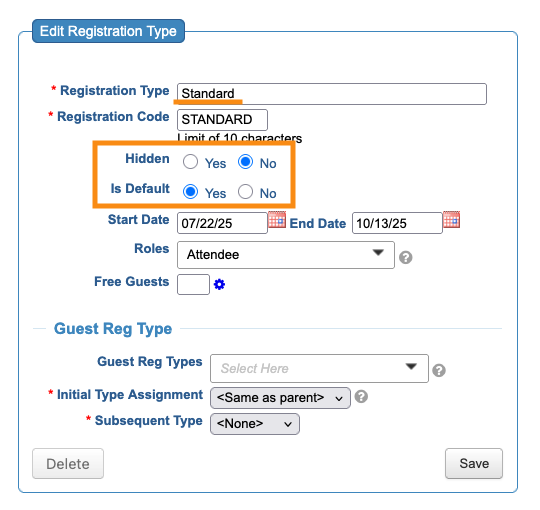
For each of the options above, we’ll create a separate Registration Type:
For this set:
- The Standard Registration Type should be visible as the default price on our registration form.
- The discounted VIP registration should be hidden from the registration form.
- If you want to add a date range to these Registration Types, you can. Here, we have them both expiring the day after our event begins. You can also leave the date range blank.
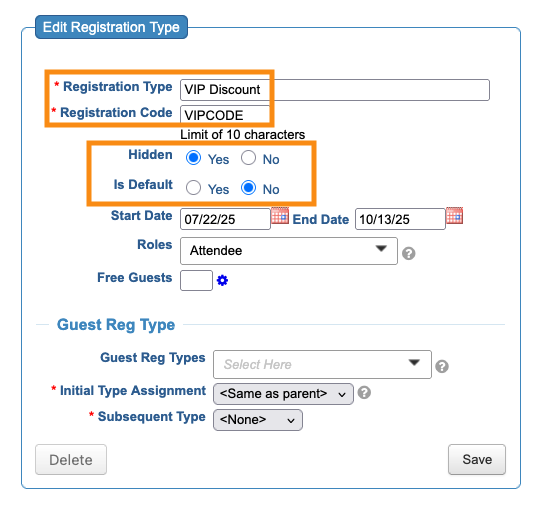
| For the VIP discount, we’ll be giving participants the Registration Code shown above: VIPCODE. That will generate their special price during registration. | |
| For this registration scenario, we don’t need any of the Guest settings. |
Creating Registration Options
Create one Registration Option, called “Admission” or similar. (If your account has this default Registration Option, you can edit it.)
For this scenario:
- Make this Registration Option required.
- MeetMax will list both of the Registration Types you’ve just created. Assign a price to each one:
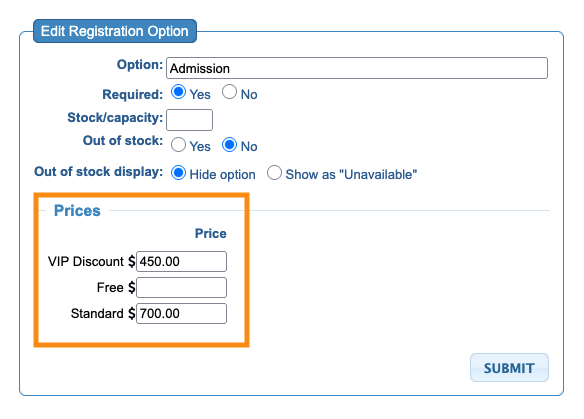
| Free is a default Registration Option in MeetMax, so you can offer complimentary admission as needed. Leave it blank for this scenario. |
What participants see
At this point, you can email the VIP registration code to the people you choose.
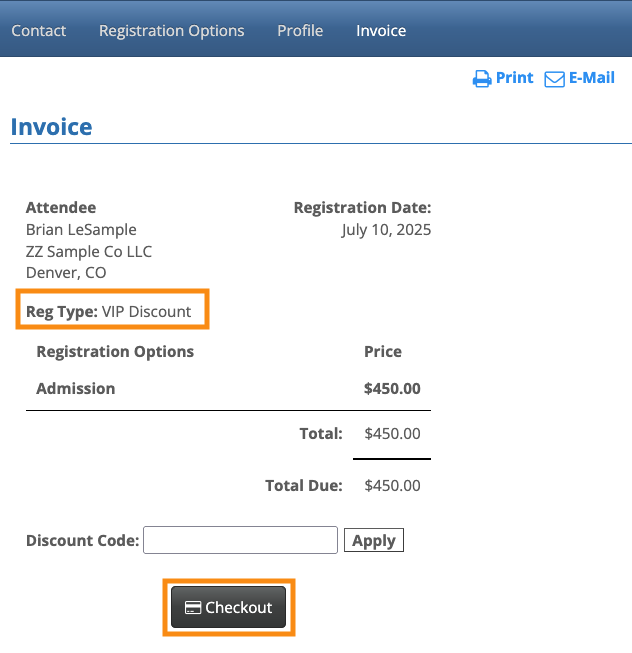
Once an invitee completes their event registration, they’ll be taken to their MeetMax account. They’ll see the Registration Options and Invoice tabs, plus any other tabs you’ve granted access to before payment.
On the Registration Options page, they’ll see only the standard admission price. They’ll choose Enter Reg Code from the menu, and type in their code. That updates the price:

| Our Support team can also configure this registration so participants don't see the Registration Options page at all - they'd just use the Invoice page. |
After the Attendee clicks the Save button here, the Invoice tab will update automatically. Now the Attendee can proceed with payment:
| Depending on your event’s needs, you might have more than one registration code. | |
| MeetMax also has Discount Codes, which can be used interchangeably with registration codes. Discounts can apply to admission as well as add-on items for sale. |

