
In this article:
Where is it?
Automated scheduling happens in the Meetings tab:

| This example is designed to give you an idea of how automated scheduling works for an event with simpler requirements. See the multi-pass example as well. Learn more about how automation works in general here. |
|
| This is a highly flexible feature. Our Support team is happy to walk you through automated scheduling. |
What’s the scenario?
In this example, we’re automating scheduling for an investor conference. Event Attendees (or Investors) request meetings with Companies.
Attendees rank those requests by priority. MeetMax uses those rankings to create the highest priority meetings first.
In this example, Companies don’t approve or decline the requests. They aren’t prioritizing which Attendees they want to meet with most. (These are, however, options your event could use. Reach out to our Support team for details.)
Starting points
We’re assuming here that:
- You’ve thought about our Pre-flight questions and decided on your scheduling priorities.
- You understand that a Source is the person submitting the meeting request, and a Target is the person who receives that request.
- Your Attendees have already ranked their meeting requests.
- You have an idea of how many meeting requests you need to schedule.
- You’ve decided how locations will be added to the scheduled meetings.
Automation pass 1
For this simple scenario, you’d typically need only one automation pass.
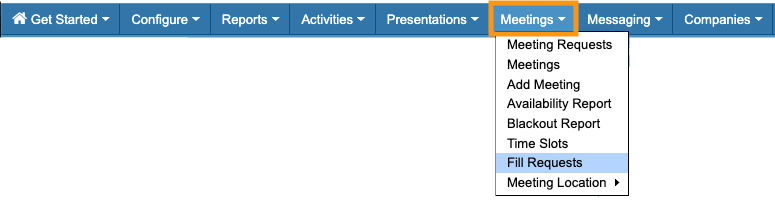
- Step 1. Head to the Meetings tab. Choose Fill Requests:
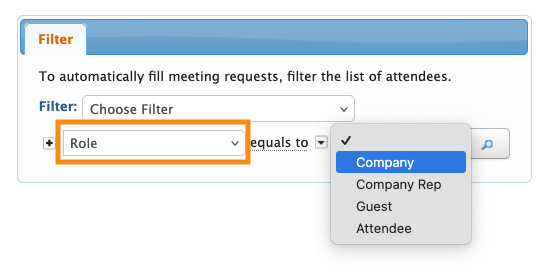
- Step 2. Set the filter to Role. Choose Company (since they’re the Target receiving meeting requests):
- Step 3. MeetMax takes this filter into account, and tells you how many people are included in this automation pass. Click Continue:
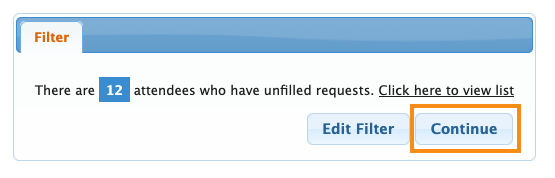
-
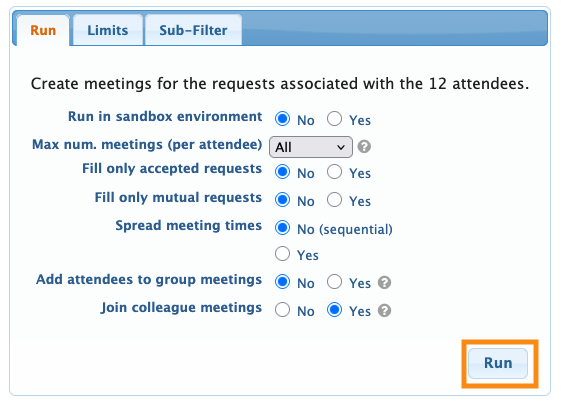
If you want to return to the initial filter and update your criteria, use the Edit Filter button. - Step 4. You’ll now set the parameters for this automation run. For this example, we recommend these settings:

- For Spread meeting times, choose the option that best meets your needs:
- • Schedule meetings sequentially, starting with your first available time slot.
- • Spread meetings around your schedule.
- Learn more about all automation settings here.
- Step 5. For this scenario, we won’t need the Limits or Sub-Filter tabs.
- Click the Run button to start the automation:
Checking the results
The automation run can take a few seconds, depending on the number of meetings you’re creating.
When the run is complete, you’ll see a success message like this:
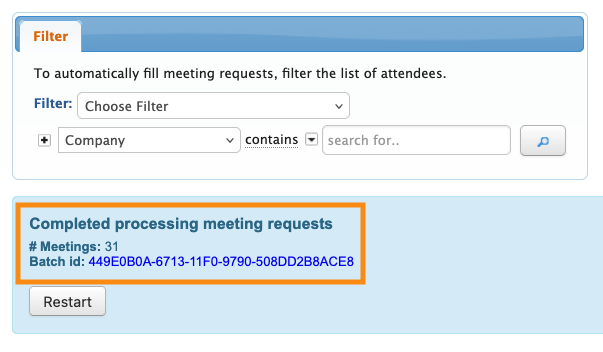
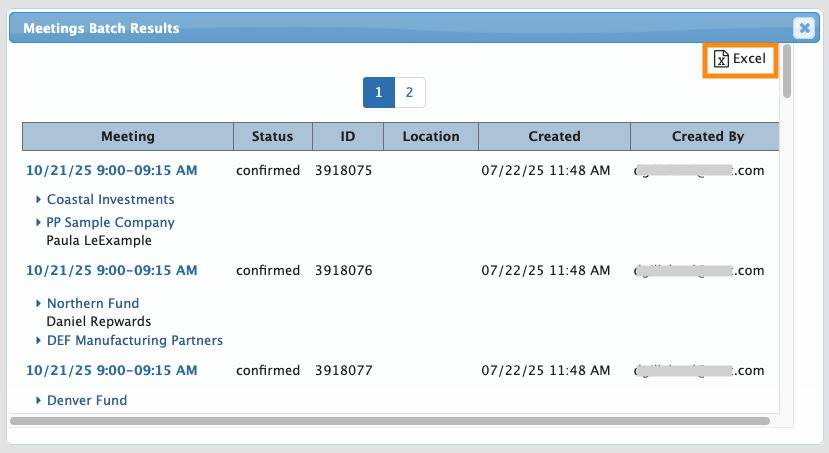
You’ll see a Batch id for this run, as shown above. Click on that to see (or export) a list of the meetings created in this batch:
| If you’re not seeing the number of meetings you were expecting, learn more about troubleshooting here. Our Support team is happy to help with troubleshooting and adjustments. |

