
In this article:
- Where is it?
- What’s the scenario?
- Starting points
- Automation pass 1: VIP Mutual requests
- Checking the results of a pass
- Automation pass 2: Remaining mutual requests
- Automation pass 3: Buyer Company requests
- Automation pass 4: Seller Company requests
Where is it?
Automated scheduling happens in the Meetings tab:

| This example is designed to give you an idea of how automated scheduling works for an event with intermediate requirements. See the one-pass example as well. Learn more about how automation works in general here. |
|
| This is a highly flexible feature. Our Support team is happy to walk you through automated scheduling. |
What’s the scenario?
In this example, we’re automating scheduling for a Hosted Buyer event. All participants are Companies. Some of them have a “Buyer” role, and some have a “Seller” role.
Both Buyer Companies and Seller Companies can request meetings with each other. No one can see any requests but their own. All Companies rank their requests by priority.
Starting points
We’re assuming here that:
- You’ve thought about our Pre-flight questions and decided on your scheduling priorities.
- You understand that a Source is the Company submitting the meeting request, and a Target is the Company receiving that request.
- Our Support team has created role groups for Buyer Companies and Seller Companies at your event. You’ve added a field to the Admin version of your registration form, and organized all Companies into these two groups.
- You’ve also added a field to the Admin version of your registration form to designate any VIP Companies.
- Companies have already ranked their meeting requests.
- You have an idea of how many meeting requests you need to schedule.
- You’ve decided how locations will be added to the scheduled meetings.
Automation pass 1: VIP Mutual requests
For this scenario, you’d need multiple automation passes. Each pass focuses on a different priority group. Learn more about prioritization here.
In this event, both Buyers and Sellers can request meetings. So we can assume that when they’ve mutually requested each other, it’s important to schedule those meetings first.
Since this event also has some VIP Companies attending, we’ll schedule their mutual requests before tackling the other mutual requests.
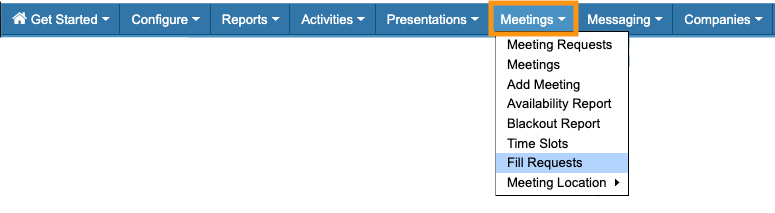
- Step 1. Head to the Meetings tab. Choose Fill Requests:
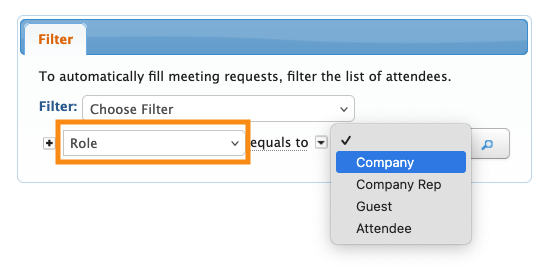
- Step 2. Set the filter to Role. Choose Company (since they’re the only role participating in meetings at this event):
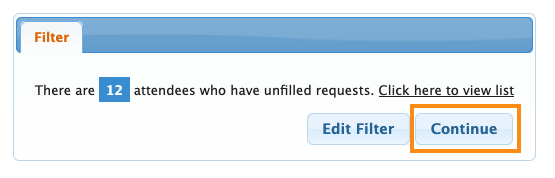
- Step 3. MeetMax tells you how many Companies are included in this automation pass. Click Continue:
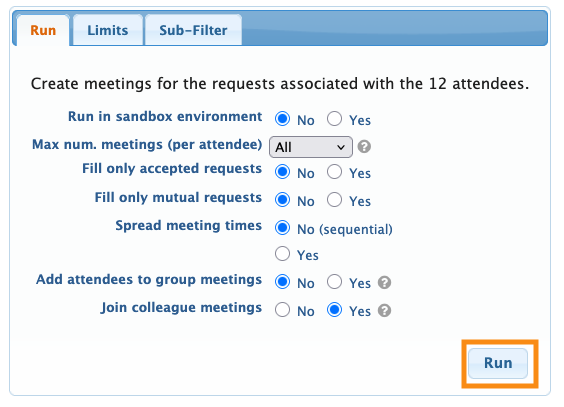
- Step 4. You’ll now set the parameters for this automation run. For this example, we recommend these settings:

- For Spread meeting times, choose the option that best meets your needs:
- • Schedule meetings sequentially, starting with your first available time slot.
- • Spread meetings around your schedule.
- Learn more about all automation settings here.
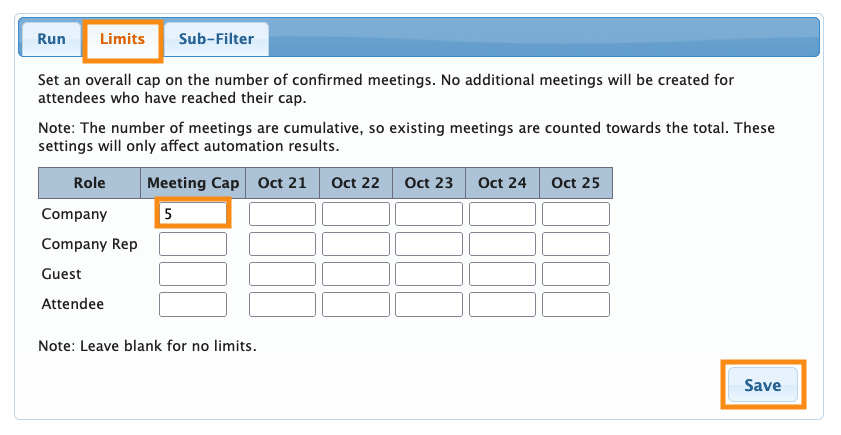
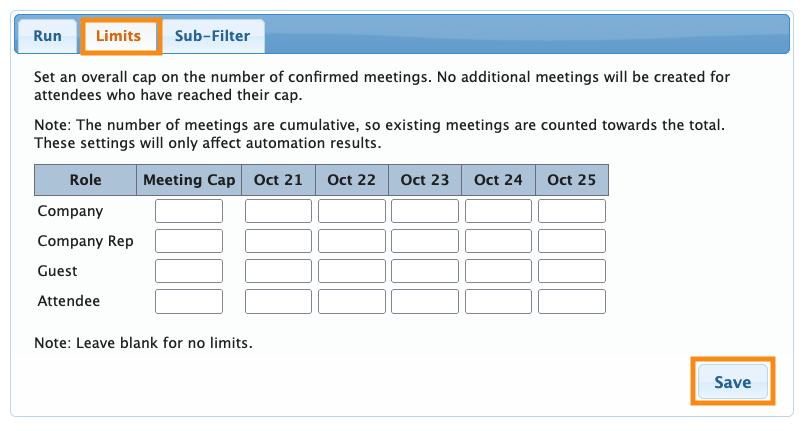
- Step 5. Click on the Limits tab now. Learn more about how this tab works here.
- In this example, we’ll be running several automation passes. We don’t want to schedule an unlimited number of meetings in our early passes - that would consume too many time slots and meeting locations, which limits options for everyone else later on.
- So for early passes especially, it’s wise to set some limits.
- In this pass, we’re working with our VIP Companies and their mutual meeting requests. We’ll cap these at 5 in this example. (You can set any limit that works for your event.)
-
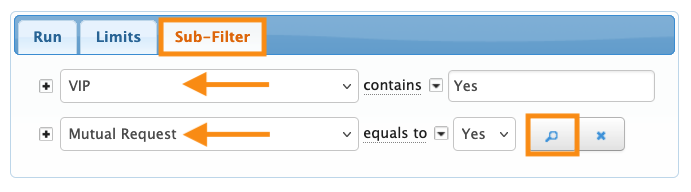
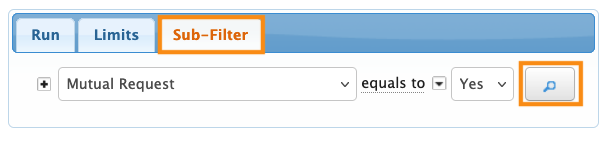
The VIP Companies will likely end up with more than 5 meetings as scheduling progresses - remember, we’ll be doing more automation passes. - Step 6. Next, click on the Sub-Flter tab. Learn more about how this works here.
- Set two sub-filters here, as shown below:
- • Filter for VIP, enter Yes.
- • Filter for Mutual Request, choose Yes.
- Click the magnifying glass button to process these filters:
- Step 7. Head back to the Run tab now. Click the Run button to start the automation pass:

Checking the results of a pass
The automation run can take a few seconds, depending on the number of meetings you’re creating.
When the run is complete, you’ll see a success message like this:
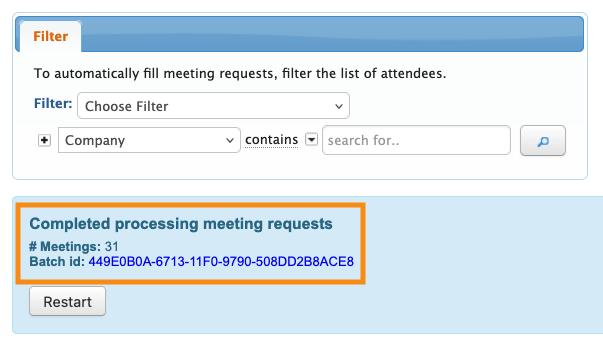
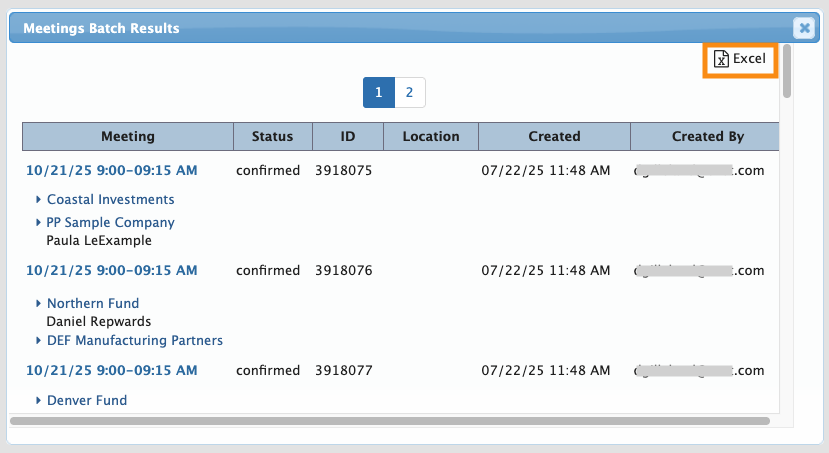
You’ll see a Batch id for this run, as shown above. Click on that to see (or export) a list of the meetings created in this batch:
If you’re not seeing the number of meetings you were expecting, learn more about troubleshooting here.
Our Support team is happy to help with troubleshooting and adjustments.
Automation pass 2: Remaining mutual requests
Now that we’ve scheduled the VIPs, we can take care of all other mutual meeting requests.
| For the rest of our automation passes here, there are only small differences in settings. So we’ll only show you the settings that are unique to each pass. |
- Steps 1-4: Use the same steps as Pass 1.
- Step 5. Head to the Limits tab. This time, we’ll increase the limit to 7:
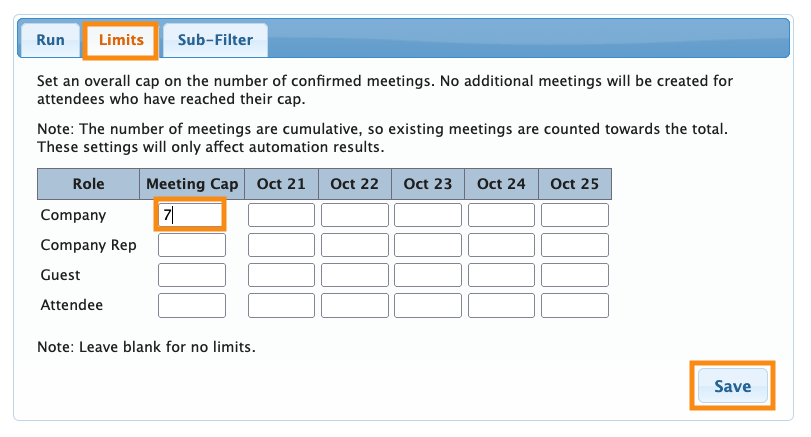
- Just as we did in Pass 1, we want to limit this group to keep it from consuming too many scheduling resources.
- Step 6. Click on the Sub-Flter tab. Set one sub-filter
- • Filter for Mutual Request, choose Yes.
- Click the magnifying glass button to process this filter:
- Step 7. Head back to the Run tab, and click the Run button:
- Step 8. You’ll see the results of this pass as shown in the section above. If you’re not seeing the expected number of meetings and need to troubleshoot, contact our Support team.
Automation pass 3: Buyer Company requests
Now that we’ve scheduled all the mutual meeting requests, we’ll move on to schedule the meetings our Buyer companies have requested.
(In this example, we’re prioritizing Buyer Companies before Seller Companies. At your event, that priority might be different.)
- Steps 1-4: Use the same steps as Pass 1.
- Step 5. Head to the Limits tab. Remove the Limits you set before. That way, MeetMax can create as many meetings as possible for each Company:
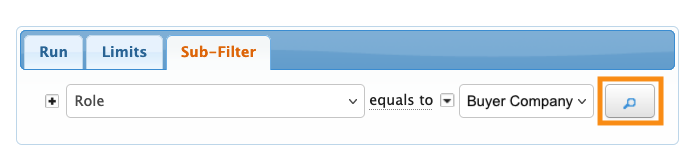
- Step 6. Click on the Sub-Filter tab. Set one sub-filter as shown below.
- • In the menu, be sure you’re in the Source section. Then choose Role:
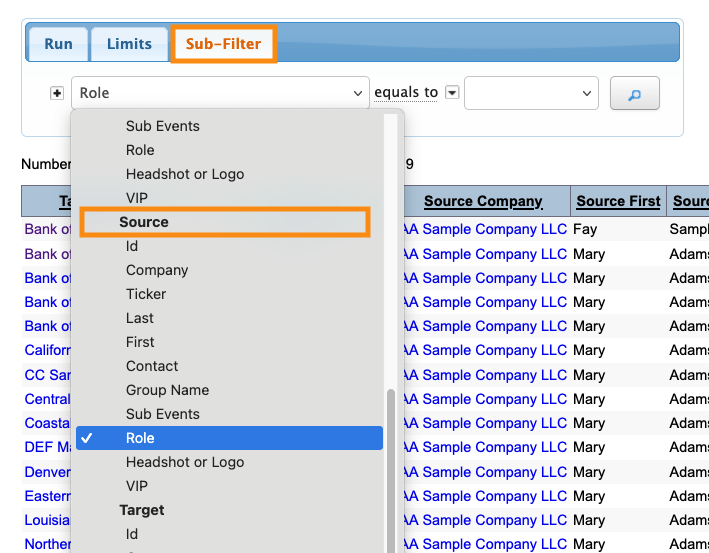
- • Set this Role filter to Buyer Company (Or any other custom name you’re using for this group).
- Click the magnifying glass button to process this filter:
- Step 7. Head back to the Run tab, and click the Run button:

- Step 8. You’ll see the results of this pass as shown in the section above. If you’re not seeing the expected number of meetings and need to troubleshoot, contact our Support team.
Automation pass 4: Remaining requests
At this point, we’ve run three automation passes to schedule our priority groups. Now, we’ll run a very general final pass to schedule any other meetings we can.
- Steps 1-4: Use the same steps as Pass 1.
- Step 5. For this scenario, we won’t need the Limits or Sub-Filter tabs.
- Step 6. Click the Run button to start the automation.
- Step 7. You’ll see the results of this pass. If you’re not seeing the expected number of meetings and need to troubleshoot, contact our Support team.

