Setting up PayPal REST API (Payment processor)

Here’s how to connect a PayPal REST API account to MeetMax, to process payments at your event.
In this article:
Where is it?
You’ll enable this integration in the MeetMax Configure tab:

| PayPal’s REST API powers several of their products, including PayPal Payments. Be sure to check their documentation for the product you’re using. |
Setup in PayPal
We’re assuming here that you already have a PayPal Developer account. That’s where you’ll configure a third-party app for MeetMax.
| If you’re already logged into your Developer account, skip to Step 4. |
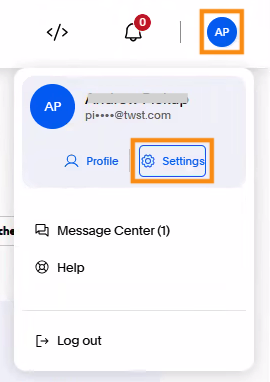
- Step 1. In your main PayPal account, access your Settings:
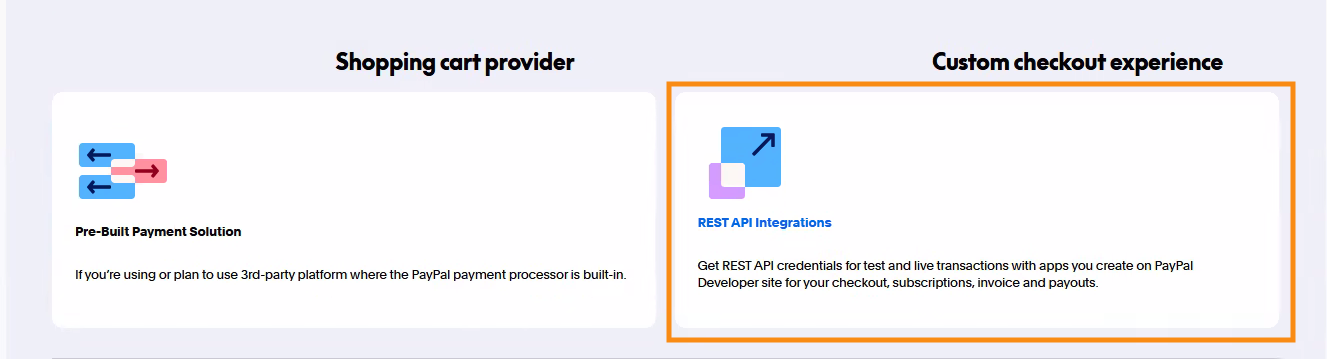
- Step 2. On the Settings page, scroll down and choose REST API Integrations:
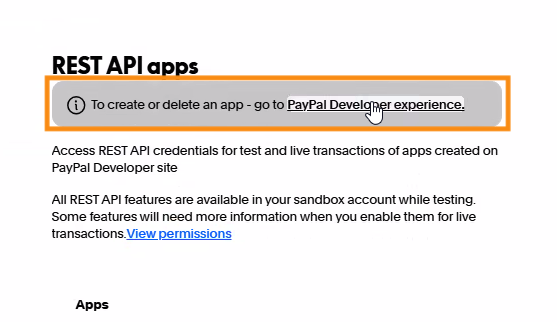
- Step 3. You’ll see a pop-up, showing any other REST API credentials you’ve already created.
- To add a new set of credentials for MeetMax, click the link to your Developer account:
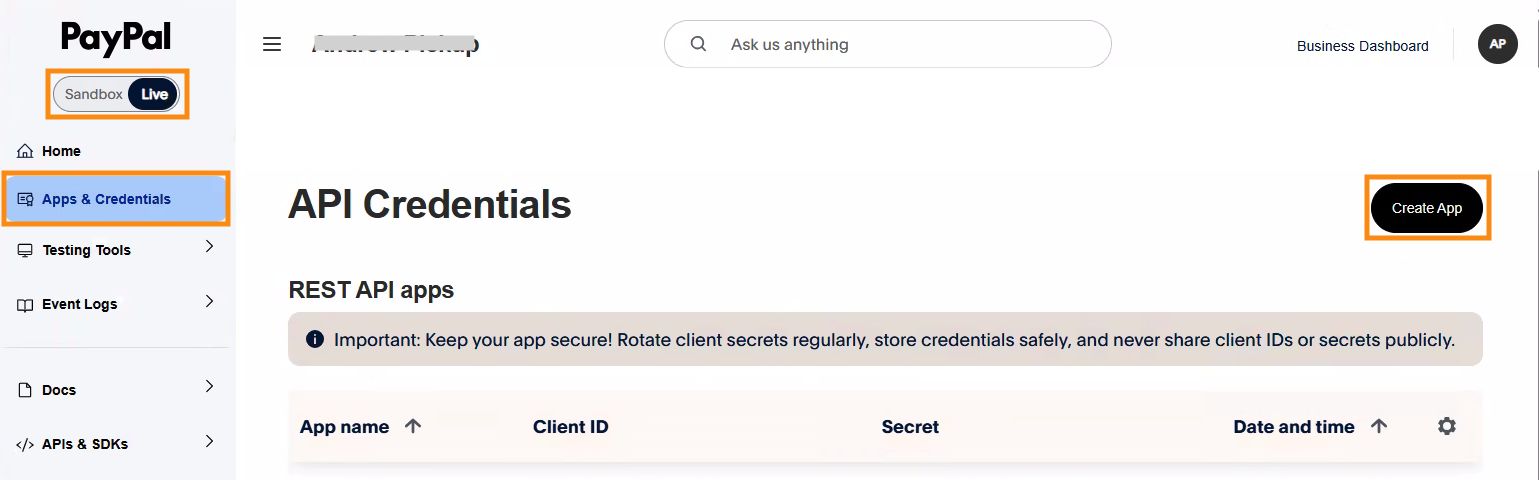
- Step 4. In your PayPal Developer account:
- • Make sure you’re toggled to the Live version.
- • In the left menu, choose Apps & Credentials.
- • Click the Create App button.
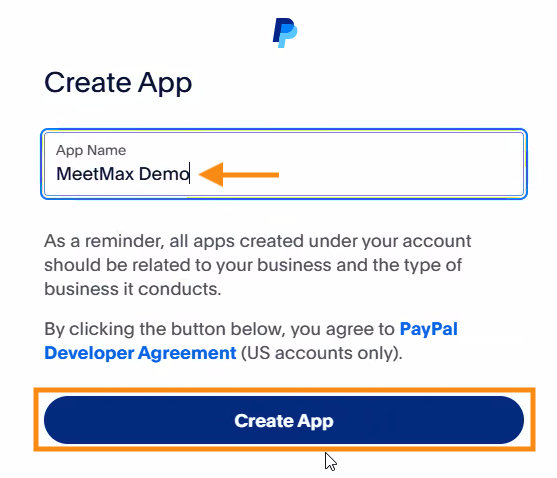
- Step 5. You’ll see a pop-up. Give the new app a name. Then click Create App:
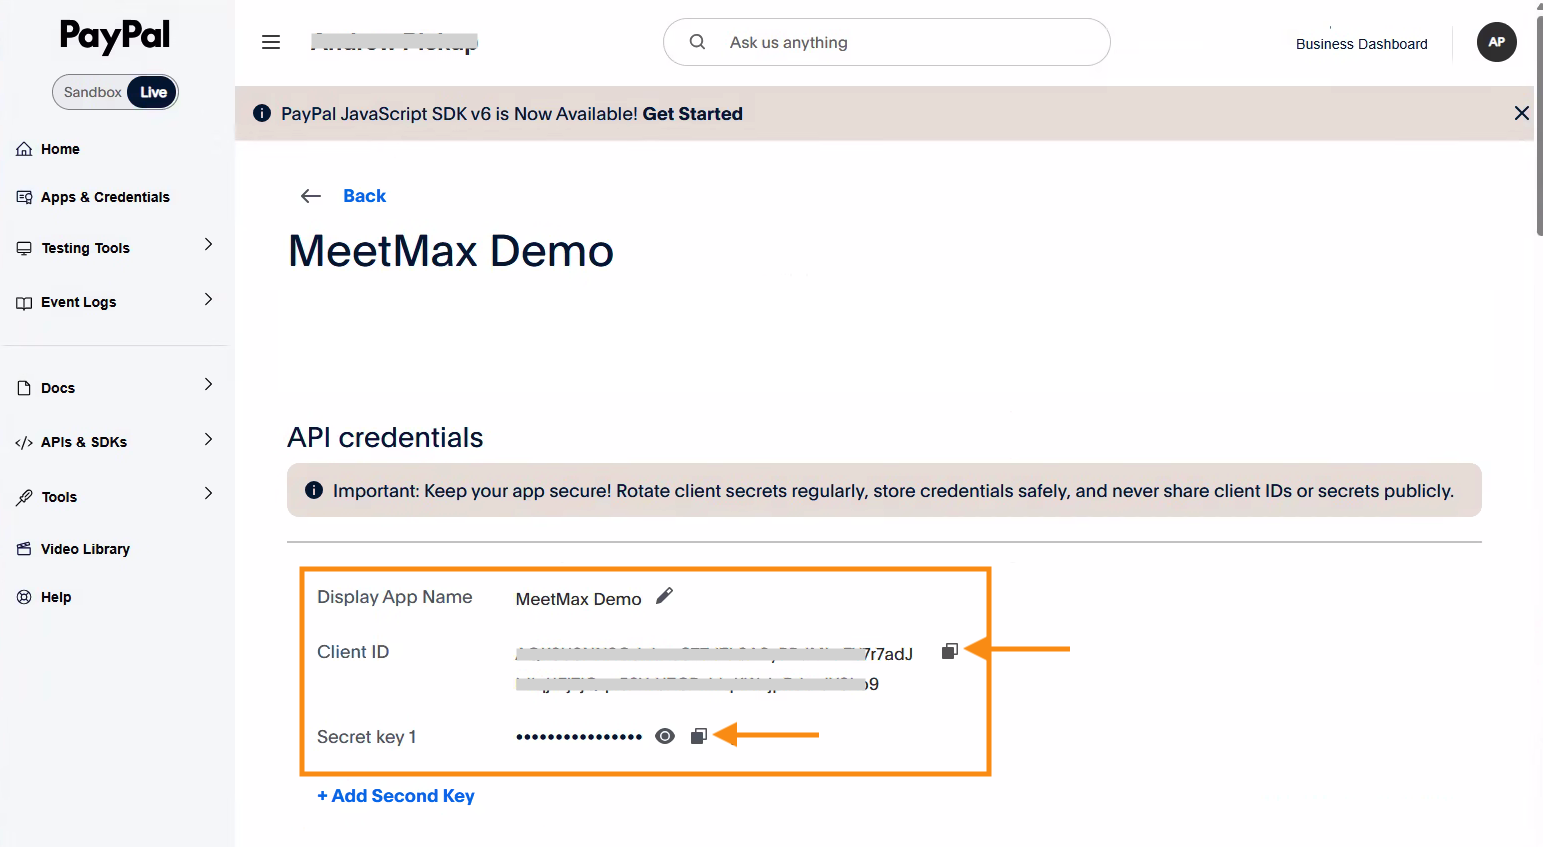
- Step 6. PayPal then generates a set of API credentials. You’ll copy these to paste these into MeetMax (see the section below):
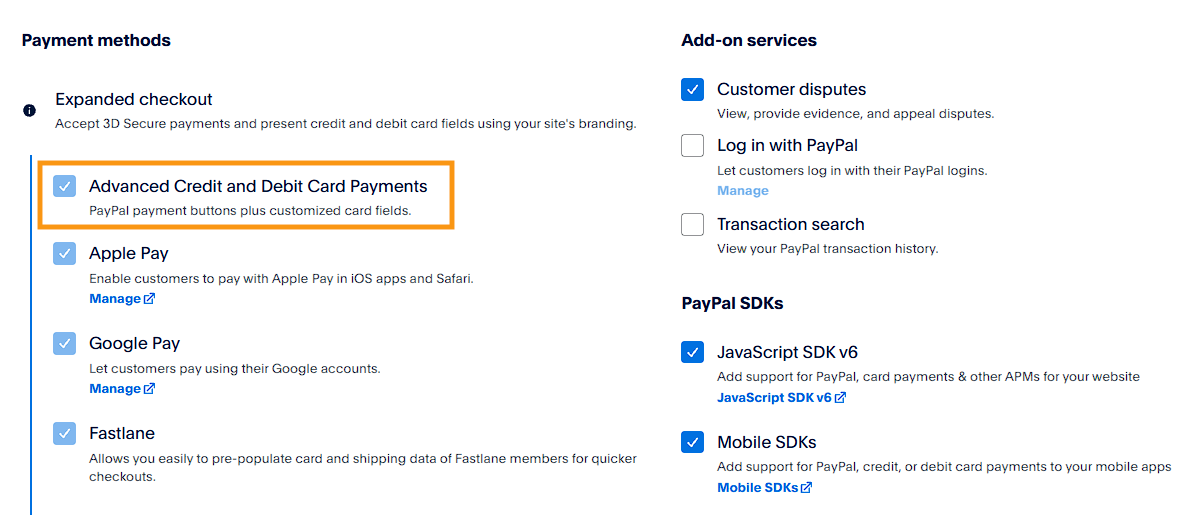
- Step 7. Scroll down to see the settings for this app.
- In the Expanded checkout section, make sure the Advanced Credit and Debit Card Payments box is checked:
-
If you don't see this setting in your account, or see a way to enable it, please reach out to PayPal Support.
Setup in MeetMax
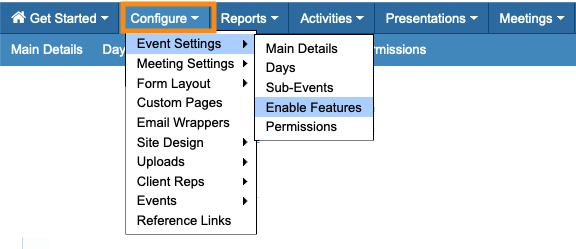
- Step 1. In MeetMax, head to the Configure tab. Choose Event Settings, then Enable Features:
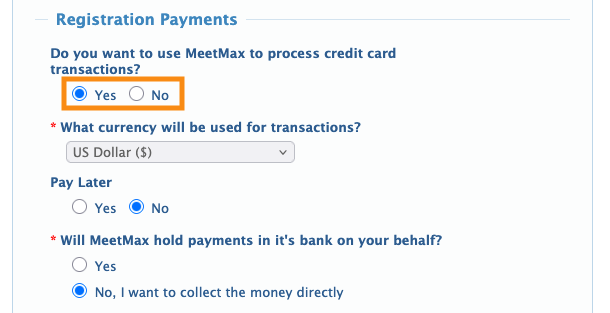
- Step 2. In the Registration Payments section, choose Yes to have MeetMax process credit card transactions for your event.
- That opens up several new fields:
- • Set your currency for transactions
- • Choose whether to use Pay Later, or not
- • Under Will MeetMax hold payments on your behalf, choose No:
- Step 3. In the payment processor menu, choose PayPal REST:
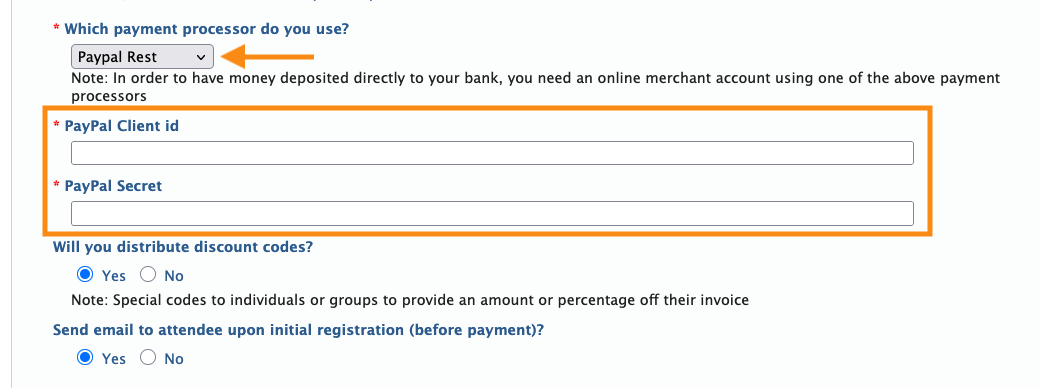
- • Paste in the PayPal Client ID and Secret you generated in the section above.
- • If you plan to use discount codes at your event, choose Yes.
- • If you want participants to get a registration confirmation email before they pay, choose Yes.
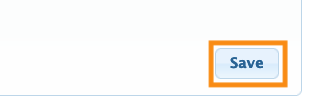
- Step 4. Scroll to the bottom of the page and click the Save button:
What’s next?
Once this integration is connected, you can:

