In this article:
Where is it?
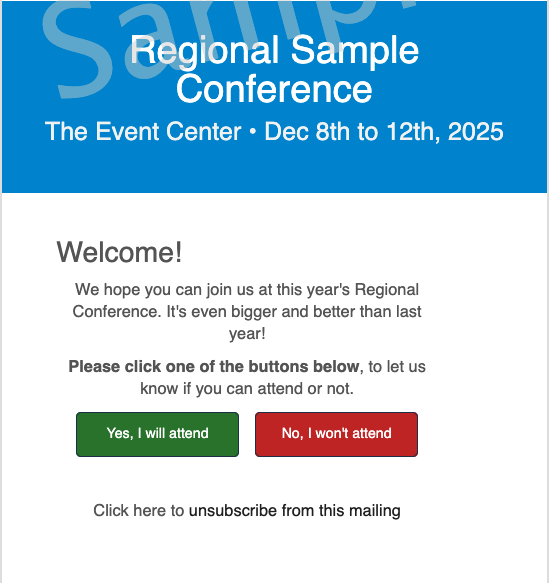
MeetMax Invitee emails have two zones where you can insert custom content, as shown below:
- At the top, above the Accept and Decline buttons
- At the bottom, below the Accept and Decline buttons
| This sample email is using the default email wrapper. |
In these spots, you can add custom text and images (and update them anytime). In MeetMax, these content insertions are called Messages.
You’ll create custom Messages from the Configure tab:
Which emails can I customize?
Depending on your event, you might be sending invitations to Attendees, or Companies, or both. MeetMax has separate invitations for each.
Our team will set up the invitation content for your event, using your copy and images. At that point, you’ll be able to use the with Custom Messages filter to locate your event’s invitations. (We’ll cover this in more detail in a moment):

Adding a custom Message
Let’s add a Message to the Attendee invitation. In this example, we’ll add a welcome message.
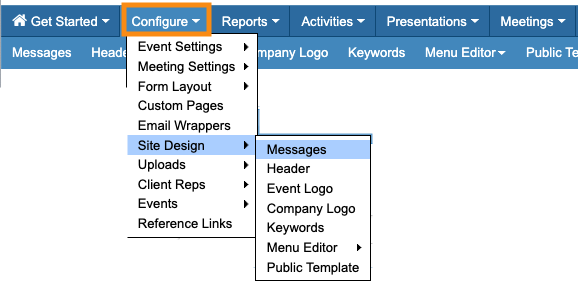
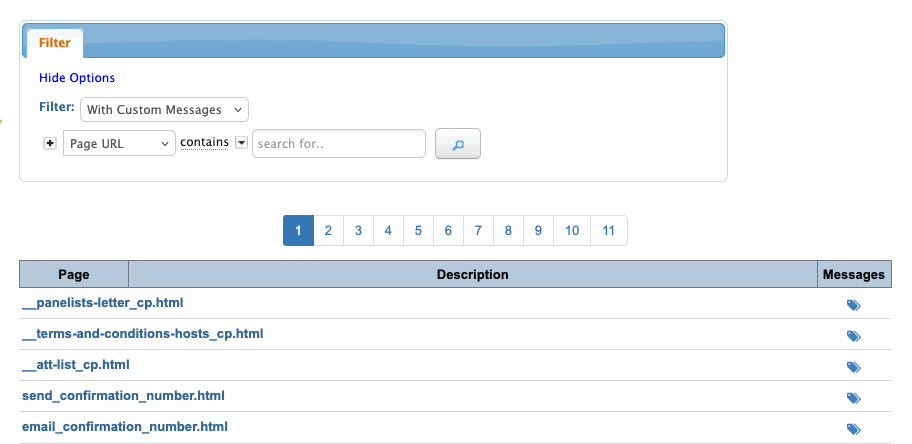
- Step 1. Head to the Configure tab. Choose Site Design, then Messages:

- Step 2. On the Messages page, set the Filter to With Custom Messages. That will display only the Messages our team has set up for your event:
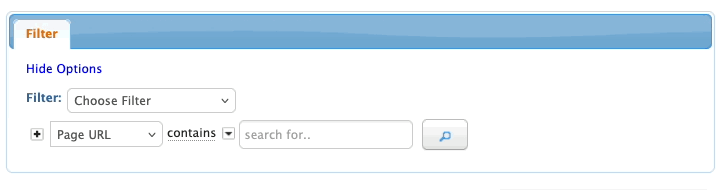
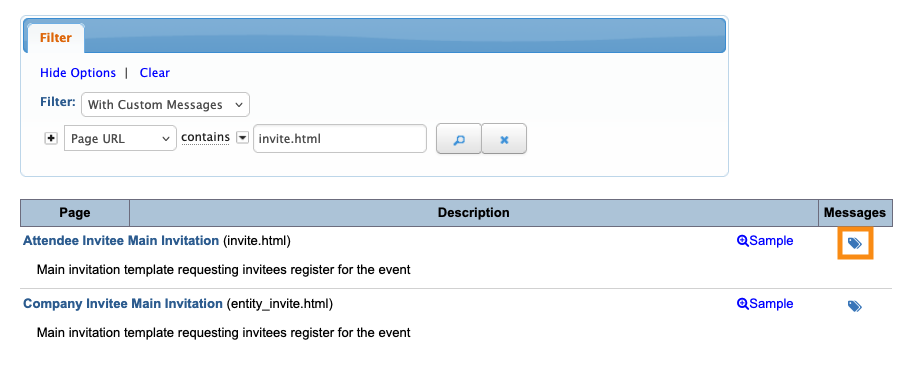
- Step 3. Set the second filter to Page URL, containing invite.html. You’ll see your customized invitations. We’re using the Attendee version for this example:
- Step 4. When you’ve located the Message, click the tag icon to open it for editing:
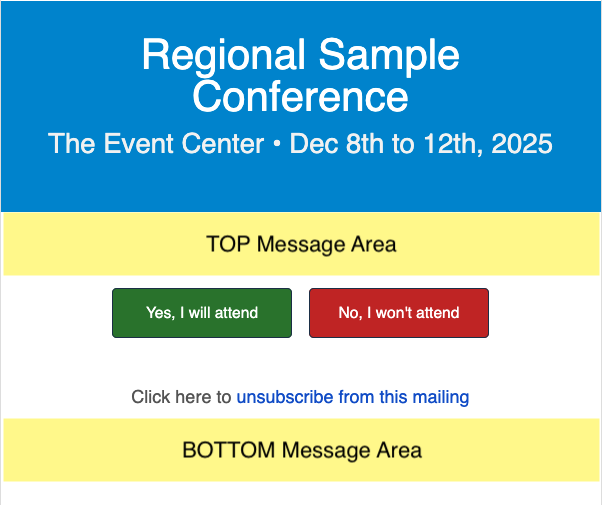
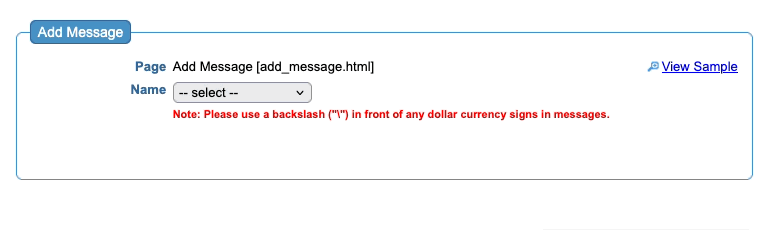
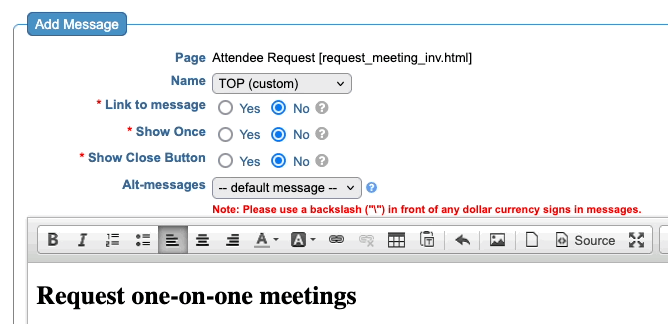
- Step 5. Now, it’s time to choose which zone of the registration page you want to add content to.
- • TOP places your content above the Accept and Decline buttons.
- • BOTTOM places your content below Accept and Decline buttons.
- You can add Messages to one or both areas. In this example, we’ll insert a TOP message.
- Step 6. When you choose a zone, that opens the content editor. You can add text, images, and links here.
- Click Submit to save:
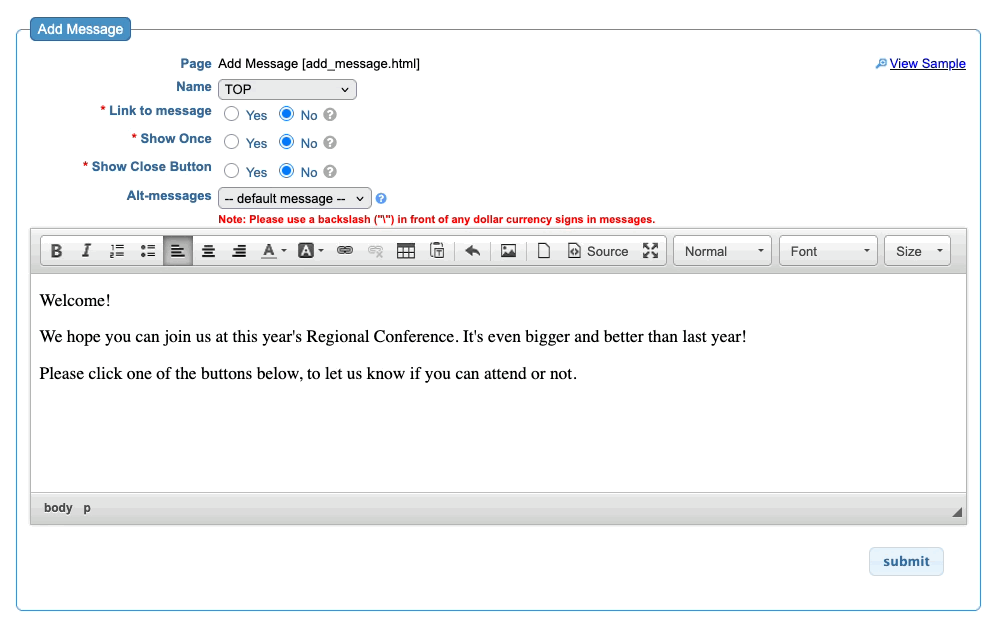
- Step 7. You also have several options for displaying your Message. Hover over the question marks to learn more about each one:
- You can return to this Message at any point during your event, and change the content. Participants will see the new version automatically.
-
Copying and pasting directly from a Word document can create formatting issues. Instead, paste your text into a Notepad app first to remove all formatting. Then paste into the MeetMax editor. If you need different versions of this Message to display for different kinds of participants, you can set up Message Tags. If you want to add merge fields to pull personalized details into a Message, reach out to our Support team.
What participants see
When you’ve saved your changes to the Message, you’ll be able to preview it.
Head to the top right corner of the editor and click the View Sample link:
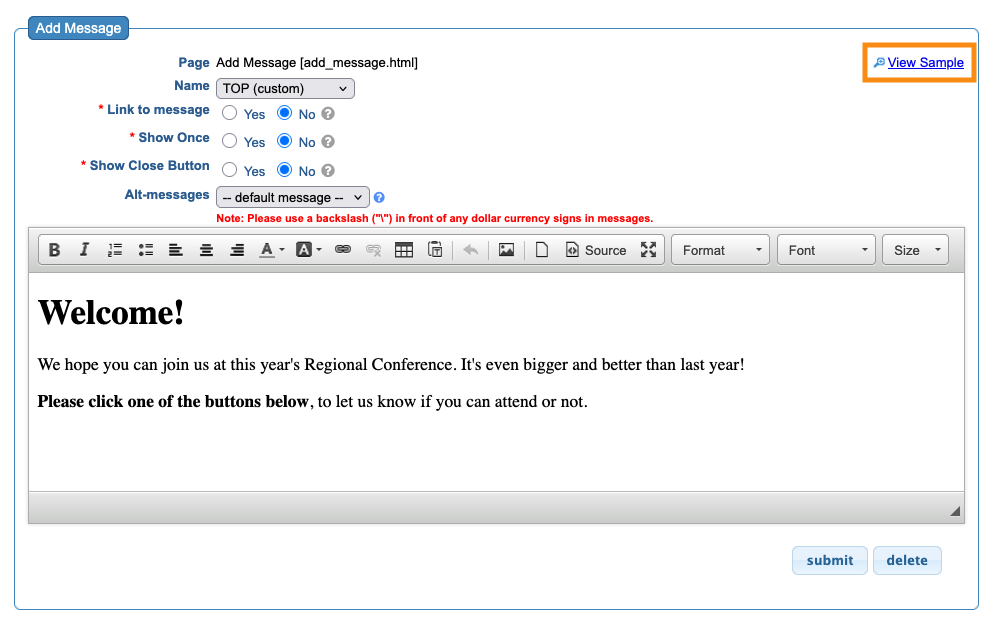
MeetMax opens a sample invitation in a pop-up: