In this article:
- Where is it?
- Filtering the data
- Adding/updating a reason after cancellation
- Settings to customize your data exports
Where is it?
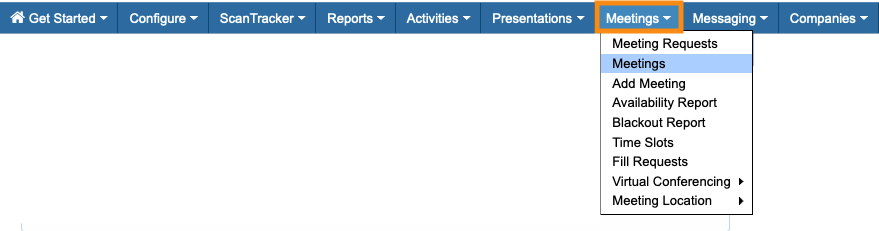
To access the list, head to the Meetings tab. Then choose Meetings:
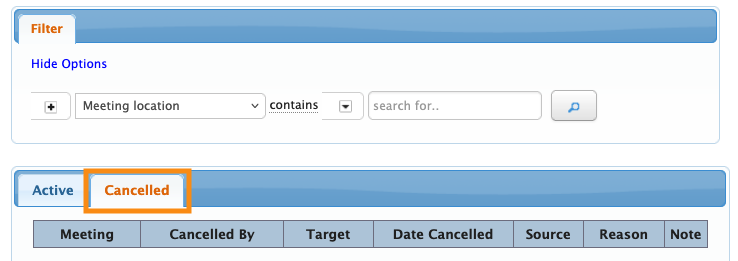
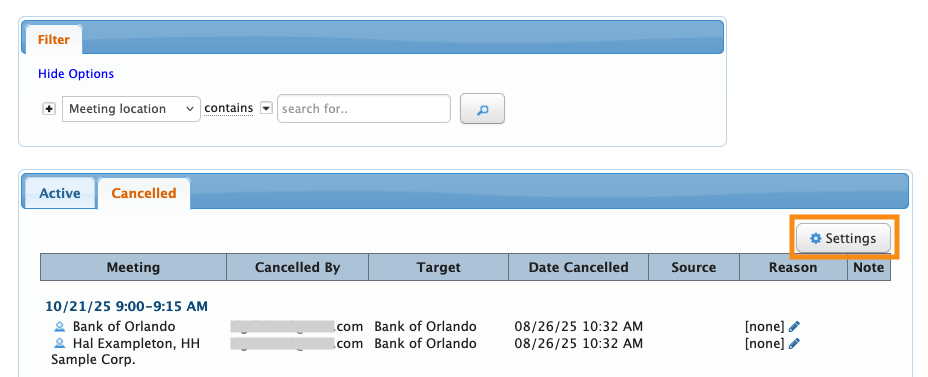
On the Meetings List, click the Canceled tab:
Filtering the data
In the Canceled Meetings List, you can filter for a wide variety of criteria, including:
- Aspects of the meetings, such as date/time, location, and so on
- Virtual meeting details, like participant counts
- Details of meeting attendees, including names, companies, and groups

One especially useful filter for this list is the Target Company filter.
With it, you can compare your event’s Companies to see which ones had more meetings canceled, and the reason for each cancellation:
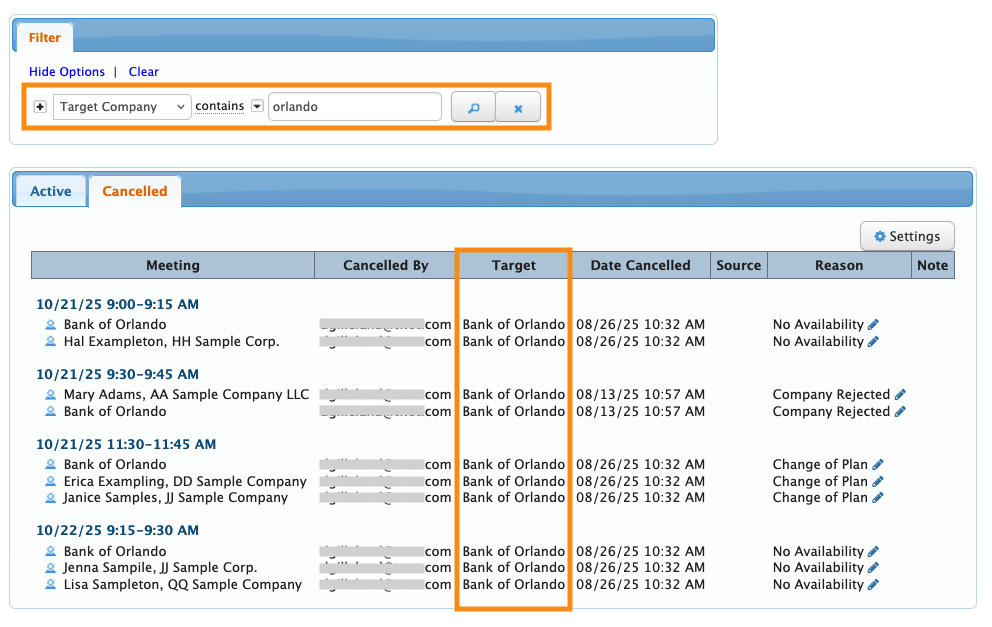
| In MeetMax: The Source is the person who sends a meeting request. The Target is the person or organization who receives that request. |
Need to remove a filter?
- Click the X button to remove one filter.
- Click the Clear link to remove all filters:
![]()
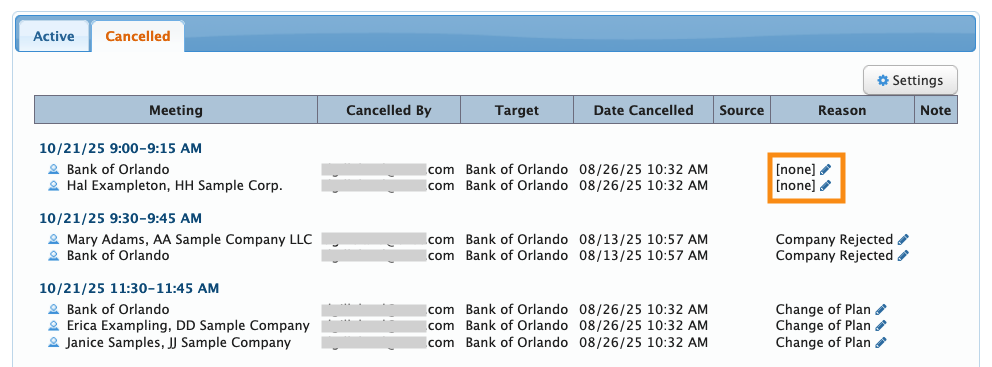
Adding/updating a reason after cancellation
When anyone cancels a meeting in MeetMax, they’re presented with a list of your event’s cancellation reasons to choose from. You’ll see these reasons on the Canceled Meetings List.
If any of the canceled meetings are missing a reason, you can click the edit icon to add it any time.
You can also update existing cancellations this way:
Settings to customize your data exports
As with the Meetings List, the columns of the Canceled Meetings List aren’t editable. MeetMax always shows the same set of columns - a streamlined display for quick reference.
You can, however, customize how the list exports to spreadsheet form. Click the Settings button to get started:
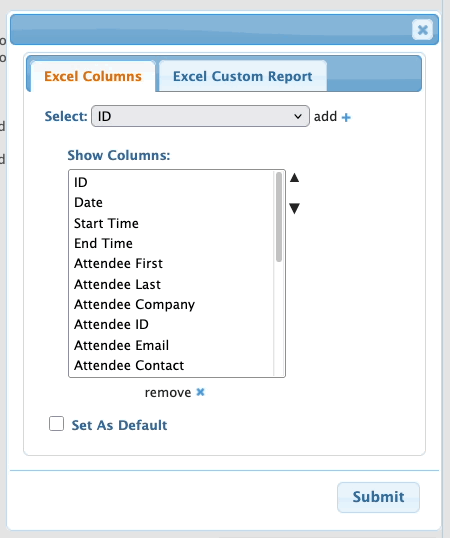
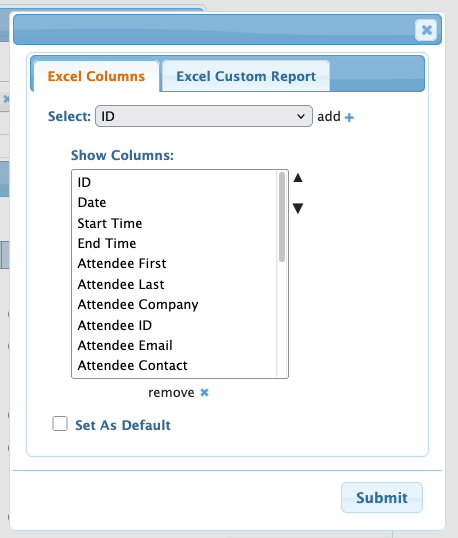
Excel Columns tab
In this tab, you can decide which columns of data to include in your export. You can add columns from the list, or remove any you don't need.
You can also highlight any column and use the arrow buttons to move it. Click Submit to save:
As an option, you can click the Set As Default checkbox. That makes this configuration of columns standard for you, and also applies it to all other Admins on your team:
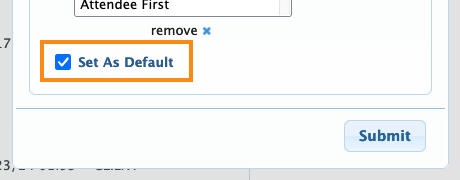
Any other Admin can still come to this tab and customize their own display.
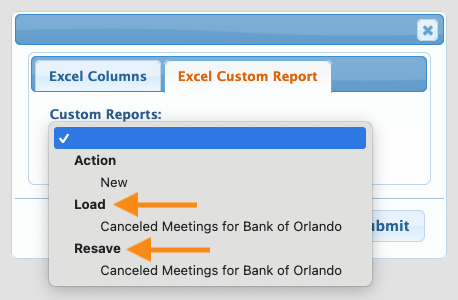
Excel Custom Report tab
In this tab, you can save any of your filtered views of the Canceled Meetings List.
To save a report, choose New from the menu. Give the report a title, and choose whether to share it with your team. Then click Submit to save:
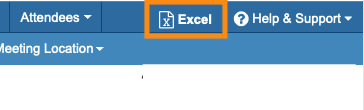
With that done, you can head to the top right corner of the page to export the report:
To access your reports later, head back to the Excel Custom Report tab.
If you update a report at any point, you can also Resave the new version: