
How it’s used:
• As you’re scheduling meetings from Attendee requests, this report helps you keep track of how many requests you’ve filled.
• Depending on how you filter it, you can see one Attendee’s requests, or overall allocation for a company.
• With this report, you can make sure you’re giving all Attendees as many meetings as you’re able.
In this article:
| This report is designed for Moderated meeting programs. |
Running the report
- Step 1. Head to the Attendee List:

-
You can also run this report from the Company List, to see allocation of a Company’s meetings. - Step 2. Go to the Columns tab. Here, you can add and remove columns. Click Apply to save the changes.
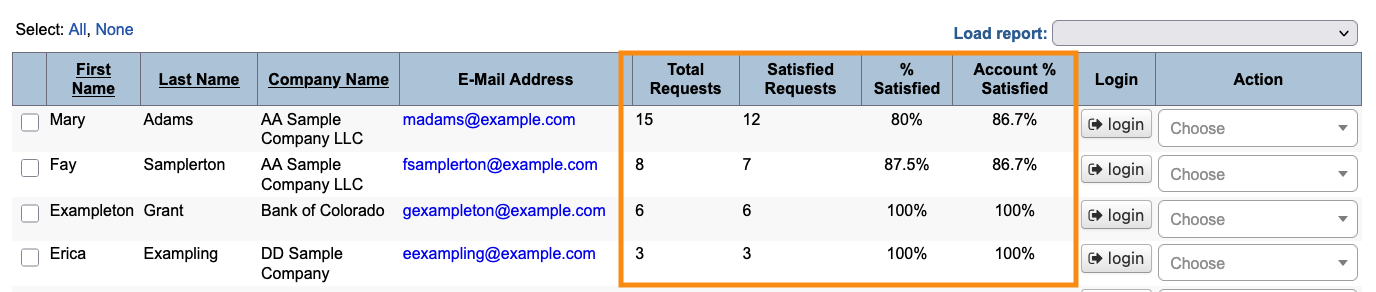
- We recommend including these columns:
-

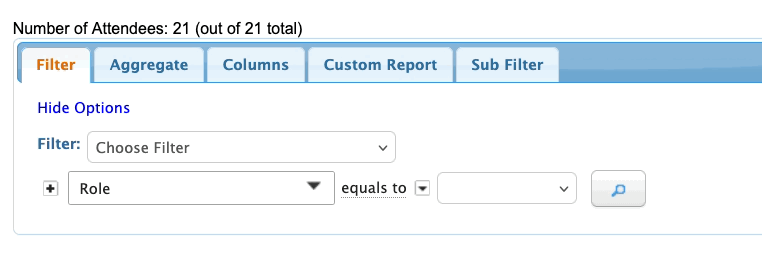
You can use either the % Satisfied or Account % Satisfied filter, or both. It depends on the data you need to see. - Step 3. Now, head to the Filter tab. Set the filter by Role, and choose Attendee.
- Then choose the With Requests filter:
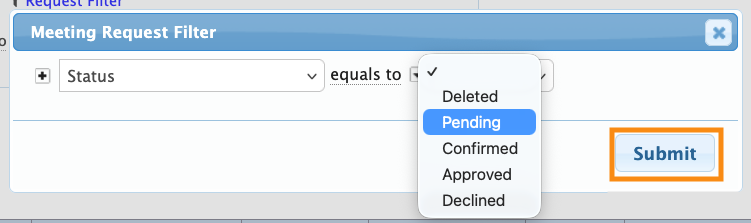
- Step 4. As an optional step, click the Request Filter link. In the pop-up, you can narrow the list down to Attendees with Pending requests:
- Step 5. Click Submit to save the filter.
- Click the magnifying glass to run the report.
- Step 6. You’ll now see how many of each Attendee’s meetings have been allocated, alongside the overall allocation for each company:
Simpler, company-focused option
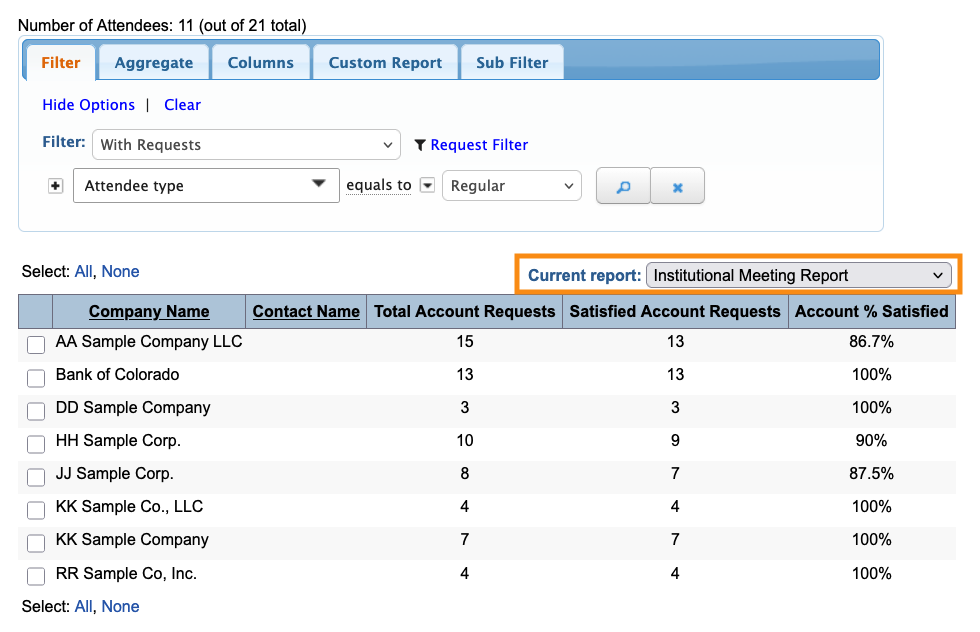
If you only need to see the overall allocation for each company, head to the Load report menu. Choose Institutional Meeting Report:
Exporting the report
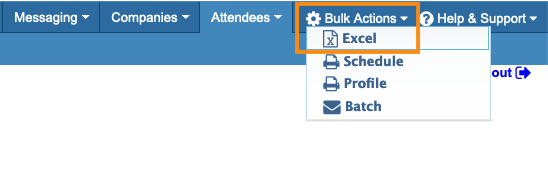
To export either version of this report in spreadsheet form, head to the top right corner of the page. Click Excel.
You can open the exported file in any spreadsheet software:
Saving the report
The Institutional Meeting Report version is automatically saved for you.
If you’re using the more detailed version, you can save it to quickly access it later.
Head to the Custom Report tab. Choose New from the menu.
Then give the report a title, choose whether to share it with your team, and click Save:

Learn more:

