In this article:
- Where is it?
- Data available in the list
- Adding, removing, and reordering columns
- Sorting and filtering meeting requests
- Creating custom reports
- Exporting from the Meeting Request List
Where is it?
You’ll find the Meeting Request List in the Meetings tab:

Data available on the list
Every meeting request appears here, whether it’s been approved, scheduled as a meeting, canceled, or any other status:

| The Source is the person who requested the meeting. The Target is the company or person who’s received that request. |
Other important information
By default, you can also see information like:
- The date each meeting request was created
- Whether a meeting has been scheduled
- The way the requestor ranked their interest in each request
The Meeting Request List is most helpful when you shape it to your needs - and your needs will change throughout your event. Read on for several ways to work with your data.
Adding, removing, and reordering columns
Click on the Columns tab. There, you can add new columns to the list, or remove columns you don’t currently need. As you can see, there are a lot of columns to choose from!
Be sure to click the Apply button afterward:

Need to change the order of columns? Click on any column name to highlight it. Then use the arrows to move it up or down. Click Apply to save:

Sorting and filtering meeting requests
As you’re managing your meetings program, you’ll have many questions, such as:
- Are there any meeting requests that still don’t have a meeting scheduled?
- How do I see a list of a particular Company’s meeting requests?
- How can I see all the meeting requests made by a single Attendee?
- Which Attendees have expressed the most interest in meeting with this Company?
- Which meeting requests have been canceled?
- Are there more requests for 15-minute meetings, or 60-minute meetings?
Questions like these are easy to answer by sorting and filtering the Meeting Request List.
Sorting columns
Look at the titles on each column of the list. They’re all links.
Click on any of these links, and that sorts the whole list by that column. Click again to switch between ascending and descending order:

Filter tab
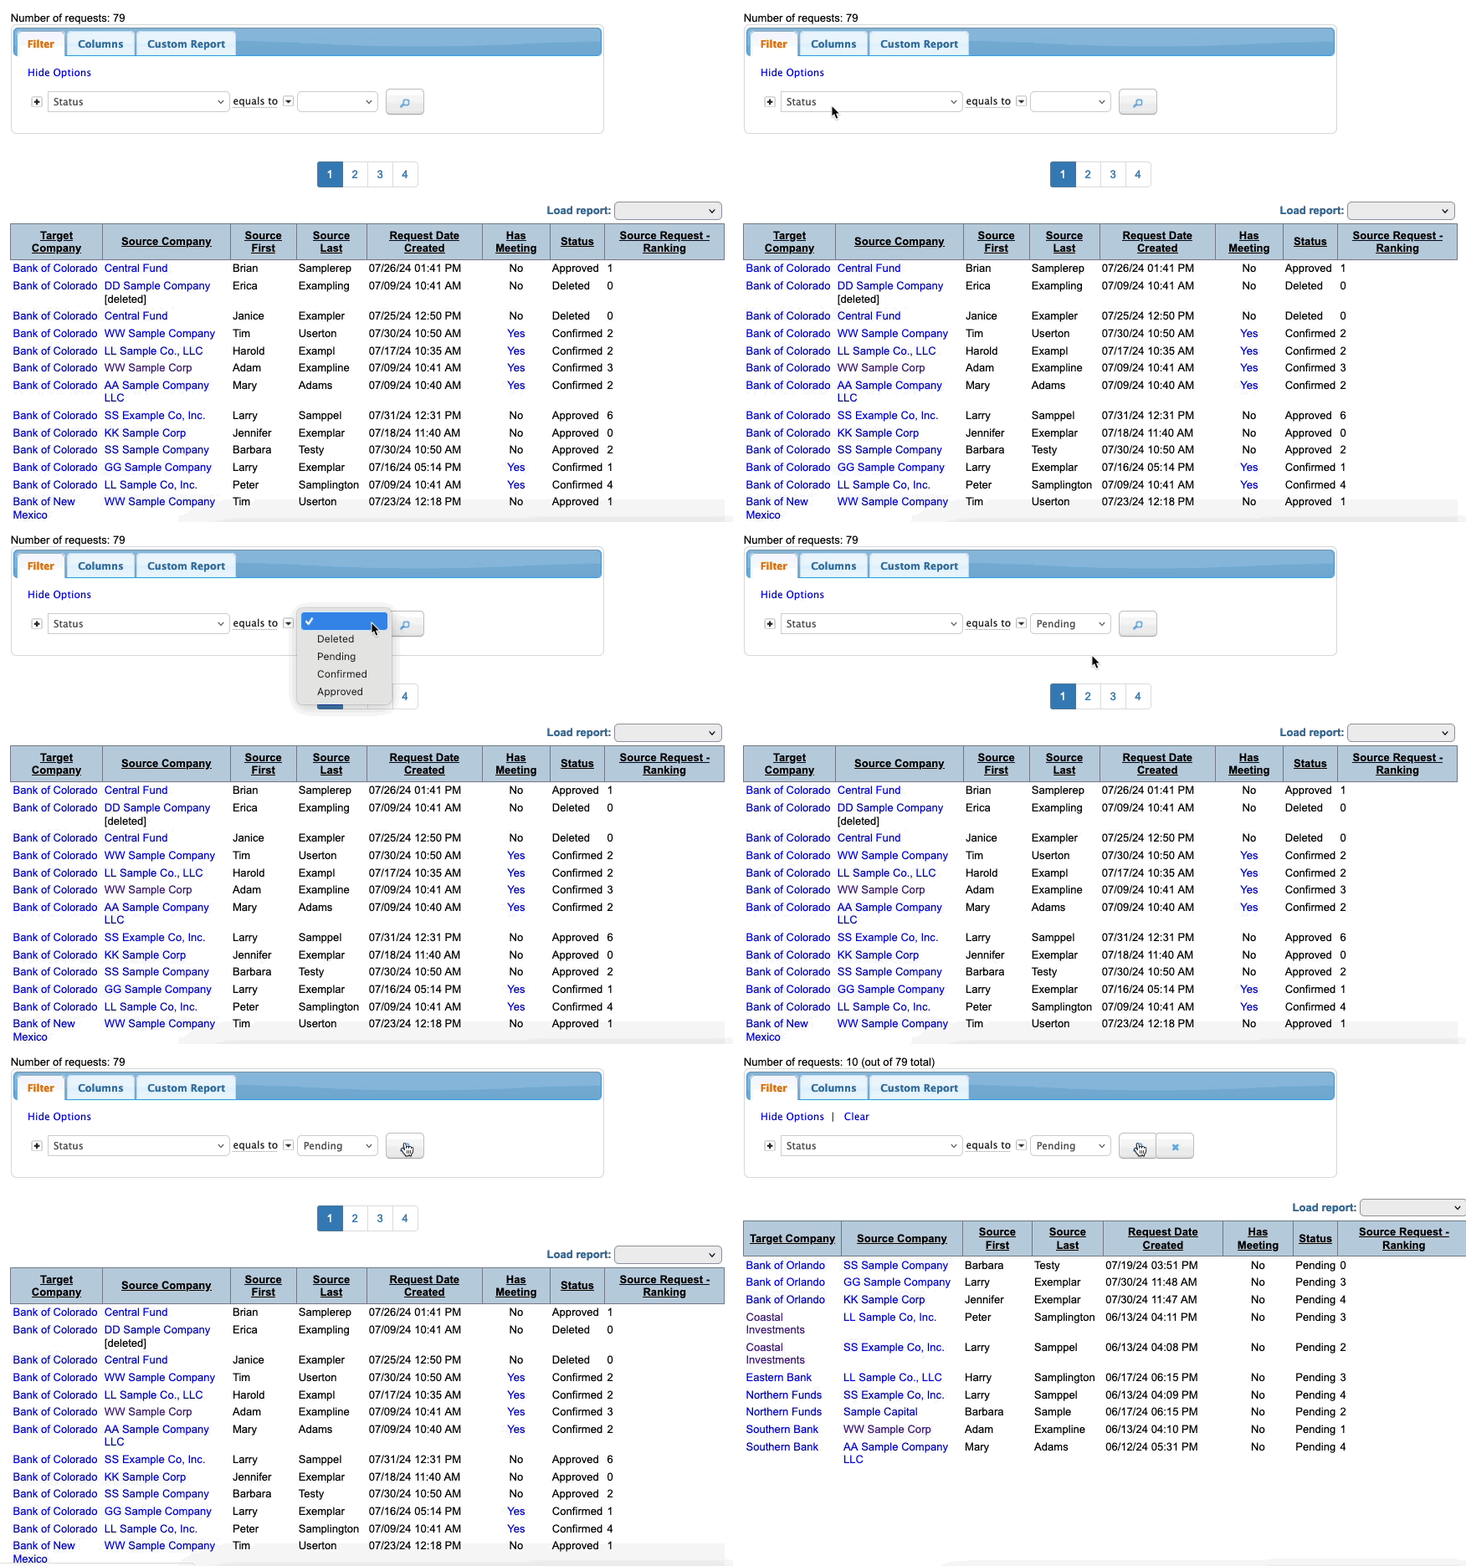
In the Filter tab, you can narrow down the display using a variety of criteria.
The default filter, Status, narrows the list by the current status of requests. Here, we’ll narrow the list down to the Pending requests, so we can schedule meetings for them:

Combining filters
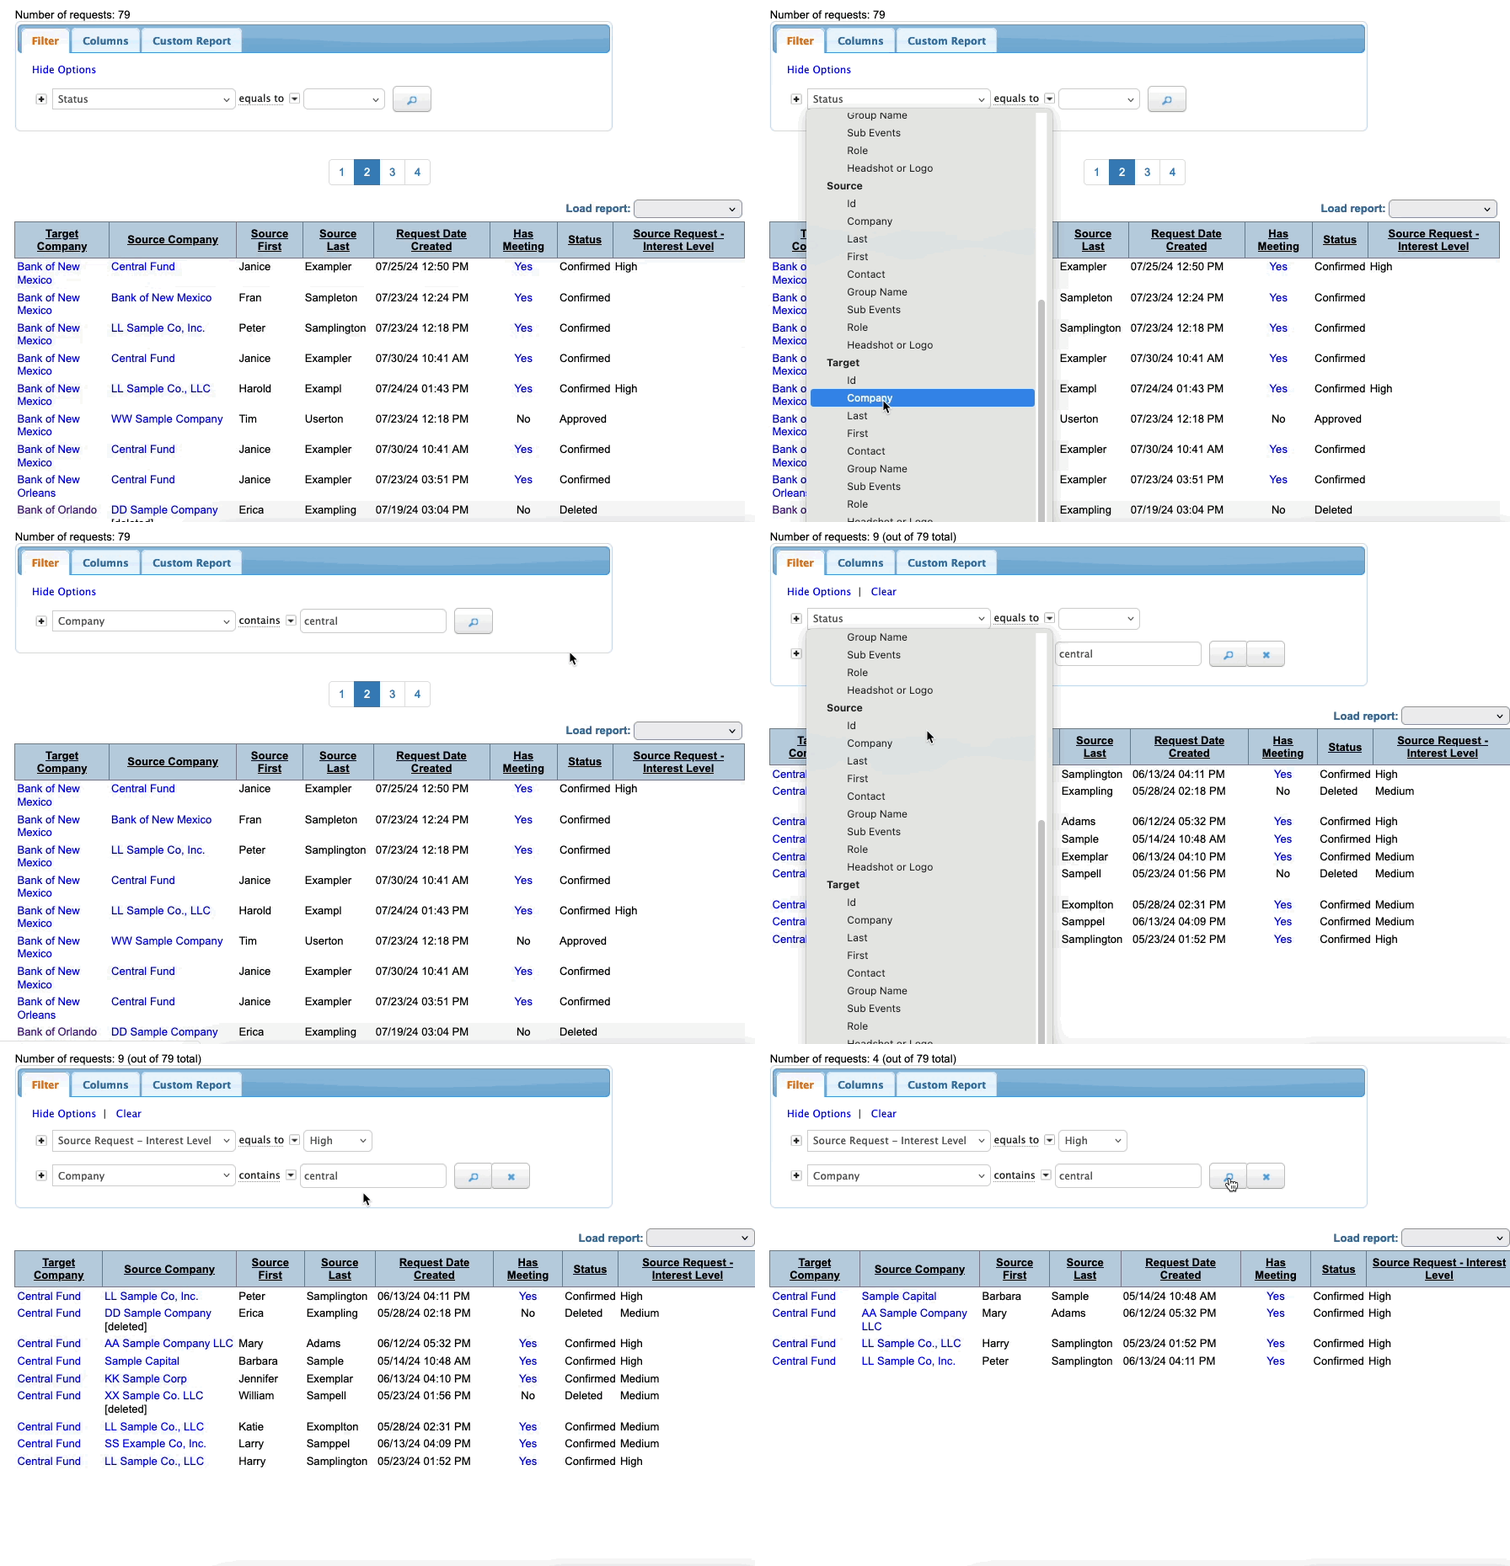
You can combine filters to get even more specific views. In this example, we want to give one of our Companies, Central Fund, a list of Attendees who’ve expressed the most interest in meeting with them.
First, we’ll filter the list by the Target name, which is the Company name. (Remember, the Target receives the meeting request.)
After that, we’ll add another filter for the interest level of the Source (who requested the meetings):

Need to remove a filter? There are two ways:
- Click the X button to remove one filter
- Click Clear to clear all current filters

Creating custom reports
If you’ve created a view of your Meeting Request List that you’ll want to access later, you can use the Custom Report tab to save it.
You can choose to share this report with other admins on your team, or not:

Create as many custom reports as you like. Once you’ve saved some custom reports, you can access them from the Meeting Request List any time.
Head to the top right corner of the list and click the Load Report menu. You’ll see your custom reports there:

When you’re ready to switch back to the main view, use this menu to choose Standard Layout.
Exporting from the Meeting Request List
You can export any Meeting Request List view as a spreadsheet. The export will contain only the data in your current filter/sort.
Head to the top right corner of the page and click the Excel icon:

You can open the downloaded file in any spreadsheet software.


