
In this article:
- Preliminary steps
- Adding meeting locations
- Starting an automation pass
- Automation settings
- Running an automation pass
| Our Support team is happy to work with you on automated scheduling. |
Preliminary steps
Every event is unique, so MeetMax’s automation tools are extremely flexible. Automation will look different for every event.
The most important work happens before you actually start scheduling. Be sure to take these preliminary steps first.
Adding meeting locations
Since you’ll be creating meetings in bulk, it’s wise to think ahead about how you’ll assign locations to those meetings.
You can either:
- Enable MeetMax to automatically assign locations as it creates meetings (see below).
- Add locations to meetings after they’re created, using the Assign Locations Grid.
To have MeetMax assign locations as it creates meetings, follow these steps:
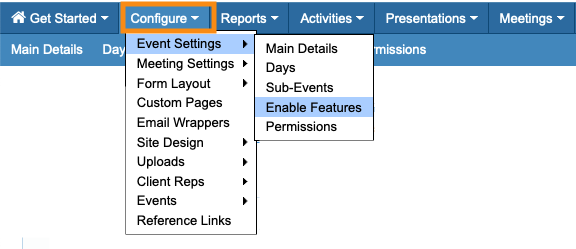
- Step 1. Head to the Configure tab. Choose Event Settings, then Enable Features:
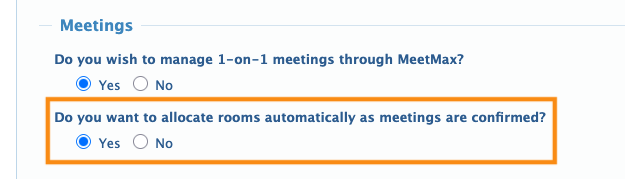
- Step 2. Scroll to the Meetings section. Under Do you want to allocate rooms automatically as meetings are confirmed, choose Yes:
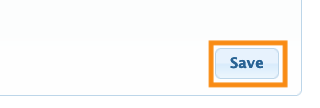
- Step 3. Scroll to the bottom of the page and click the Save button:
-
If your event has multiple reserved locations, that will slow down the automation process.
Starting an automation pass
Depending on your event, automated scheduling can happen in one pass, or multiple passes:
- If you have minimal scheduling requirements, MeetMax might be able to schedule your entire database of participants at once.
- If you have any priority groups of participants, you’ll want MeetMax to create their meetings first. After that, you’d run subsequent automation passes for other groups.
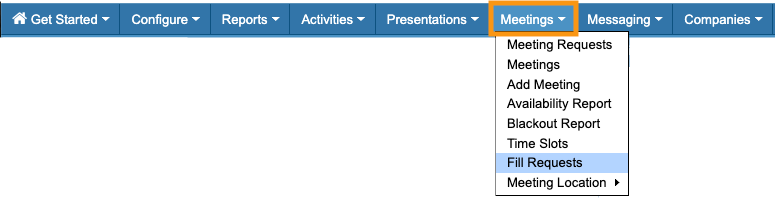
To start an automation pass, head to the Meetings tab. Choose Fill Requests:
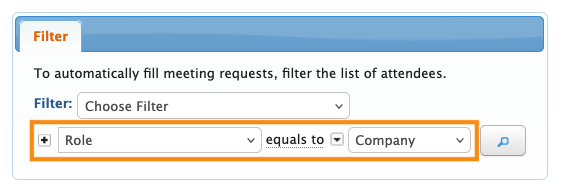
Initial filter
To separate priority groups for scheduling, you’ll add filters - much like you do on the Attendee List or Company List.
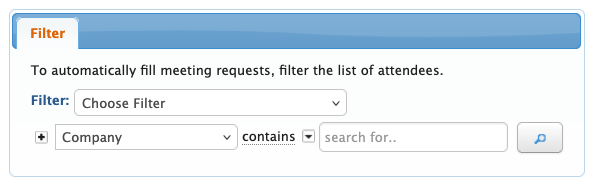
When you begin automated scheduling, you’re presented with an initial filter:
- If you set no filter here: MeetMax will run automated scheduling on all participants.
- If you set filters here: MeetMax will only automate scheduling for that group. Then you’ll schedule other groups in subsequent automation passes.
Most of the time, you’ll set this filter to a specific user role, like Company or Attendee. But for more complex events, you might filter for things like:
- A specific company or parent company name
- Whether participants have submitted meeting requests or not
- Whether you’ve organized your participants into groups
| There are many more filter options. Our Support team will help you choose the right initial filters for your event. |
Once you’ve set the filter criteria, MeetMax confirms how many participants are in that group. You can click the link to see a list.
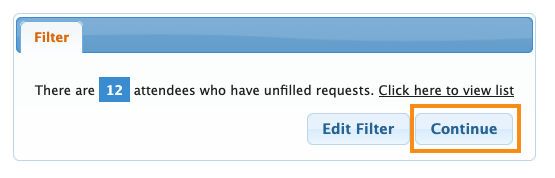
From here, you can either:
- Edit Filter: Update your initial filter settings.
- Continue: Proceed to the automation settings.
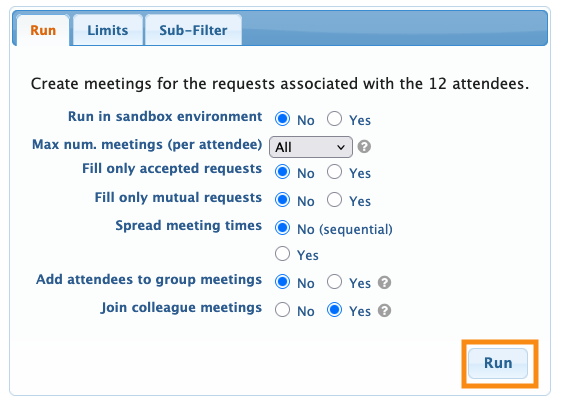
Automation settings
Once you’ve clicked Continue in the pop-up shown above, you’ll have access to the settings for this automation pass.
All of these are optional. Choose the ones that apply to your current automation pass:
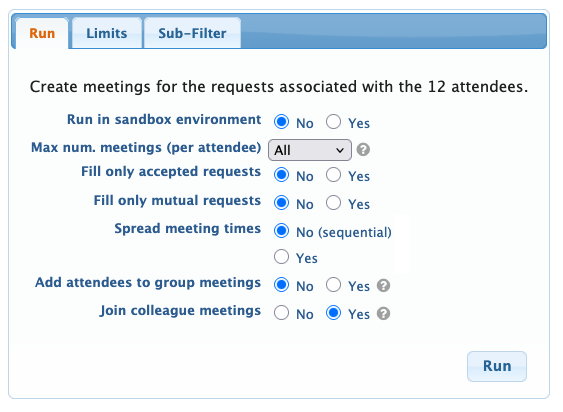
- Run in sandbox environment: For large events, you can test your automation passes. When you use this setting, MeetMax produces a spreadsheet of all the meetings, instead of creating them.
- Max Num. Meetings: By default, MeetMax creates one meeting for each participant in this batch. You’ll usually choose All instead, so MeetMax creates as many meetings as possible. (This setting also relates to the Limits tab - see the section below.)
- Fill only accepted requests: Use this setting if you’re having participants approve or decline the meeting requests they receive. MeetMax will then ignore pending and declined meeting requests.
- Fill only mutual requests: Some events allow bi-directional meeting requests, where every participant can request meetings with every other participant. If this is your event format, MeetMax would only create meetings if both parties have requested each other.
- Spread Meeting Times: MeetMax can schedule meetings sequentially, starting with your first available time slot. Or, we can spread the meeting times around your event schedule. Make your choice depending on your event’s overall content and schedule needs.
- Add Attendees to Group Meetings: If your event is using group meetings, MeetMax will identify any Companies that are hosting that type of meeting. The automation will schedule multiple Attendees into those group sessions, based on your Meeting Type Rules.
- Join Colleague Meetings: If two people from the same company have requested a meeting with the same Target, the automation will include them in the same meeting.
Limits tab
The Limits tab is optional, and it’s an event-wide setting.
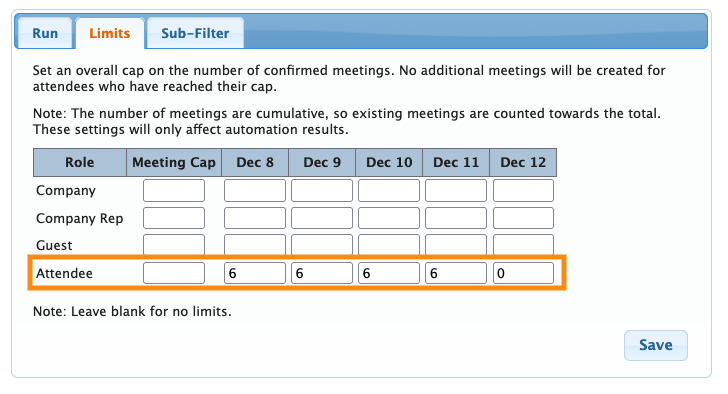
By setting Limits, you’ll tell MeetMax how many total meetings to schedule. You can set limits by:
- User role
- Total number of meetings per event day
- Overall meeting count
In the example below, our event gives each Attendee access to up to 6 meetings each day.
On the last day of our event, we’ll have presentations but no meetings.
In this case, the Limits tab would look like the example below:
If we also wanted to limit the number of meetings MeetMax creates for Companies or Company Reps in this pass, we could add numbers for those roles too.
You don’t need to use all of the fields here - just the ones where you want to apply a limit.
- Leave any field blank to set no limit at all.
- Put a zero in any field where you don’t want any meetings scheduled.
When you click Save, these limits will apply to this automation pass, and every subsequent one.
| Our Support team can help you design any limits you need for automation. If you need advanced design/strategizing help, reach out to your TWST Sales Rep to discuss contracting those services. |
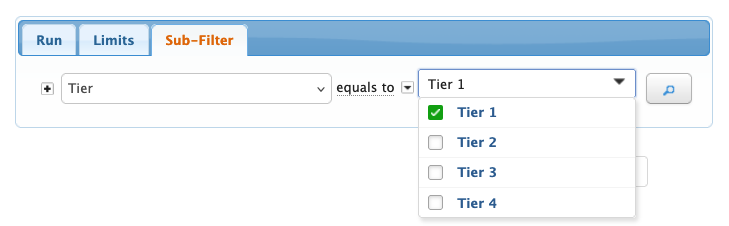
Sub-Filter tab
This optional tab lets you add more precision to an automation pass. It’s useful if you need to create sub-groups within a particular group you’re scheduling.
For example, let’s say that for our event, we’ve organized our Attendees into four tiers, based on their potential sales value. We want to use these tiers in an automation pass.
In this pass, we want to schedule only the Tier 1 Attendees. We want to pair them with any Companies they’ve requested to meet with.
So our initial filter could designate scheduling for the Source of requests, using the Company user role:
…And the Sub-Filter could designate those Tier 1 Attendees only:
| Our Support team will help you design any sub-filters you need for automation. |
Running the automation pass
When you have all the settings you need in place, click the Run button:
Depending on the number of meetings, it might take a few minutes to run the batch. Once it’s complete, you’ll see a message like this:

- MeetMax shows how many meetings it created.
- You can click on the Batch ID number to see the details of those meetings.
- Below the message, you’ll see a list of all pairings where MeetMax wasn’t able to create meetings.
If you notice that MeetMax didn’t create as many meetings as you were expecting, here’s how to troubleshoot.

