
In this article:
- Where is it?
- Why is it useful?
- Creating a general Discount Code
- Creating a Discount Code with conditions
Where is it?
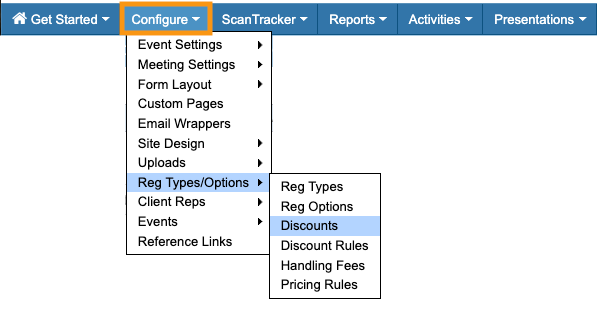
You’ll add and manage Discount Codes from the Configure tab:

Why is it useful?
MeetMax Discount Codes work like the ones you’re likely used to using online.
Once you’ve created a Discount Code, MeetMax invoices will have a Discount Code field.
An Attendee can enter their Discount Code to change the invoice total:
| We’ve used a basic Discount Code name in this example, but you can give your codes any kind of name you like. |
You can place as many controls on a Discount Code as you need. If you’re worried about a code being shared widely, you can limit:
- The number of times it can be redeemed
- The invoice items it applies to
- The amount of time it’s active
You can create as many Discount Codes as you need.
| If you want to have a discount apply based on how a participant fills out certain form fields, you can also create Discount Rules. |
Creating a general Discount Code
In this example, we’ll create a simple promotional code - 15% off registration. We’ll give this code an expiration date.
- Step 1. Head to the Configure tab. Choose Reg Types/Options, then Discounts:
- Step 2. The Add Discount form has a few required fields, and many optional ones. Feel free to use only the criteria you need.
- The top section has these fields:
- • Discount code: The public code you’ll give to your Attendees. It’s not case-sensitive.
- • Type: You can set a Fixed Amount, or a Percentage. Once you choose one of these, enter its amount.
- • Apply discount to: We’re applying this discount to the invoice total. You can also have it apply only to specific items. (See the section below for details.)
- Step 3. In the Criteria section of the form, you can set optional limits:

- • Limit usage: You can set a maximum number of times this discount can be redeemed. If you’re creating a discount code for one person, set this to 1. If you want to offer a discount to the first 10 registrants, you can set the limit to 10 and give the code to as many people as you like.
- • Minimum: This setting lets you limit the discount to specific registration levels. You can set a minimum invoice amount, and the discount code will only work on invoices at or above this amount.
- • Start and End Date: Use this setting to make a limited-time discount code. If an Attendee registers for your event but doesn’t pay until after this end date, the discount won’t apply.
- Step 4. Click Submit to save the code.
Creating a Discount Code with conditions
Sometimes, you’ll want a Discount Code that only applies to specific parts of a registration.
In this example, our event has a standard registration price and a discounted Early Bird price. We’re setting up a 15% discount, but we only want it to apply to the standard registration fee.
- Step 1. Head to the Configure tab. Choose Reg Types/Options, then Discounts:

- Step 2. Fill out the Add Discount form, as shown in the section above.
- In the Apply discount to field, choose Charges matching conditions below.
- In the Conditions section, choose the Registration Types and/or Options this discount can apply to:
-
Use the + button to add more conditions as needed. You can set a Discount Code to apply to multiple Registration Types and Options, or only one as we’ve done here.

