
In this article:
- Where is it?
- Default view
- Showing or hiding menu items
- Showing/hiding menu items for specific circumstances
- Reordering menu items
- Renaming menu items
- Creating nested menu items
- Changing an icon
- Previewing the menu
Where is it?
You’ll find the Menu Editor in the Configure tab. Choose which menu you want to update:

Participants see their menu when they log into MeetMax. It appears as both a menu bar and a set of icons:
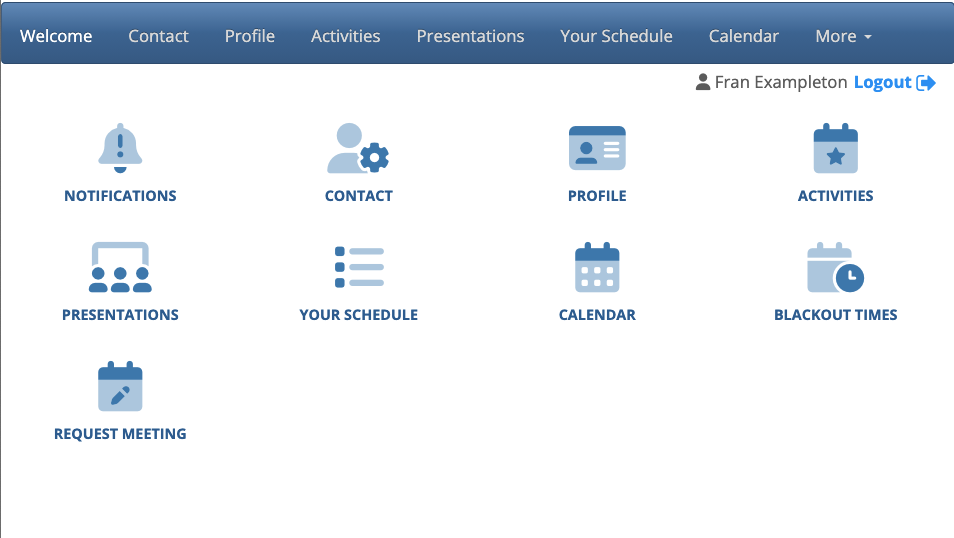
| We’re showing the Attendee menu here, but all menu editors work the same way. |
Default view
When you access the Menu Editor, you’ll see your current default view.
- In the left section, you’ll show or hide items from the menu bar.
- In the right section, you’ll work with the corresponding icons.

You’ll make changes from the left sidebar. Once you save, those changes will appear in the icon panel on the right.
Showing or hiding menu items
You can use the methods below interchangeably.
Option 1
To hide any item from view, click the check box. A red X appears to indicate that the item is hidden, and its icon disappears.
If you’d like to re-enable the item later, return to this page and click the checkbox again.
Be sure to click Save:

Option 2
With this method, you can keep the original icons in place in your Admin view, but see what’s currently hidden.
Right-click on a menu item. Then choose Toggle Show/Hide Icon. You’ll see a symbol appear over the icon so you know it’s hidden for your participants. Be sure to click Save!
You can repeat this action any time to re-enable this item:

Showing/hiding menu items for specific circumstances
You can get even more specific about when certain menu items are visible.
Learn more about showing or hiding menu items for certain groups of participants here.

Reordering menu items
You can change the order of menu items at any time during your event.
To move any menu item to a different spot, click and drag. Once you click Save, you’ll see the change in the icon display as well:

Renaming menu items
You can change the label on any menu item, and it automatically relabels the corresponding icon.
Learn how to relabel menu items here.
Creating nested menu items
Sometimes, you might want menu items to have sub-items, like this:

First, click Create menu container. Give it a label, and then drag the sub-menu items over this container.
Be sure to click Save!

| The default menu items can’t be used as menu containers. You’ll always need to create a new container. | |
| The Menu Editor supports one level of nesting. In other words, you can’t nest sub-menu items under other sub-menu items. | |
| You can nest any items you like in the menu bar, but their icons always display without nesting. |
Changing an icon
You can choose a different icon for any menu item. We use FontAwesome’s library, which has thousands of options.
Learn how to change an icon here.
Previewing the menu
Want to see the results of your changes? MeetMax has several ways to preview what your participants will see.

