

How do I customize the participant Welcome page?
In this article:
When Attendees or Companies log into MeetMax, they land on a Welcome page. Here’s the default form:
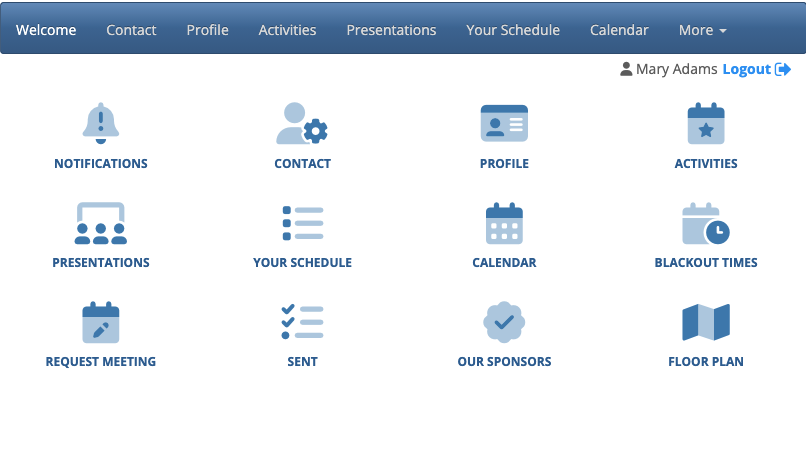
Our team will help set this page up initially with your branding, and other customizations. Here are two ways you can update this page yourself.
Changing the icons
Your Welcome page is likely set up for our Graphical Landing Pages feature.
We set default icons, but you can choose different ones any time. We use FontAwesome’s library, which has thousands of icons.
| MeetMax doesn’t currently support custom icon uploads. |
- Step 1. Head to the Configure tab. Choose Site Design, then Menu Editor. Then choose which site you need to update:

-
We’ll show the Attendee Menu here, but the process is the same for the Company Menu and Public Menu. - Step 2. In the Menu Editor, head to the left sidebar. Right-click on the item you want to update. Then choose Change Icon.
- Step 3. Type in a description for the icon you want instead. You’ll be able to choose from a selection that matches your description. Choose a new icon, and then click Save:

|
If you’re having trouble locating the icon you want, you can also search Font Awesome’s website. That gives you the keywords to search in MeetMax. |
Adding a custom message
You can also add text and graphics above or below the icon display, something like this:
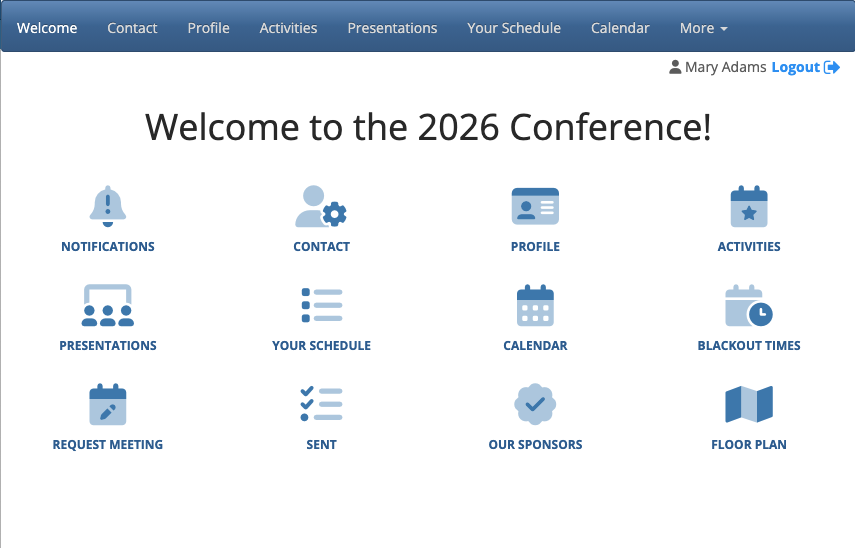
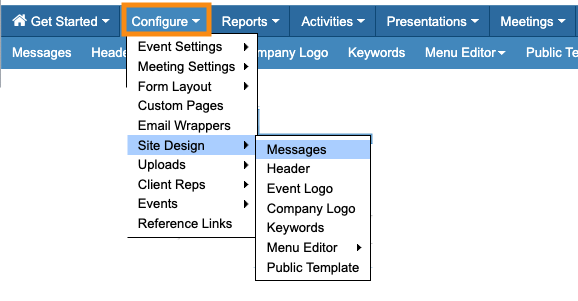
- Step 1. Head to the Configure tab. Choose Site Design, then Messages:
- Step 2. On the Messages page, set the Filter to With Custom Messages. That will display only the Messages our team has set up for your event:
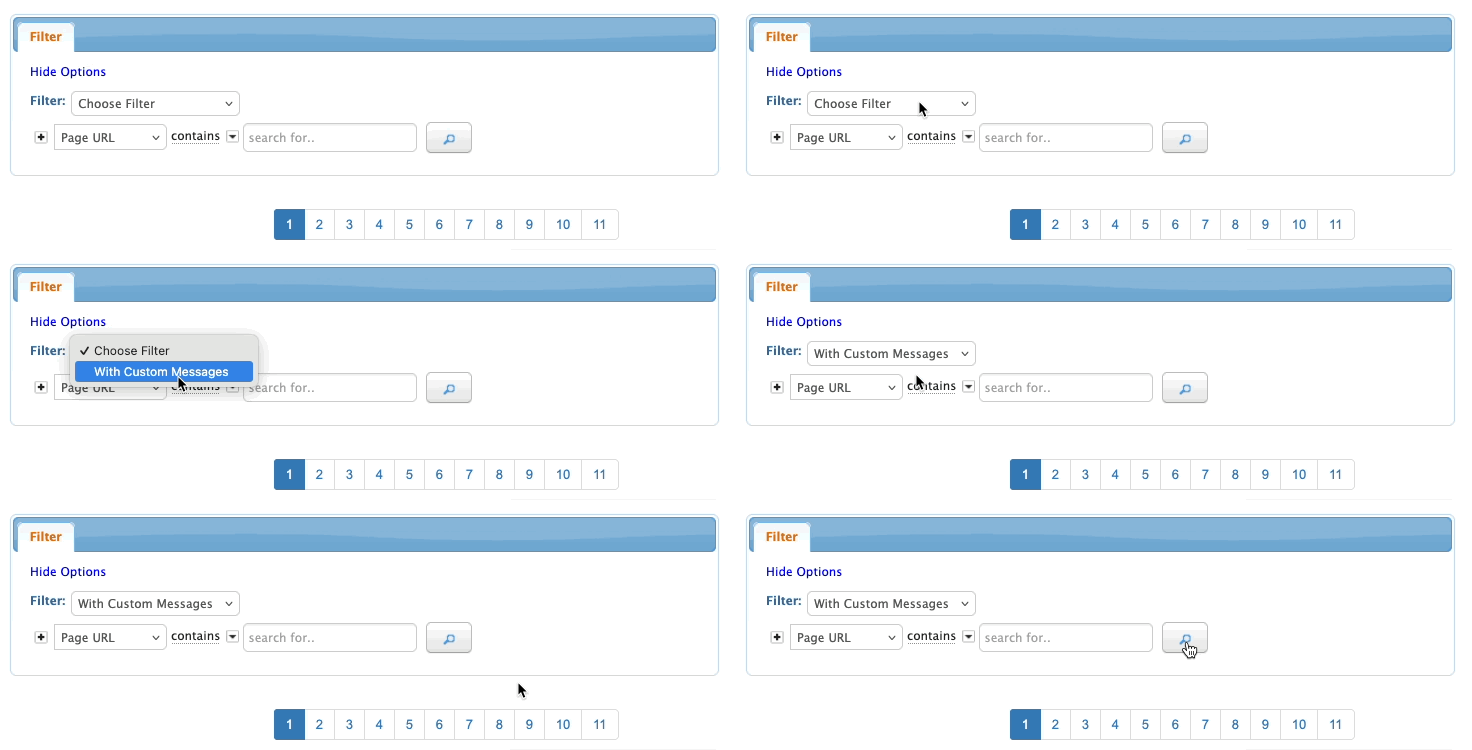
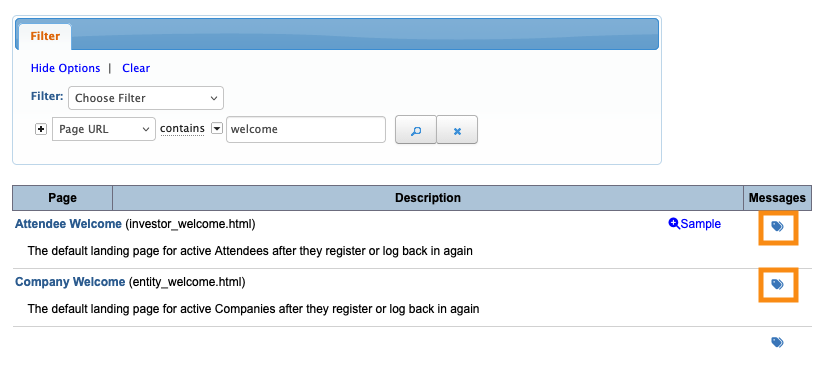
- Step 3. Next, set the Page URL filter to contain “welcome,” as shown below. That will show you both Welcome pages:
- • investor_welcome.html: Displays for Attendees and Company Reps
- • entity_welcome.html: Displays for Companies
- Click either tag icon to open the page editor:
-
If you need Attendees and Company Reps to see different messages on this page, you can set up Alt messages. - Step 5. Now, it’s time to choose the zone of the page where your content will go:
- • TOP places your content above the icon display.
- • BOTTOM places your content below the icons.
- You can add Messages to one or both areas. In this example, we’ll insert a TOP message:
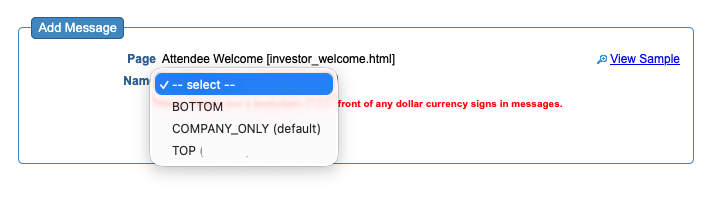
- Step 6. When you choose a zone, that opens the content editor. You can add text, images, and links here.
- Click Submit to save:
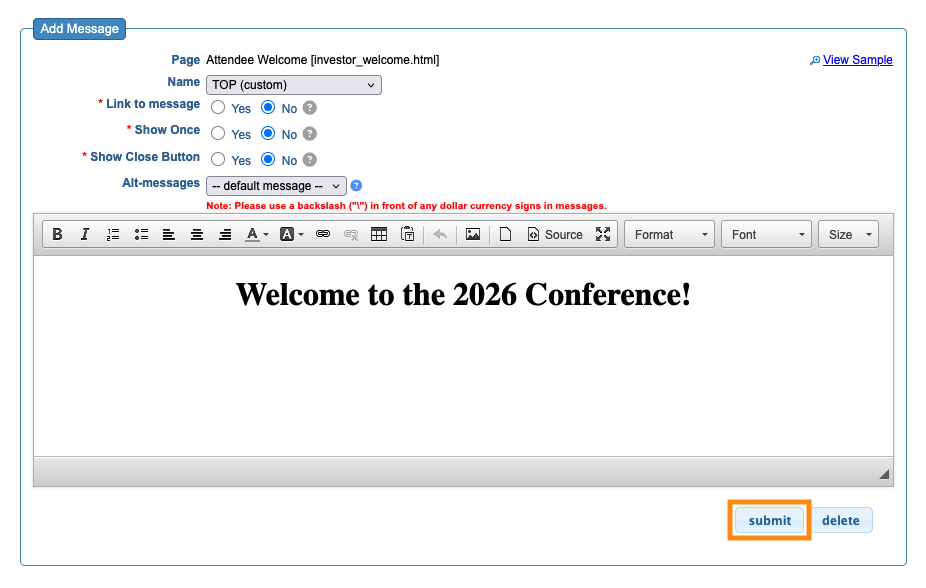
- You can return to this Message at any point during your event, and change the content. Participants will see the new version automatically.

