
In this article:
- Getting started
- Getting SSO enabled for your account
- SSO settings
- Adding team members to the MeetMax account
- What your team members see
Getting started
| SSO is a premium add-on service. Reach out to your TWST Sales Representative to learn about annual licensing. |
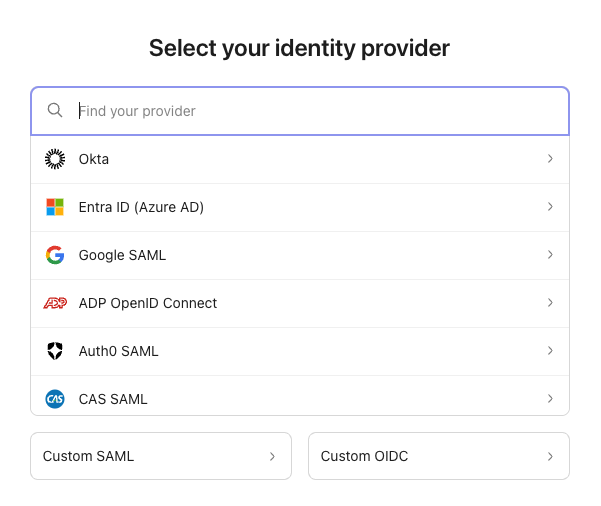
We’re assuming here that you already have a corporate SSO provider. MeetMax supports these:
- Okta
- Entra ID (Azure AD)
- Google SAML
- ADP OpenID Connect
- Auth0 SAML
- CAS SAML
- Custom SAML
- Custom OIDC
You’ll also need a list of all email domains your team will be using in their SSO login credentials.
Getting SSO enabled for your account
Once you’ve licensed our SSO service, you’ll give our Support team your list of approved domain names.
Our team will then enable SSO for your account and set up these approved domains. We’ll notify you when it’s time to configure settings on your side.
SSO settings
Your IT team will be taking most of these steps.
- Step 1. Head to the Configure tab. Choose Event Settings, then SSO/SAML:

- Step 2. On the SSO/SAML settings page, you’ll see your approved domains.
- In the Disable password login field, you’ll choose whether your team will also have the option to log in with a MeetMax username and password. (For best security, we recommend disabling password logins.)
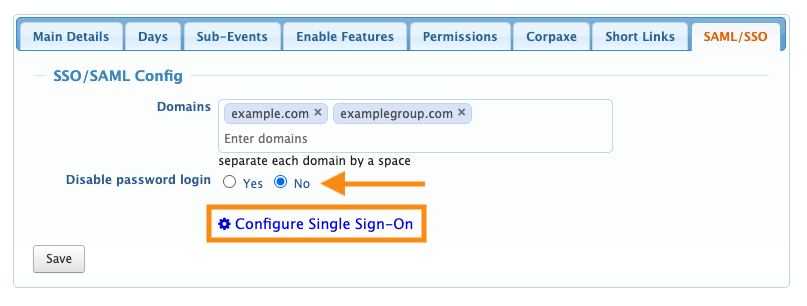
- Step 3. Finally, you’ll connect your SSO identity provider to MeetMax. To get started, click the Configure Single Sign-On link, as shown above.
- You’ll then see a list of provider options. Make your choice and proceed with the prompted steps:
- Step 4. Once you’ve finished the connection process, be sure to click the Save button:

Adding team members to the MeetMax account
In MeetMax, an event Admin is called a Client Rep. When you’re using SSO login, here are the special requirements for Client Rep accounts:
- For each Client Rep, you’ll need to create an account in MeetMax and an account in your SSO identity provider.
- The email on these accounts must use one of your approved domains. The emails on both accounts must match.
- You can assign each Client Rep any permission level - all are compatible with SSO login.
Passwords on Client Rep accounts
While creating the MeetMax account, you’ll need to set a password, even if you’ve disabled password logins. The Password field is required.
- If you’ll be allowing both SSO and username/password logins, use our standard process to assign a password to each account.
- If you’re disabling password login, you can enter any value in the Password field. MeetMax doesn’t store Admin passwords, so the data won’t be used.
What your team members see
With SSO enabled, your team will see the option on the MeetMax login page.
They’ll click the Single Sign-On link, which connects them with your identity provider:
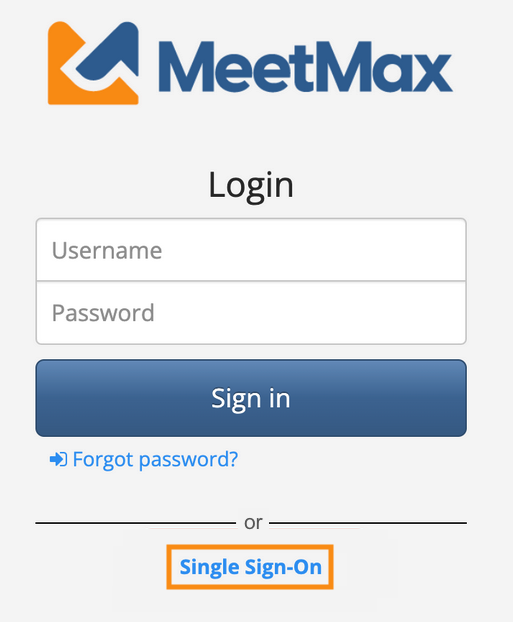
- If you’ve disabled username/password login, a user can still try to enter that data into the form. But they’ll see an error message directing them to use SSO.
- If you’re allowing both types of login, the user can click the SSO link, or enter their MeetMax credentials.

