Sending event details to Corpaxe

With our integration, you can list your MeetMax events to the public Corpaxe Calendar. Now it’s easy for prospects to find you on this industry-leading aggregator.
In this article:
- Where is it?
- Enabling an event to be shared
- Event-level settings
- Optional: Assigning Analysts to an event
- Publishing an event to Corpaxe Calendar
- Removing an event from Corpaxe
| To comply with Corpaxe Calendar 2.0, as of July 7 2025 we’ll be adding more required data fields for each event you’re publishing. You’ll need to update these fields in your existing events. See the Settings sections below for details. |
Where is it?
We're assuming here that you've already set up the integration. Once that's done, your integration settings are in the Configure tab:

If you’re opting to publish the assigned Analysts for your event, those settings are in the Client Rep List:

Enabling an event to be shared
In MeetMax, you can set any of your events to share information with Corpaxe Calendar.
- Step 1. In MeetMax, open the event you’d like to update.
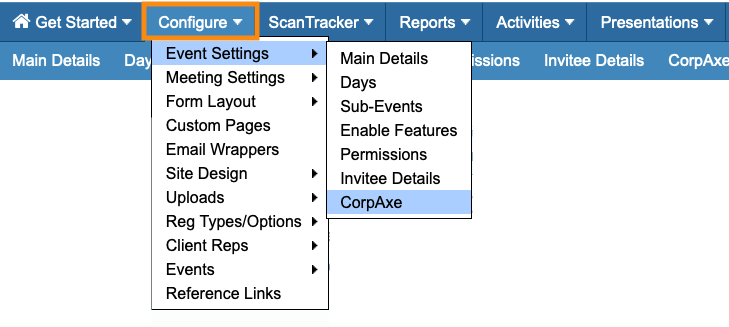
- Step 2. Head to the Configure tab. Choose Event Settings, then Enable Features:

- Step 3. Scroll down to the Event List section of the page.
- • Set Should this event be shown on the event list to Yes.
- • Paste in any link you’d like to share for the event. It might be a sales or marketing website, or your event registration page.
- • Add an event description:

- Step 4. Scroll to the bottom of the page and click Save:

Event-level settings
| As of July 7 2025, Corpaxe Calendar 2.0 will add new required fields. If you don’t have these fields completed in your existing MeetMax events, they will stop publishing. Be sure to check all of your events. Make sure you’ve completed all required fields in this section, and the Company-level settings section below. |
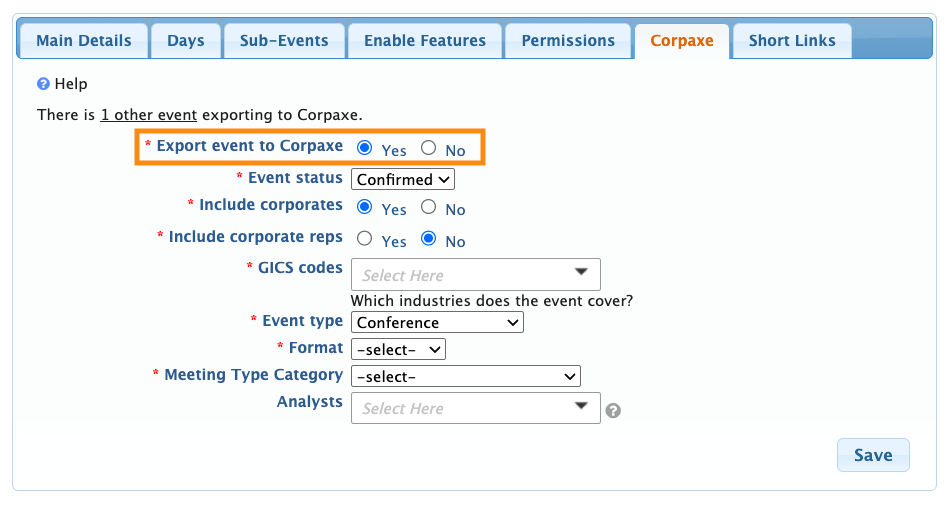
- Step 1. In your MeetMax event, head to the Configure tab. Choose Event Settings, then Corpaxe:

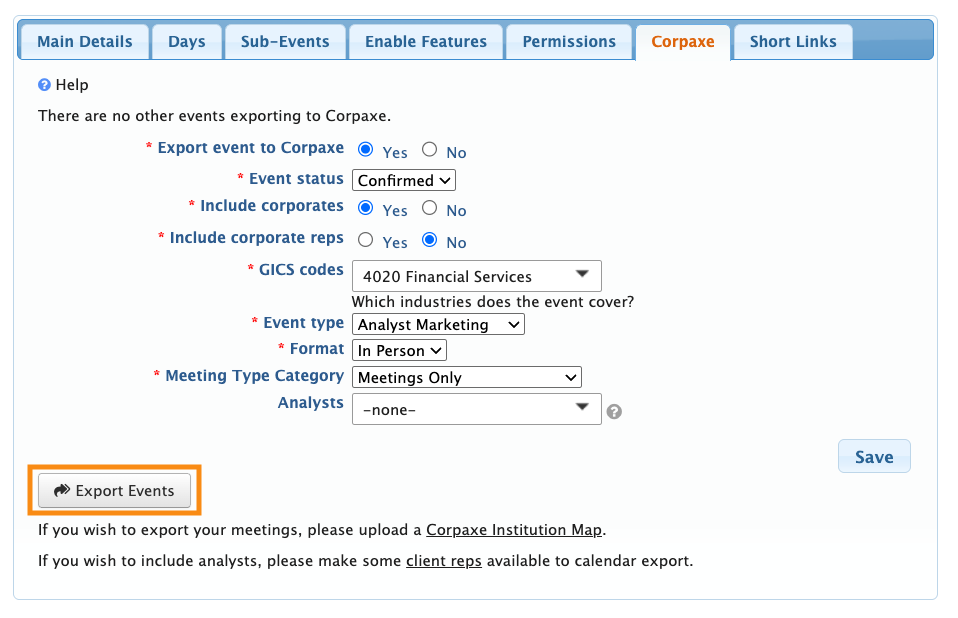
- Step 2. Under Export event to Corpaxe, click Yes. That opens the event-level settings. All required fields are marked with a red star.
- Learn more about each setting below:
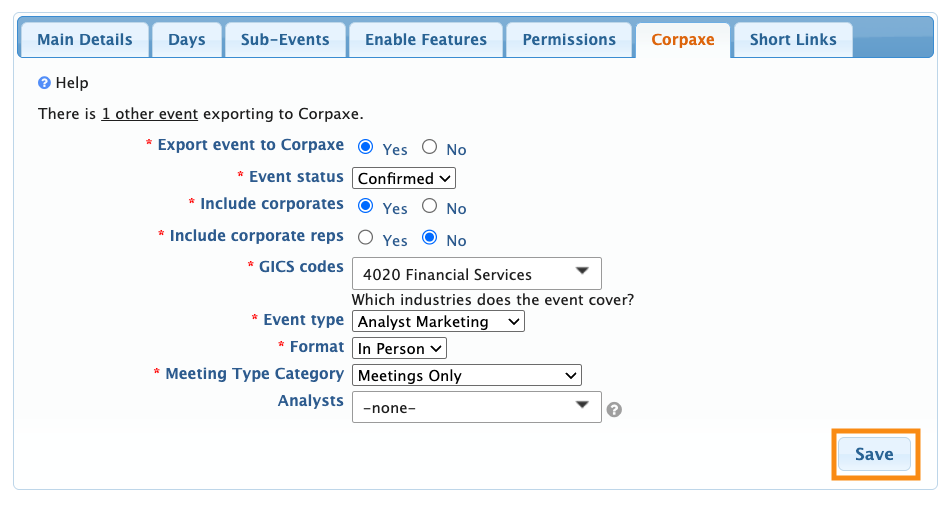
- • Event Status: Set the event’s current status here. (You can update it any time.) The published event will display this setting in Corpaxe.
- • Include Corporates: You can publish a list of participating companies with this event, or not. (If you’re including Corporates, see the Company-level settings article.)
- • Include Corporate Reps: Choose whether to publish a list of this event’s Analysts. You can also publish the event initially without this list, and enable it later. (We'll cover this in a moment.)
- • GICS Codes: Choose the Global Industry Classification Standard codes that apply to the event.
- • Event Type: Choose the type of event you’re hosting: Conference, Non-Deal Roadshow, Field Trip, Analyst Marketing, Bespoke, or Corporate Broking.
- • Format: Choose whether the event is In Person, Virtual, or Hybrid.
- • Meeting Type Category: Will this event offer meetings only, presentations only, or a combination of both?
- • Analysts: With this optional setting, you can associate specific Analysts (members of your Admin team) with this event. (If you’re using this setting, see the Assigning Analysts section below.)
- Step 3. Click the Save button. This saves your event settings, but doesn’t publish the event yet:
- If you’ve opted to Include Corporates, use the section below to configure those settings.
Optional: Assigning Analysts to an event
For some events, you might want to assign certain members of your Admin team as Analysts, and publish their names along with the event.
In MeetMax, Admins are called Client Reps. You’ll need to enable each Client Rep that you want to include in published events.
| We’re assuming here that you’ve already added your Client Reps to MeetMax. |
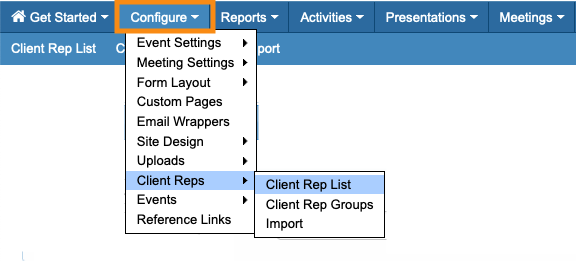
- Step 1. Head to the Configure tab. Choose Client Reps, then Client Rep List:
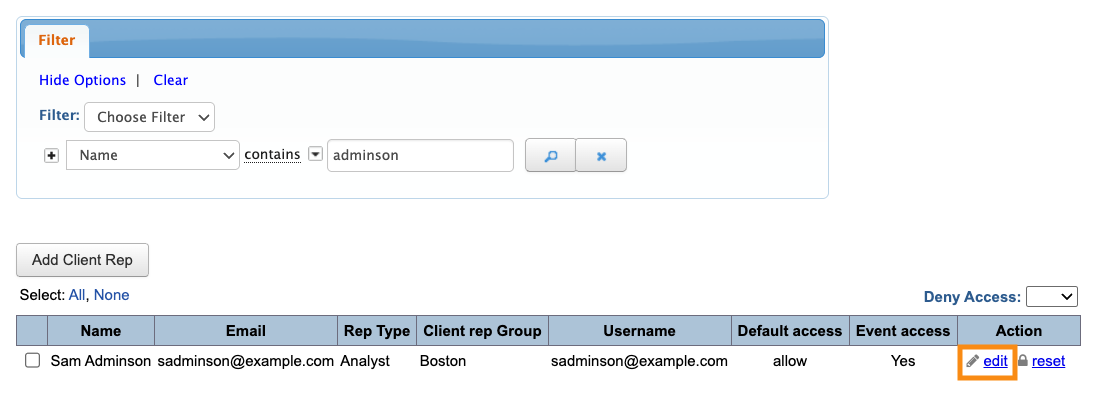
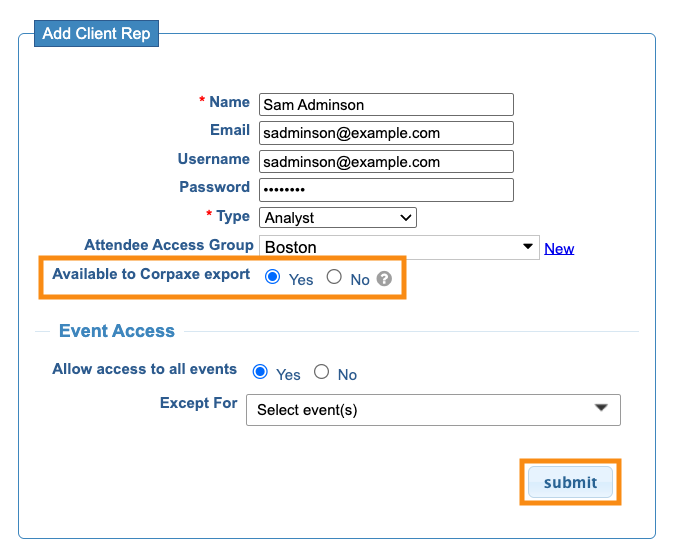
- Step 2. On the Client Rep List, locate the person you need to update. Click the Edit link:
- Step 3. Under Available to Corpaxe Export, choose Yes. Then click Submit:
- Step 4. Repeat these steps for each Analyst you want to include in published events.
- Step 5. Return to the Corpaxe event-level settings:
- Step 6. In the Analysts field, you can now choose as many of your enabled Client Reps as needed for this event:
Publishing an event to Corpaxe Calendar
- Step 1. In your MeetMax event, head to the Configure tab. Choose Event Settings, then Corpaxe:

- Step 2. Click the Export Events button:
-
From this page, you can also set your event up to export its meetings and attendance data to CorpAxe. - Step 3. You can click the Export Events button again any time you want to send updated information to Corpaxe. Each time you export an event, that overrides any previous exports.
Removing an event from Corpaxe
| Our integration automatically stops sharing events with Corpaxe once they’re 30 days in the past. |
- Step 1. In MeetMax, open the event you’d like to stop exporting.
- Step 2. Go to the Configure tab. Choose Event Settings, and then Corpaxe:
- Step 5. Change Send Event to Corpaxe to No. Then click Save. That will stop publishing your event:

What participants see
Corpaxe Calendar users will see event details like these:


