Create your own fields for any form. MeetMax helps you capture exactly the data you need.
In this article:
Where is it?
You can create custom fields in the Form Editor:

| We’ll show the Attendee form editor here, but this tool is available in all MeetMax forms. |
Creating a custom field
- Step 1. In the Form Editor, head to the bottom right corner. Click the Create field button:

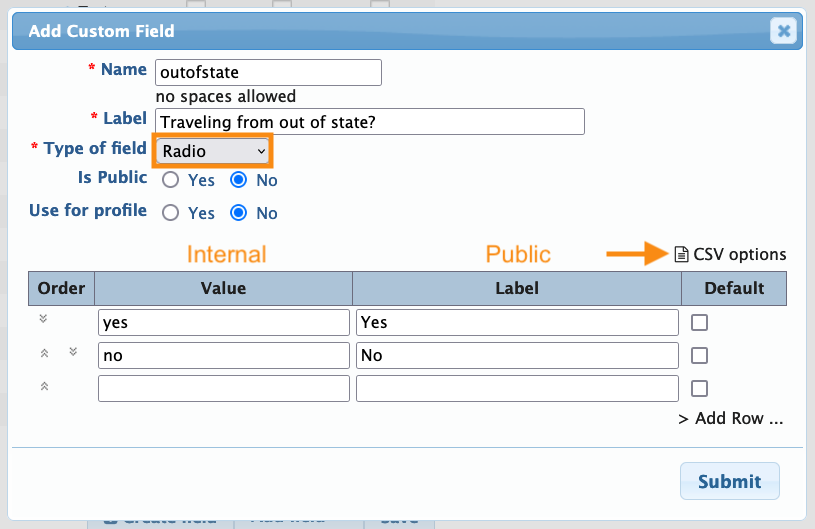
- Step 2. Give your field a Name (internal reference, no spaces) and a Label (the name your participants see):

- Step 3. Choose a Type of field - this controls the kind of data the field requires. Learn more about field types here.
- MeetMax supports these options:

- Step 4. If you chose a field type that needs to have options attached, you’ll be prompted to add those next. In this example, we chose a Radio button that needs to offer the options of Yes and No.
- For each option, you'll add:
- • Value: An internal designation (don't use any spaces)
- • Label: The public label for the field

-
If you need to add many options here, you can save time by pasting in a CSV file. Click the CSV options link and follow the instructions. - Step 5. Click Submit to save the field. You’ll then see it in the Form Editor:

- Step 6. Be sure to click Save to update the form!
- • Click the checkbox to save this change to both the Attendee and Admin versions of this form.
- • If you only want the new field on the version you’re currently working on, leave the box unchecked:

Previewing the form
Want to see how your form is looking? Click the View Sample link:

What’s Next?
Now that you have a custom field, you can:


