
In this article:
- Where is it?
- Uploading an event file
- Uploading a Company file
- Accessing the Upload Lists
- Linking to an uploaded file
- Downloading uploaded files
Where is it?
As an Admin, you’ll use the Configure tab to add and manage general file uploads for your event:

If you need to upload a file on behalf of a specific Company, you can do this from the Company List:

| MeetMax supports file uploads up to 100MB. | |
| Company accounts also have access to upload their own files. Learn more about how Companies upload files here. |
Uploading an event file
In this process, we’ll upload a file to the event in general. You might use this method to upload a PDF of transportation details, for example.
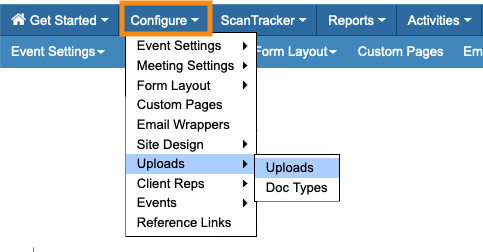
- Step 1. Head to the Configure tab, then choose Uploads:

- Step 2. The first time you visit this page, you’ll see the display below.
- Click Browse to choose a file from your computer. Then click Upload:

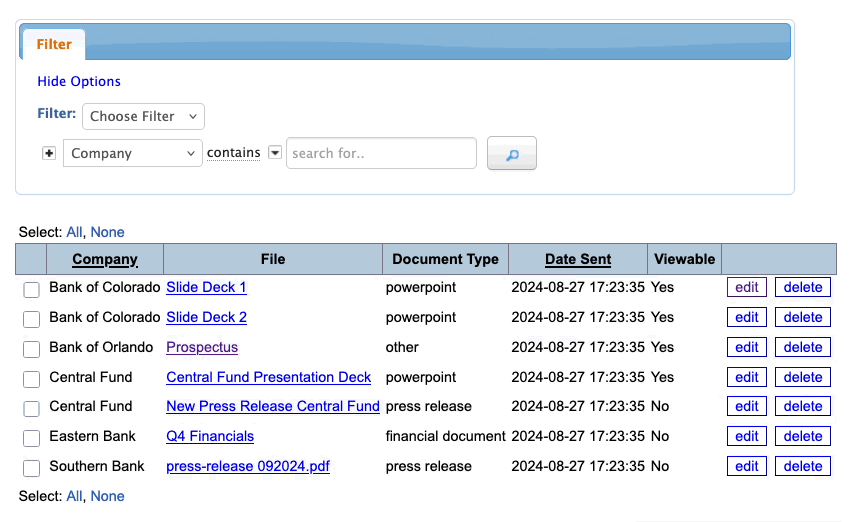
- Step 3. After your first upload, the page will look like the example below, with a list of your uploaded files.
- • Click the file name to download a copy.
- • Click the Edit link to upload a replacement document.
- • Click Delete to remove the document.
- • To make a new upload, click the Add File Upload button:

Uploading a Company file
Sometimes, you’ll need to upload a file on behalf of a Company. (Remember, Companies can upload their own files too.)
- Step 1. Head to the Company List:

- Step 2. Filter the list to locate the Company you need. Then use the Action menu to choose Upload:

- Step 3. You’re now in the Admin view of this Company’s Uploads page.
- Give the file a name, and choose who can view it - only your team, or all Attendees.
- Step 4. Next, choose a Document type. Learn more about document types here.
- Step 5. Click Browse to choose the file from your computer. Then click Save:

- After the first upload, the page will look like the example below, with a list of uploaded files.
- • Click the file name to download a copy.
- • Click the Edit link to upload a replacement document.
- • Click Delete to remove the document.
- • To upload a new file. click the Add File Upload button:

Accessing the Upload Lists
MeetMax maintains two master lists of uploads - one with your own event uploads, and one with Company-specific uploads.
Admin Uploads List
To see this list, head to the Configure tab and choose Uploads:

This list contains all files you’ve uploaded to your event, like PDFs, slide decks, etc. It also includes any CSV files you’ve used to import data to MeetMax:

- Click Edit to upload a replacement file. The replacement file overwrites the original.
- Click Delete to remove any file.
- To upload a new file, click the Add File Upload button.
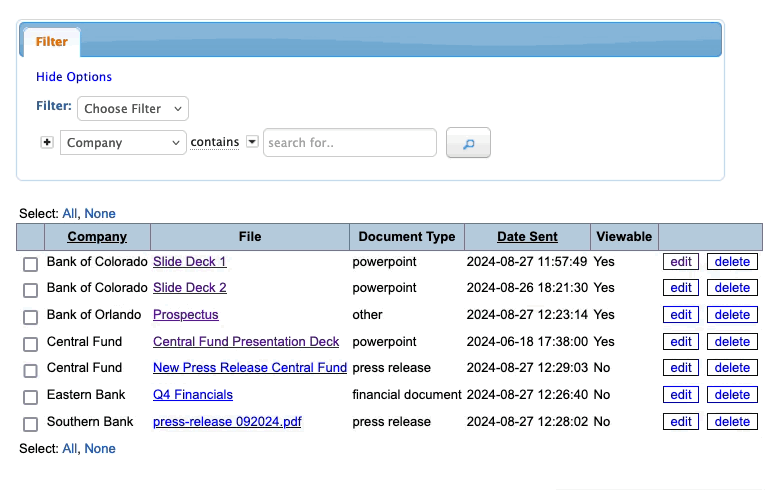
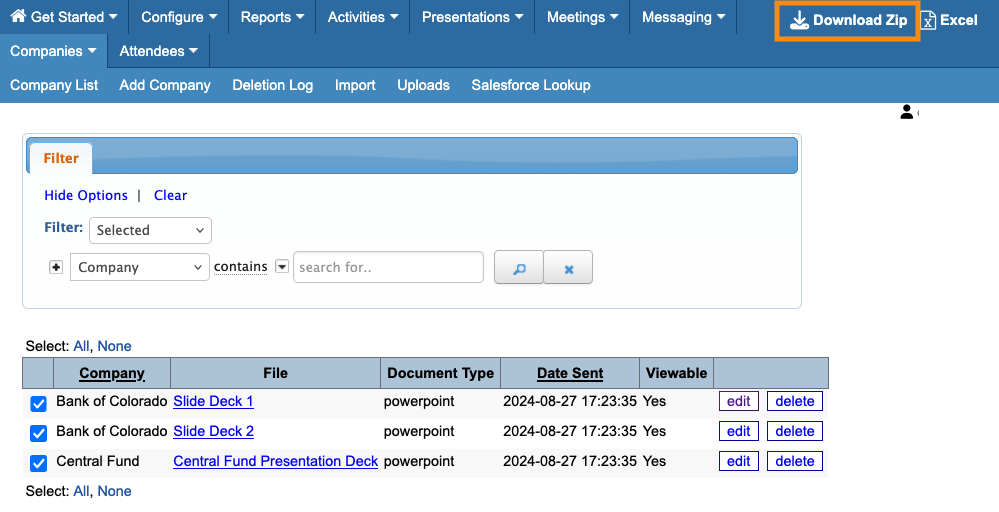
Company Uploads List
Head to the Companies tab and choose Uploads:

In this master list contains:
- Files any Company has uploaded to MeetMax
- Files an Admin has uploaded to any Company’s account:

From this list, you can:
- Click any file’s link to download a copy.
- Click Edit to upload a replacement file. The replacement overwrites the original file.
- Click Delete to remove a file.
At the top of the list, you’ll find several handy filters. You can filter the list to see a single Company’s uploads, or filter by document type to see a specific type of file:
Linking to an uploaded file
Once a file is uploaded to MeetMax, you can get a link to share.
| Companies can also create links to their uploaded files. Learn more about that here. |
You can get links from either the Admin Uploads List or the Company Uploads List - the process is the same.
- Step 1. Head to the list you need:


- Step 2. Right click on the name of the file you want to link. Your browser will open a menu, where you can choose Copy Link.
- (This menu might look slightly different in your browser.)


- The file’s link is now copied to your clipboard. It looks something like this:
-
https://www.meetmax.com/upload/event_XXXXXX/inv/1234567/slide-deck.pptx">https://www.meetmax.com/upload/event_XXXXXX/inv/1234567/slide-deck.pptx
- Step 3. You can paste it into a batch email, an automated email, or a web page. When someone clicks this link, the document will download to their computer.
Downloading uploaded files
Your process will depend on who uploaded the files.
Downloading Admin-uploaded files
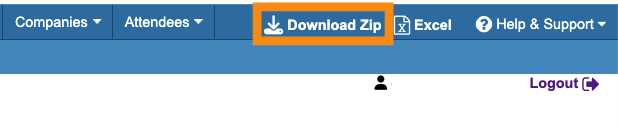
For files Admins have uploaded, you can download them all as a ZIP file. You might want to do this at the end of an event, for your records.
- Step 1. Head to the Uploads page:
- Step 2. Head to the top right corner of the page. Click Download ZIP:
Downloading Company-uploaded files
For files that Companies have uploaded, you can download selected files, or all files.
- Step 1. Head to the Company Uploads page:

- Step 2. If you want to download specific files, click their checkboxes.
- Then, set the Filter to Selected. Click the magnifying glass icon:
- Step 3. The Uploads list now only displays your selected files. Head to the top right corner of the page and click Download ZIP:
-
If you want to download all files, skip Step 2.

