
In this article:
- Where is it?
- What Attendees see by default
- Where can I insert content?
- Editing the Message areas of the paget
- Previewing your changes
Where is it?
Your Attendees will access the Transportation page when they log into MeetMax:
![]()
You’ll add content to this page from the Messages editor:
What Attendees see by default
Before you add your own content, Attendees will see only the details of reserving ground transportation.
The first time they visit the Transportation page, they’ll make or decline reservations:
![]()
After that, they can view, edit, or delete their reservations:
![]()
Where can I insert content?
As with many MeetMax web pages, you can insert your custom content above or below the default content. The zones are marked in yellow below:
![]()
Our custom content editor supports formatted text, images, and links.
| You can also use the Menu Editor to control how the Transportation page displays for Attendees. |
Editing the Message areas of the page
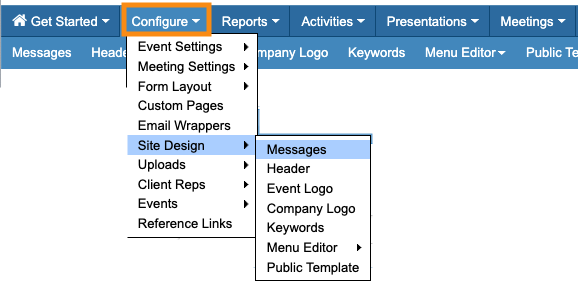
- Step 1. Head to the Configure tab. Choose Site Design, then Messages:

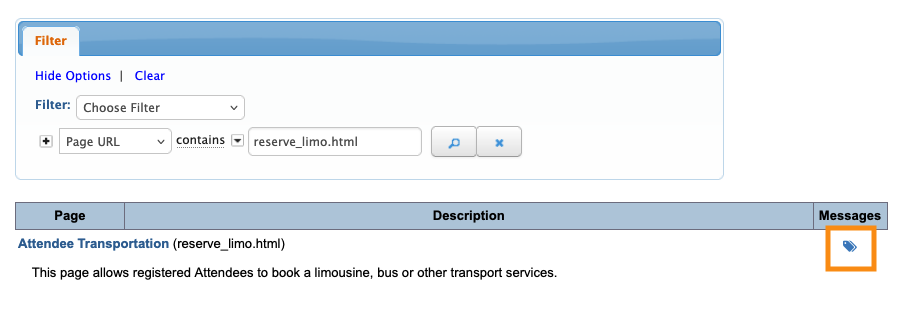
- Step 2. On the Messages page, filter for Page URL. Enter reserve_limo.html and click the Search button:
- Step 3. Click the tag icon to open the Message for editing:
- Step 4. Now you’ll choose which area of the page to add content to. In this example, we’ll be inserting a TOP message:
- Step 5. When you choose an area, that opens the custom content editor. Add your text, images, and links. Then click Submit to save:
Previewing your changes
You can see how your new page content looks from the Attendee List:

Click the Login button for a test user, or any Attendee:
![]()
You’ll then be able to preview the Transportation page as Attendees will see it:
![]()
| Participant account pages will be branded for your event, and contain the menu options you’ve enabled. |

