
In this article:
- Before you start
- Adding a walk-in registration
- Editing and reprinting a badge
- Tracking check-in activity
Before you start
During your event, you’ll be working from a separate laptop with the MeetMax Check-in interface.
You might also have your main MeetMax account logged in on your own laptop, so you can monitor how many people have checked in.
Adding a walk-in registration
If you’re taking walk-in attendees, you can register them either in your main MeetMax account or the check-in interface. The registration details will transmit between systems automatically.
If you’re registering someone from your main MeetMax account, use these steps.
In the check-in interface, click the Create button:
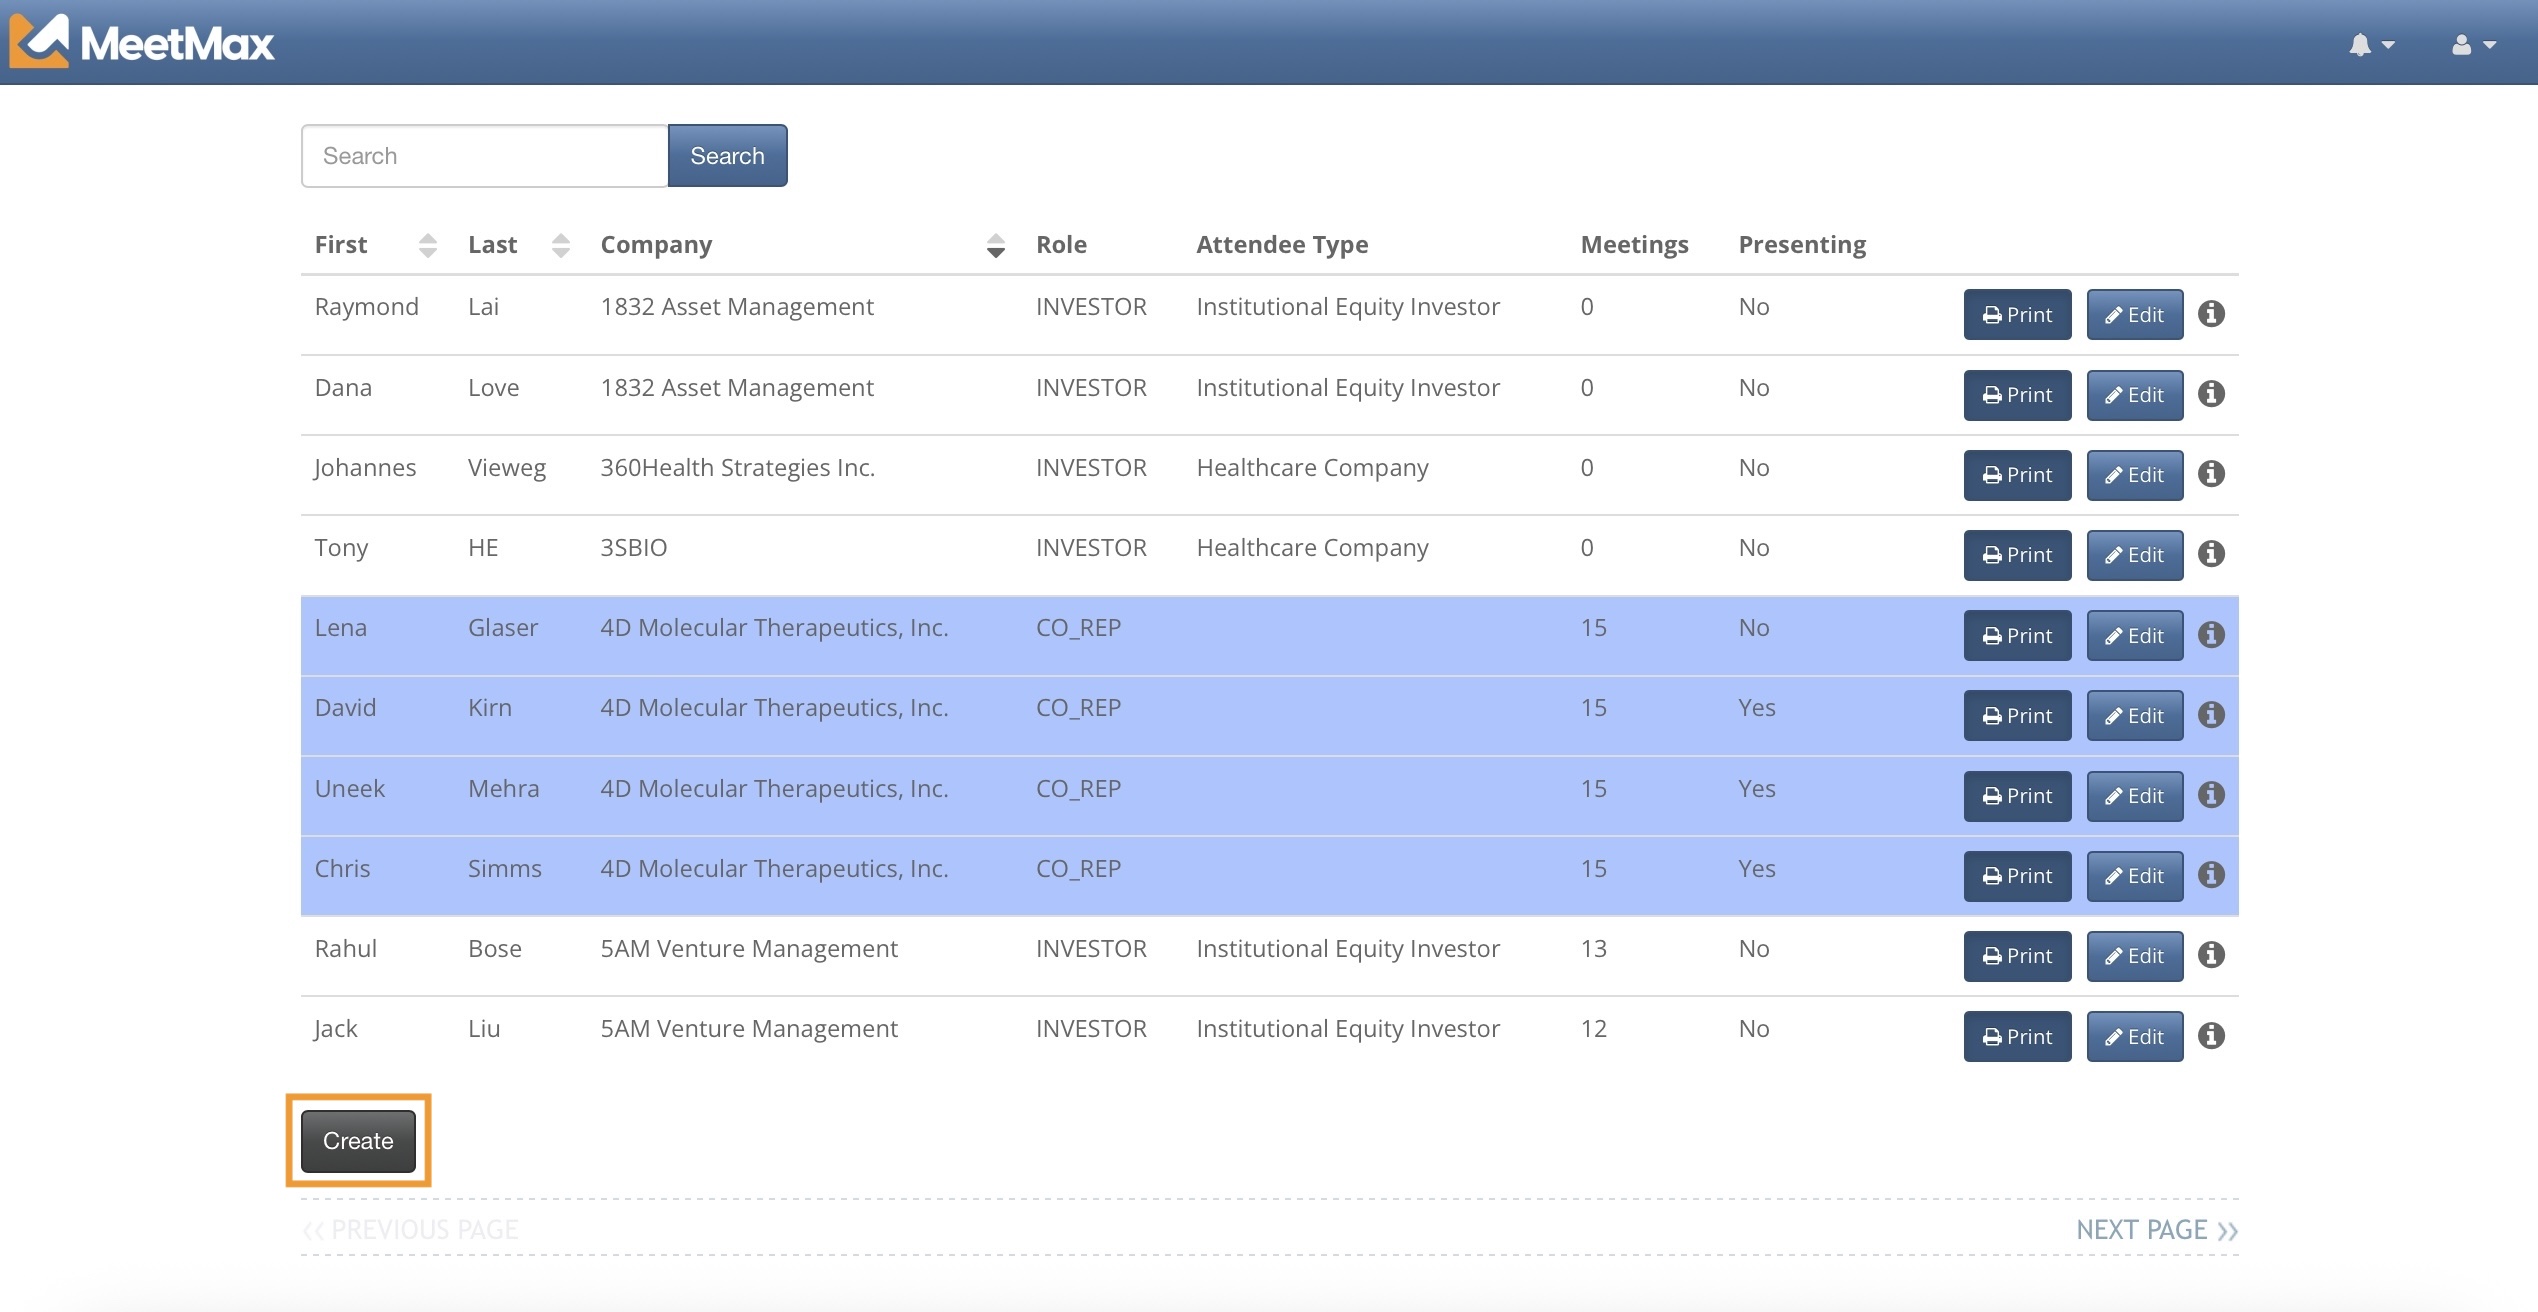
| The check-in interface has some customization options. Our Badging team will work with you on this. |
Your registration form will pop up. Fill it out and click Save Changes:
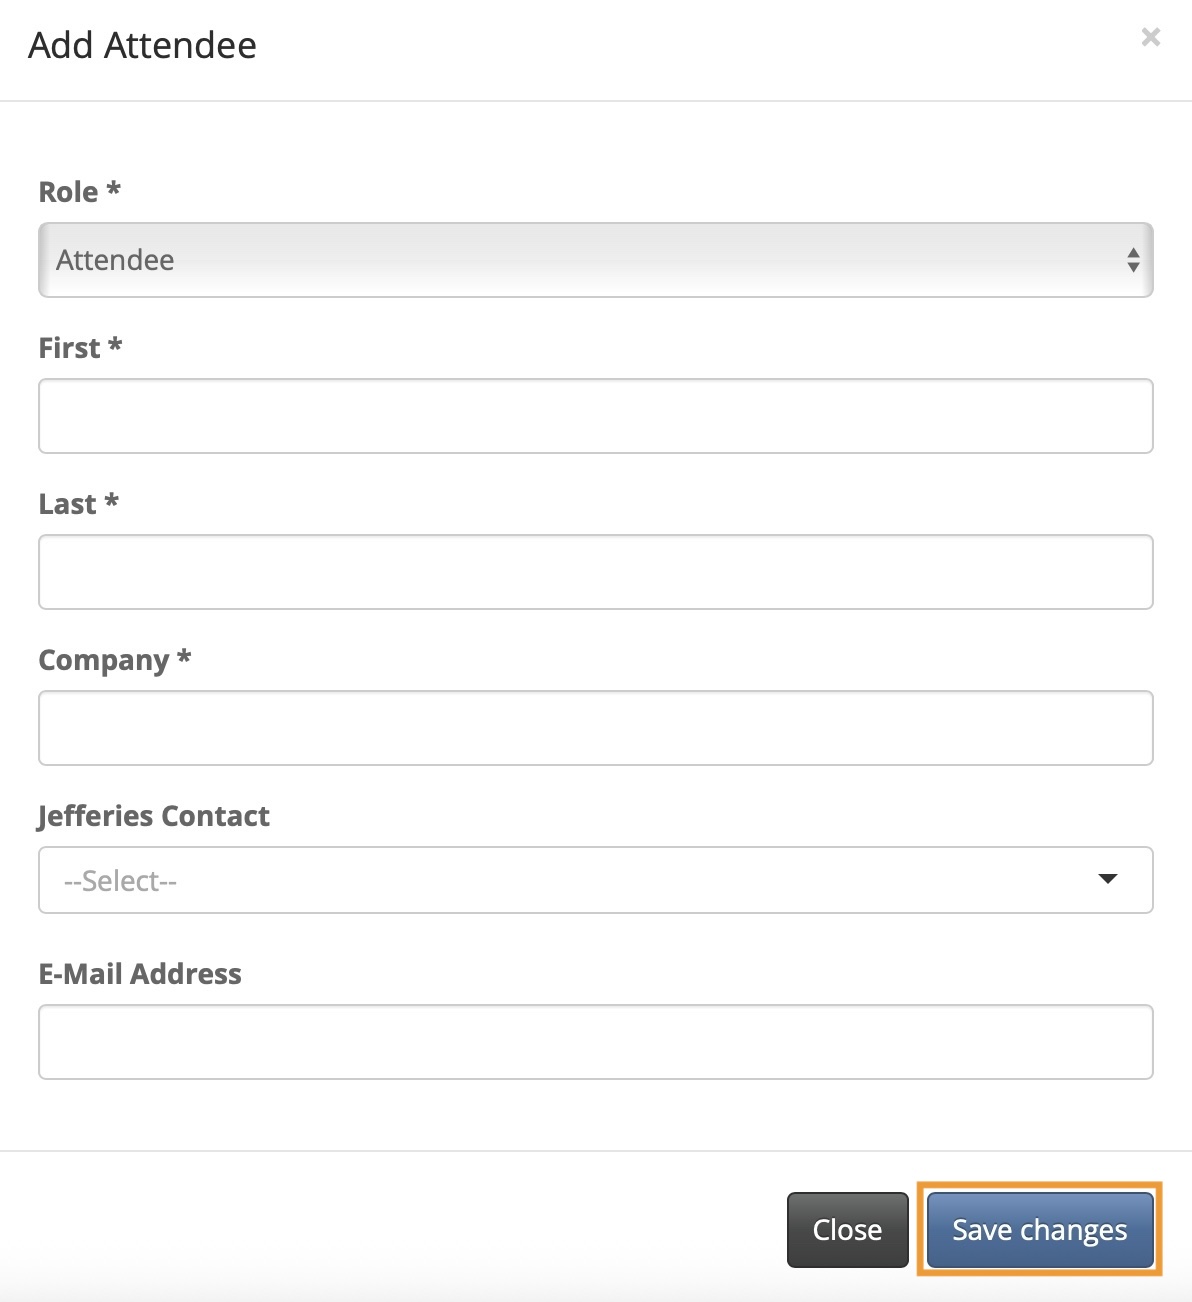
Depending on network traffic, it could take a few minutes for the new walk-in’s registration to transmit between systems.
If you want to sync the check-in interface with your main MeetMax account immediately, head to the top right corner of the page and click the bell icon:
![]()
Editing and reprinting a badge
Sometimes, a registrant will want a minor change to their badge. You’ll make these changes in the check-in interface.
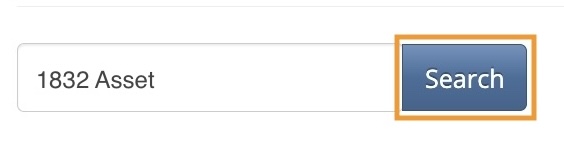
- Step 1. At the top of the check-in interface, search by last name or company name:
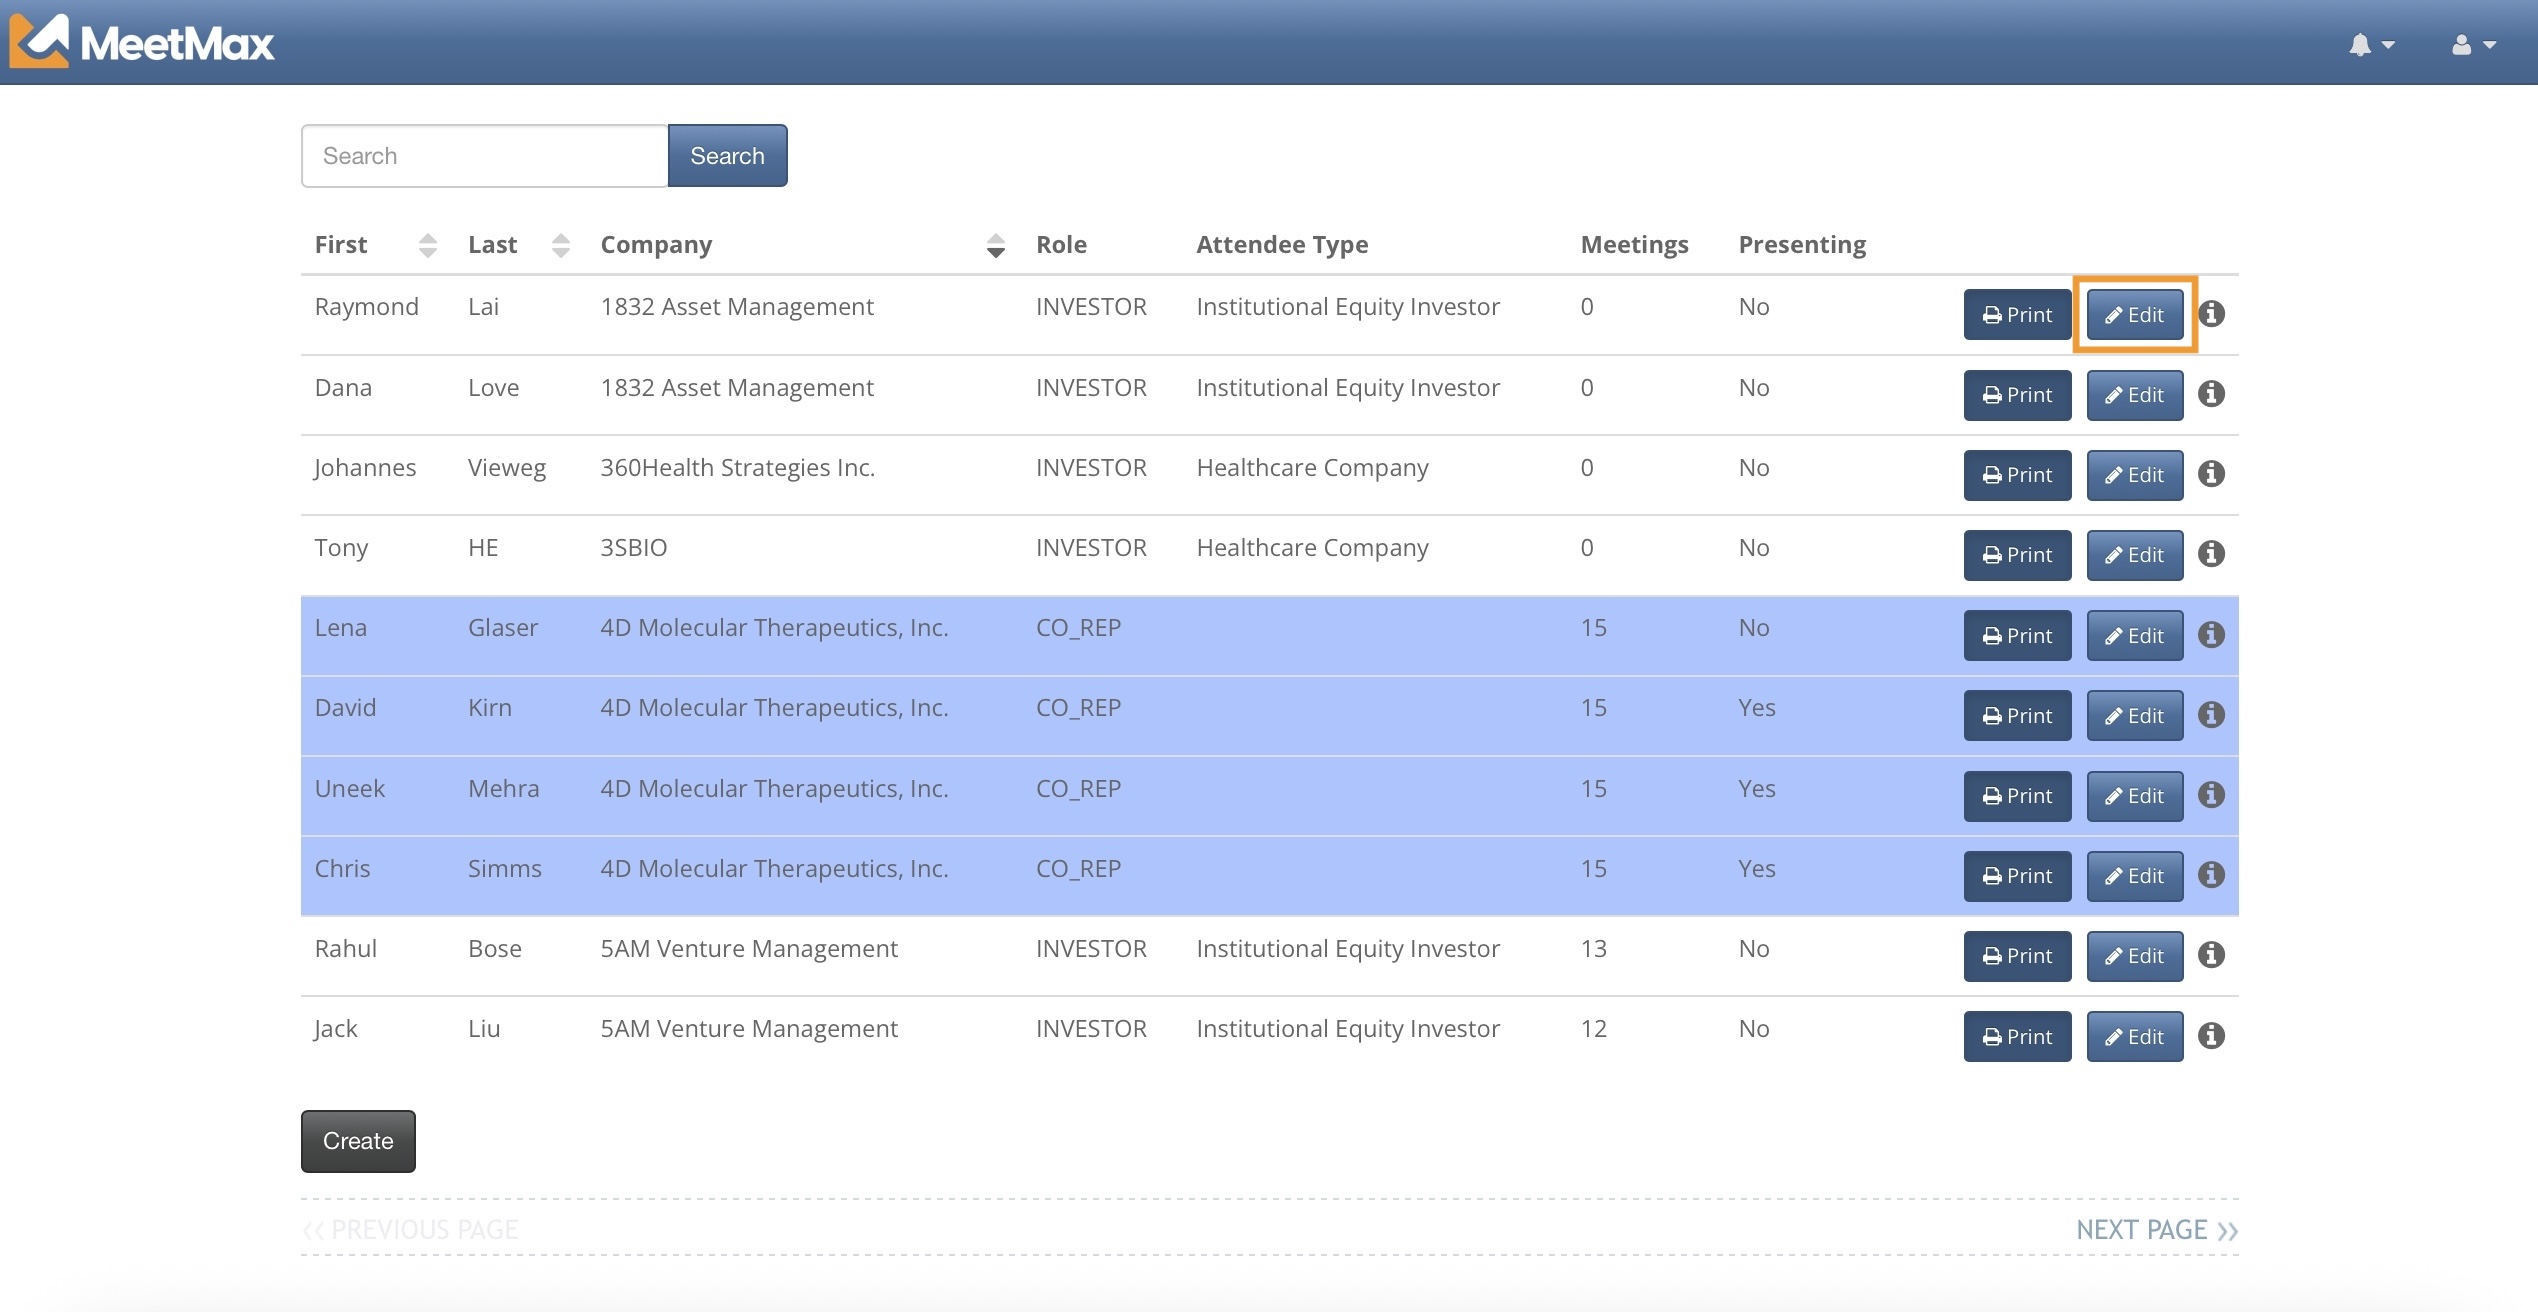
- When you’ve found the registration you need, click the Edit button:
- Step 2. The attendee’s registration form pops up. Update any information you need.
- Click Save Changes.
- Step 3. Click the Re-print button to send the updated badge to the badge printer:

Tracking check-in activity
The check-in interface shows you who’s checked in by the appearance of the Re-print buttons, as shown above.
You’ll use your main MeetMax account to run periodic check-in reports.
Who hasn’t checked in yet?
| We’re assuming here that you’ve already added the two check-in columns to your Attendee List. |
- Step 1. Head to the Attendee List:

- Step 2. Set the Filter menu to Is Attending, then choose No.
- Click the magnifying glass to save the filter:
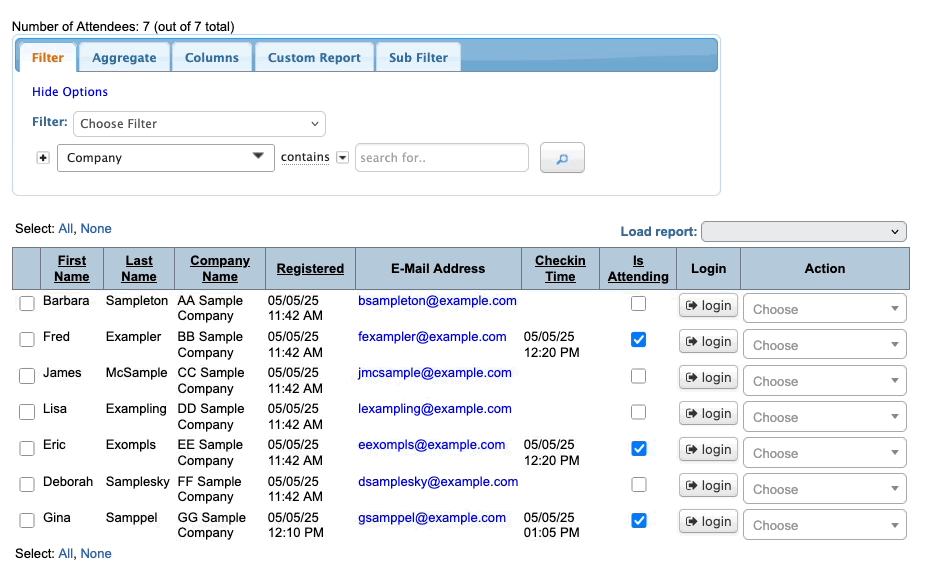
- The list now shows only people who haven’t checked in.
-
When you send an attendee’s badge to the printer for the first time, MeetMax automatically marks them as Attending.
Who has checked in?
- Step 1. In the Attendee List, use the same Is Attending filter as above. Set it to Yes.
- Step 2. Click the magnifying glass to save the filter:
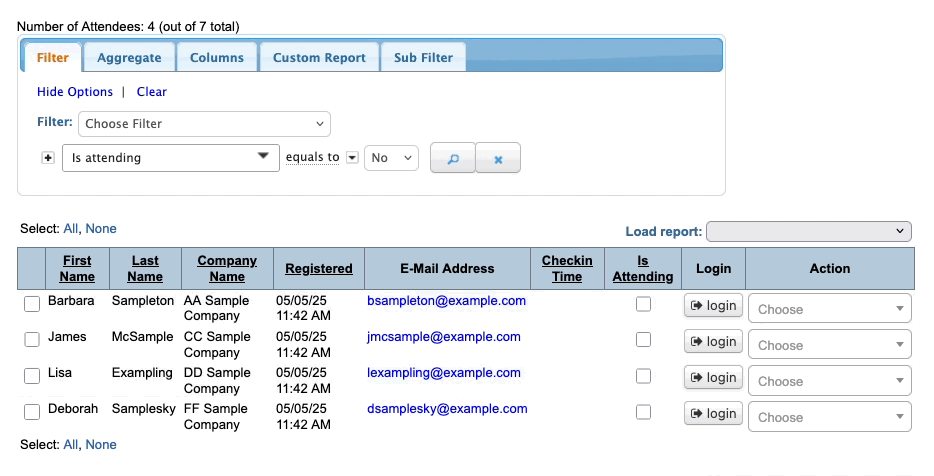
- The list now shows everyone who has checked in. You’ll also see each person’s check-in time.
Clearing filters
Need to remove a filter? Click the Clear link:
![]()

