
How it’s used:
• If you’re using schedule approvals at your event, this report lets you see who hasn’t submitted their approval yet.
• With this report, you can follow up with these Approvers.
• If your event has a deadline for approvals, you can run this report after that deadline and see which schedules you’ll need to approve manually.
In this article:
Running the report
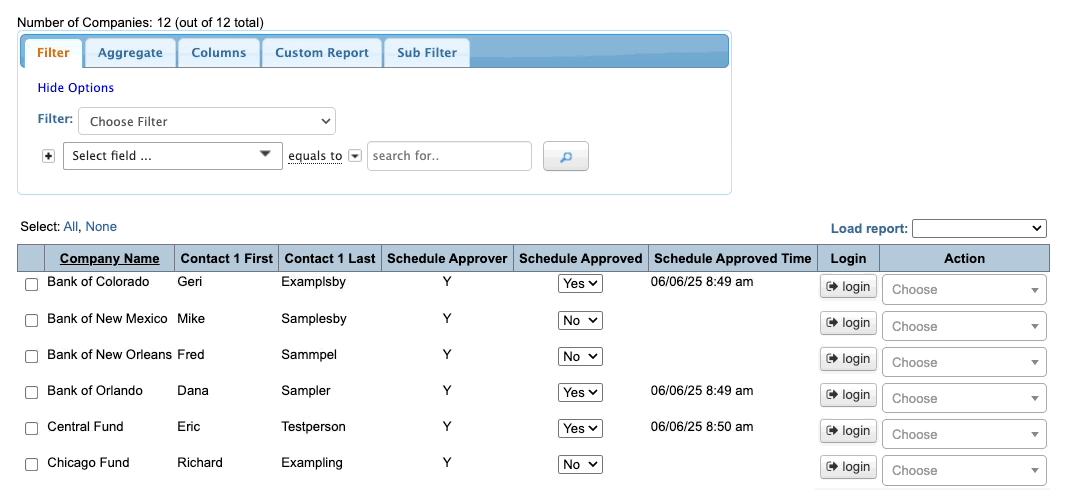
The list you start from depends on which role has Approver permission at your event. In this example, Companies are schedule approvers, so we’ll start from the Company List.
- Step 1. Head to the Companies tab. Choose Company List:

- Step 2. Go to the Columns tab. Here, you can add and remove columns. Click Apply to save the changes.
- We recommend including these columns. There might be others you want to add:
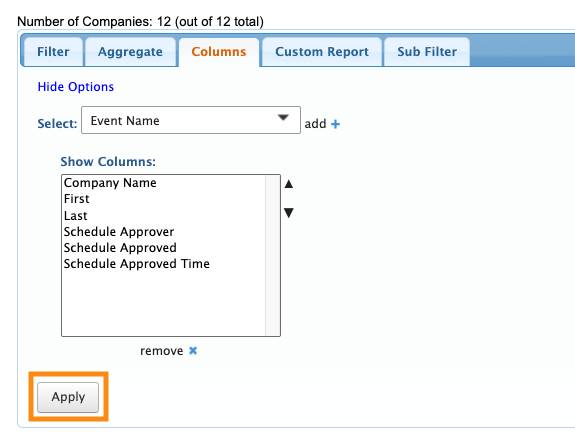
-
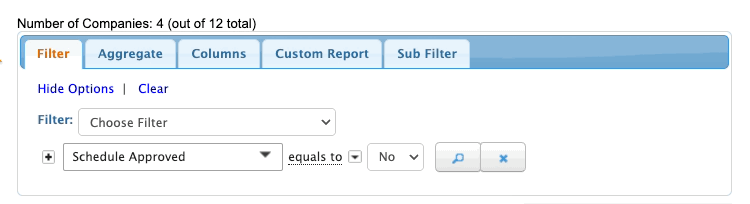
Your event might have slightly different names for these columns. - Step 3. Now, head to the Filter tab. Set the filter by Schedule Approved, and choose No:
Exporting the report
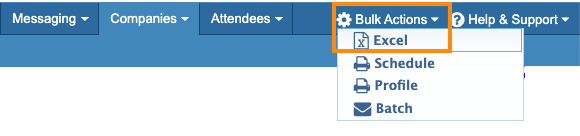
To export the report in spreadsheet form, head to the top right corner of the page. Click Bulk Actions, then choose Excel.
You can open the exported file in any spreadsheet software:
Saving the report
Want to save this report so you can quickly access it later?
Head to the Custom Report tab. Choose New from the menu.
Then give the report a title, choose whether to share it with your team, and click Save:
Learn more:

