
In this article:
- Where is it?
- Adding time slots for a single day
- Adding time slots for multiple days
- Adding a single time slot
- Adding a supplemental batch of time slots
- Editing or deleting a time slot
- What participants do next
Where is it?
You’ll work with your time slots in the Meetings tab:

Time slots are flexible. You’ll set them for the days and times you want to offer 1x1 meetings.
- Different days can have different time slots.
- If you have an event day where you don’t want to offer any meetings, you won’t set any time slots at all.
Adding time slots for a single day
If your event will have 1x1 meetings on a specific day, that’s the only day where you’ll need to create time slots.
- Step 1. In the Meetings tab, choose Time Slots:

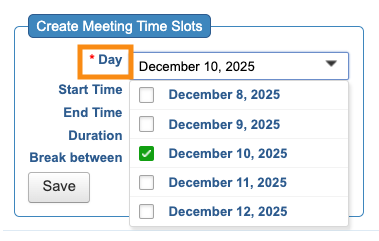
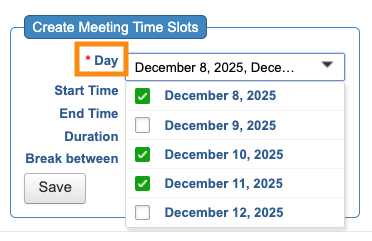
- Step 2. In the Day menu, choose the date when you want to schedule meetings:
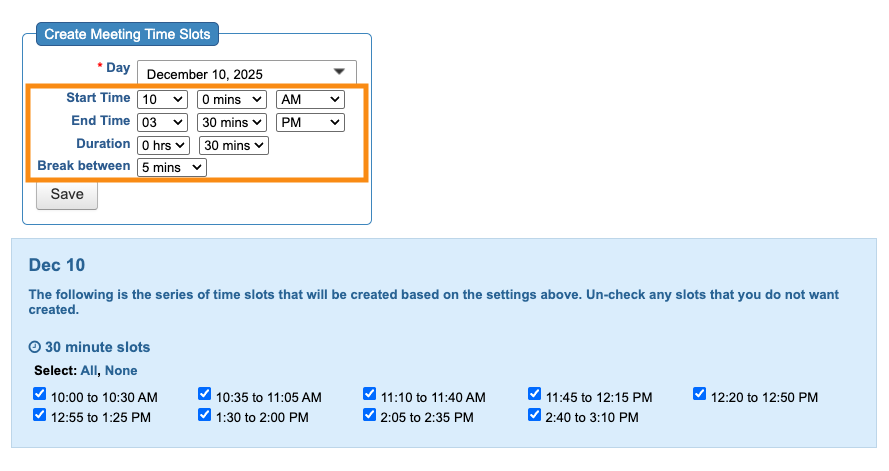
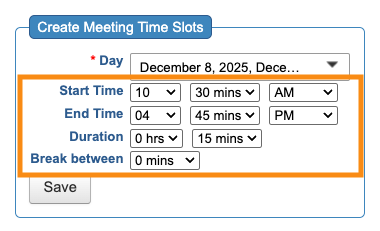
- Step 3. The default meeting day in MeetMax is 9am to 5pm. Make any adjustments you need to these key settings:
- • Start time for meetings that day
- • End time for meetings that day
- • Meeting duration
- • Time between meetings
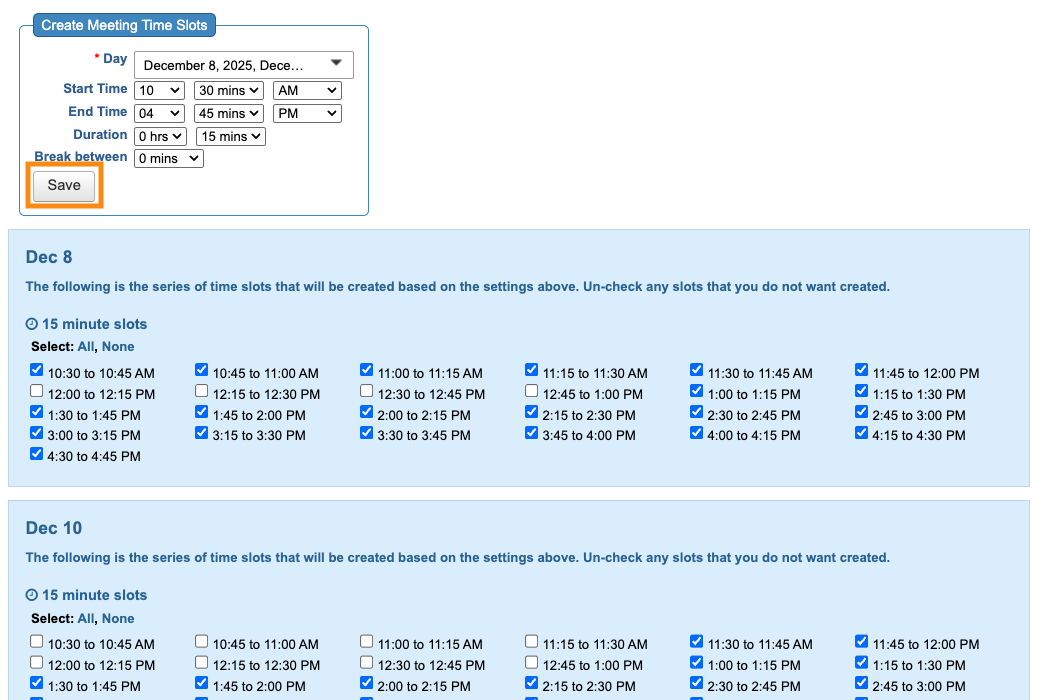
- As you set these, you’ll see the list of available time slots update to match:
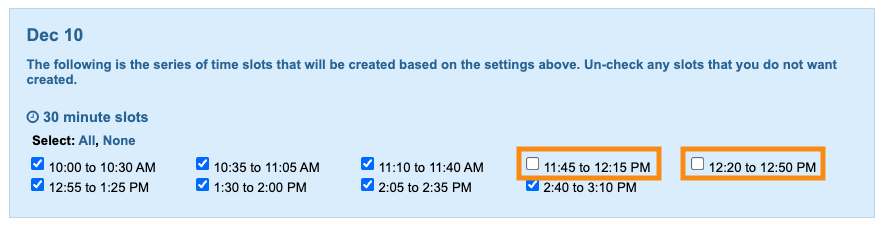
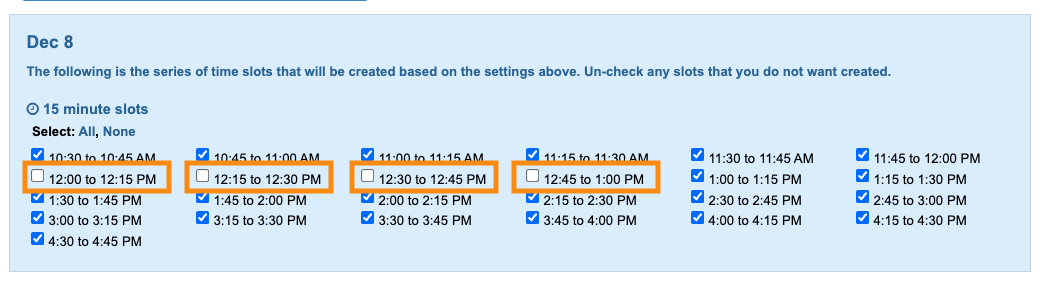
- Step 4. Do you need to remove any of these time slots? Uncheck those boxes as shown below.
- It’s common, for example, to remove time slots over the lunch hour, so no one can schedule meetings then:
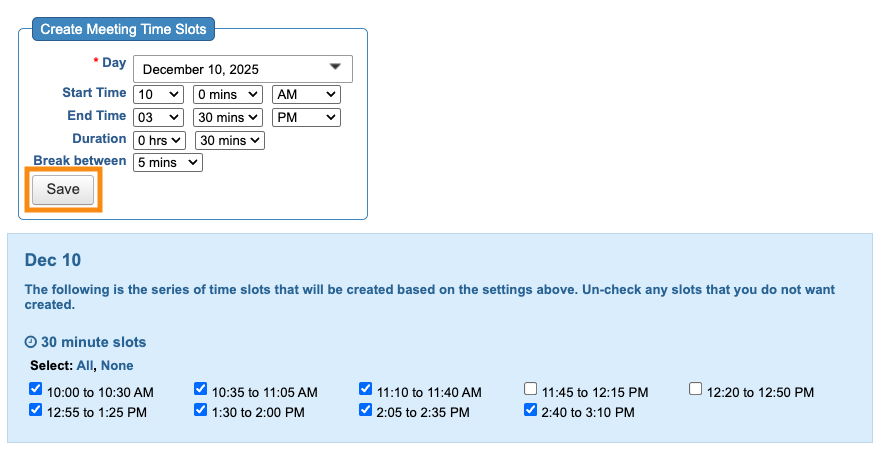
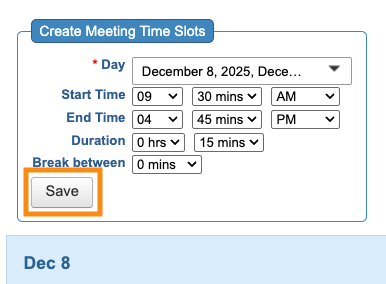
- Step 5. Click the Save button to create this batch of time slots:
Adding time slots for multiple days
If your meeting program spans several days, you can create time slots for multiple days at the same time.
- Step 1. In the Meetings tab, choose Time Slots:

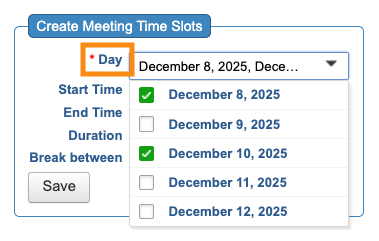
- Step 2. In the Day menu, choose as many dates as you need. It can be all days, or selected ones:
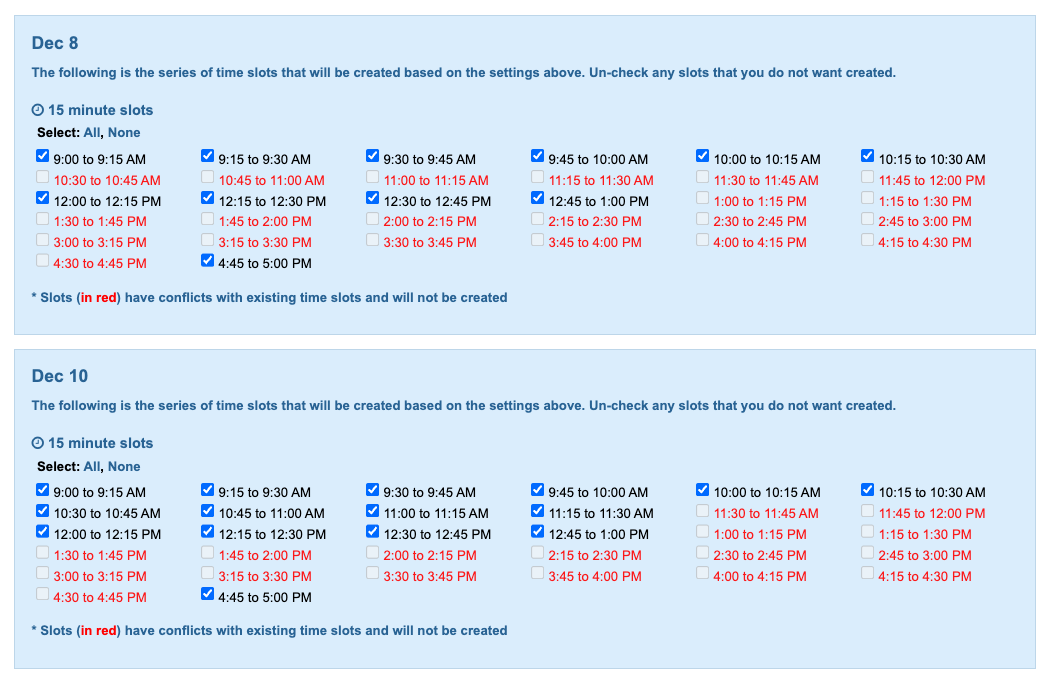
- At the bottom of the page, you’ll see a separate list of time slots for each selected date:

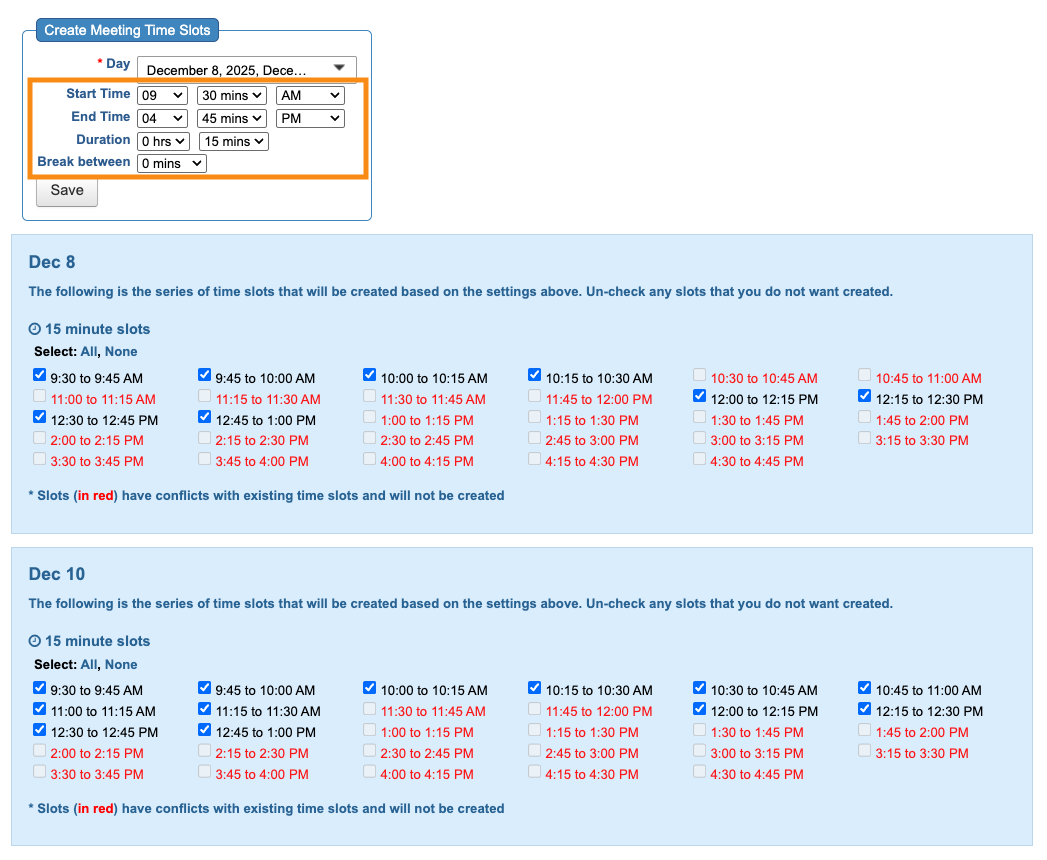
- Step 3. Make any changes you need to the default meeting settings. Your changes will apply to all days, but you’ll be able to make more adjustments in a moment.
- • Start time for meetings that day
- • End time for meetings that day
- • Meeting duration
- • Time between meetings
- As you set these parameters, the lists of time slots for each day will update to match.
- Step 4. At this point, you can make any adjustments you need to each day.
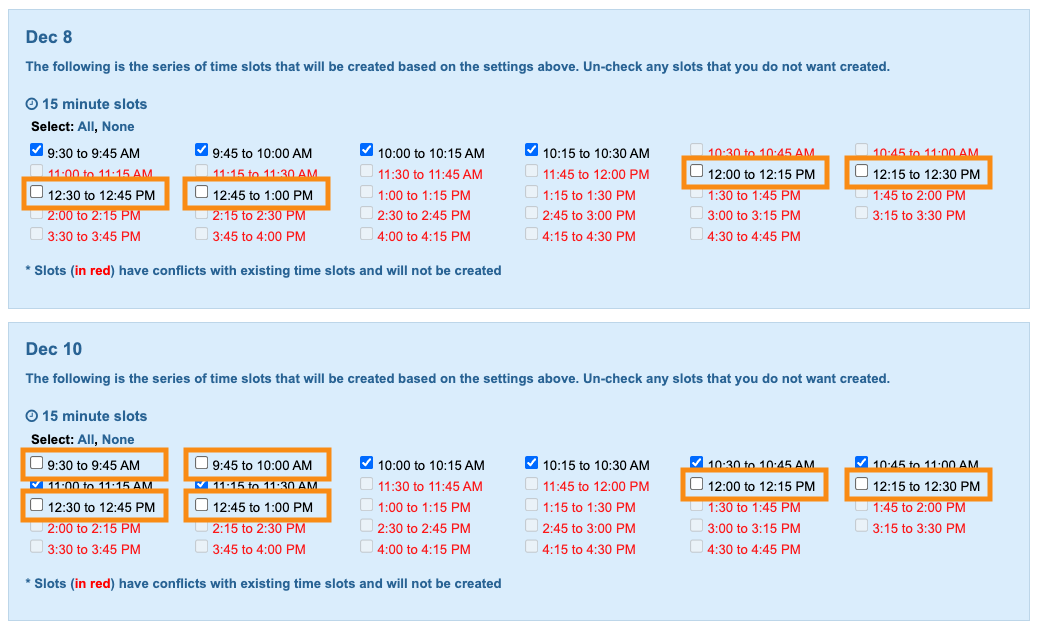
- Need to remove lunch-hour time slots? Uncheck those boxes:
- Want to have meetings begin at a different time on certain days? Remove the time slots before then:

- If you only need a few time slots on a specific day, click the None link to remove all time slots, and then add the ones you want to use:
- Step 5. Click the Save button to create this batch of time slots:
Adding a single time slot
From time to time, you might need to add just one time slot to a single day.
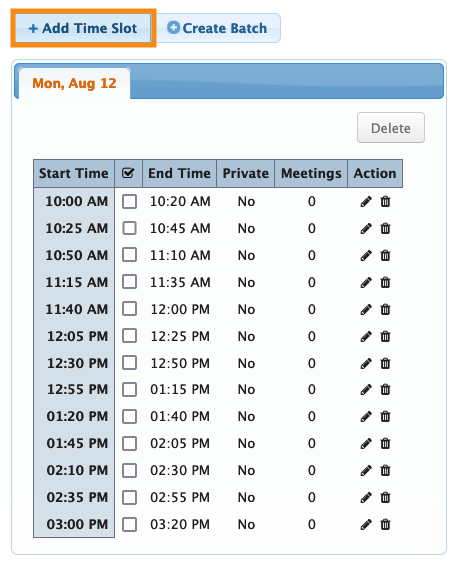
- Step 1. Click the Add Time Slot button:
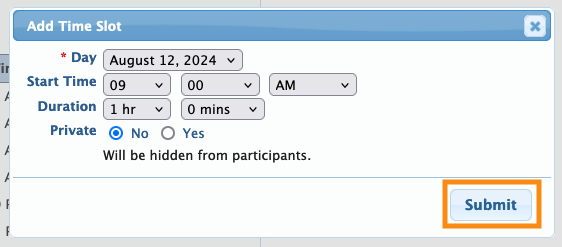
- Step 2. In the Day menu, verify your selected date.
- Then set the Start Time and Duration.
- Designate whether this time slot will be Private (so participants won't see it, but Admins can schedule it).
- Step 3. Click Submit to save:
Adding a supplemental batch of time slots
Once you’ve set your event’s time slots, you might need to add a few more. You can do this in a batch to save time.
In this example, our meeting program had more demand than we expected. So we want to add a few more time slots to each day.
- Step 1. In the Meetings tab, choose Time Slots:

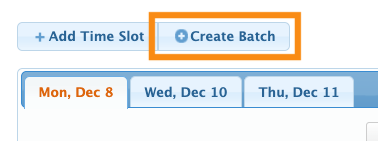
- Step 2. Click Create Batch:
- Step 3. You’ll now see your original batch of time slots.
- In the Day menu, choose which days you want to update.
- In this example, we have three days with time slots, but we only need to update two of them:
- Step 4. You’ll see separate lists of time slots for each selected day. Many of them are red.
- • Red time slots: These are your original time slots. These can’t be changed here - in this process, you can only add new time slots. (We’ll cover editing and deleting existing time slots in a moment.)
- • Black time slots: These are editable. Use the checkboxes to enable or disable them:
- Step 5. In this example, we want to start our meeting program a bit earlier on these two days, to accommodate some more time slots.
- MeetMax displays your original settings. Change them to any new Start time, End time, Duration, and Break between you need. All of the lists will update automatically:
- Step 6. Now, uncheck any boxes for the time slots you don’t want. If you’re removing the lunch-hour time slots, do that again now:
- Step 7. Click the Save button to process this update:
Editing or deleting a time slot
| Time slots are editable until they contain a scheduled meeting. At that point, MeetMax prevents changes. |
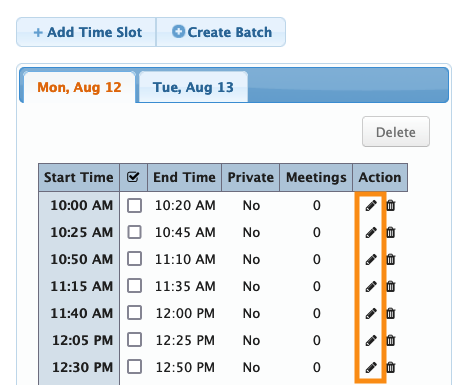
On the Time Slots page, Click the tab for the event date you need to update.
Then, click the Edit icon for the time slot. You’ll be able to change all of its settings:
If the time slot has a meeting booked already, MeetMax disables the Edit icon:
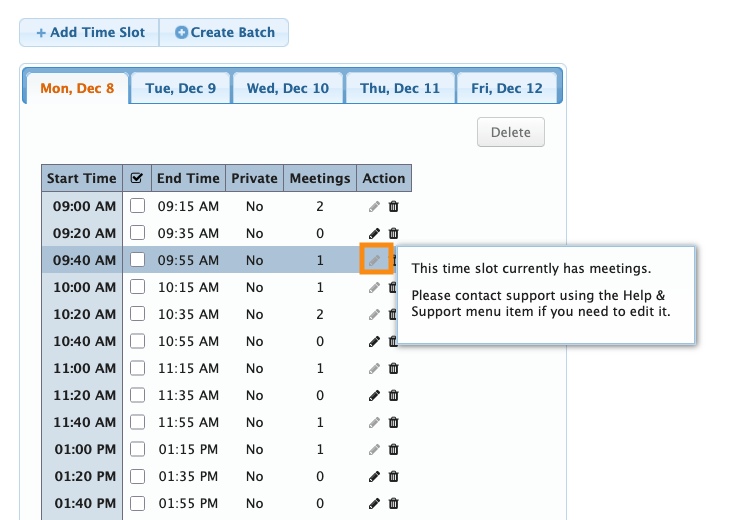
If you still want to change this time slot, reach out to our Support team for help. They’ll test the change on our Staging server to make sure it can be done safely. Then they’ll deploy it in your live event.
Deleting a time slot
| You can delete a time slot even if it already contains scheduled meetings. After deletion, those meetings will revert back to meeting requests so you can schedule them again. |
On the Time Slots page, click Delete icon for the time slot you want to remove:
![]()
What participants do next
Once you've established the general meeting times for your event, each Attendee and Company can log into MeetMax and make individual adjustments.
- Attendees will set Blackout times, when they aren’t available to meet.
- Companies will set the times when they are available to meet.

