
In this article:
Where is it?
In MeetMax, Admin accounts are called Client Reps.
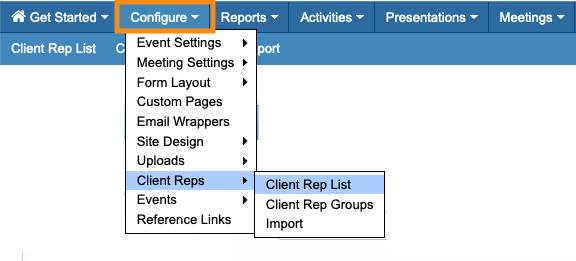
You’ll start a Client Rep import from the Configure tab:

| You can also import Attendees, Invitees, Companies, Company Reps, meeting locations, and presentations to MeetMax. |
Formatting your spreadsheet
You can use any spreadsheet software, and then export a CSV file to import to MeetMax.
This type of import works a bit differently than others in MeetMax. When you import Client Reps, you’ll set most of the criteria for the group as a whole. This means two things:
- Your spreadsheet of Client Reps won’t need a lot of data (see below).
- You’ll need to import one type of Client Rep at a time. For example, you’d import all of your Sales Reps in one group, and then do a separate import for your meeting coordinators.
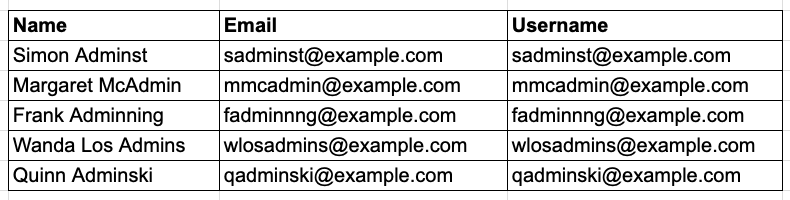
Here’s a simple spreadsheet example, with the basic fields:
| If you plan to use an OAuth framework with MeetMax, you’ll also include each Client Rep’s credentials in this spreadsheet. Reach out to our Support team if you have questions. | |
| It’s usually simplest to use each Client Rep’s email address as their Username. But you can use any username style you prefer. |
A note about passwords
Each Client Rep will need a password to access MeetMax. For security, you’ll prompt each person to create their own password. (More on that in a moment.)
We recommend leaving passwords out of your spreadsheet. They aren’t a required field for imports.
Uploading your CSV
In this example, we’re importing a group of meeting coordinators to MeetMax. (Remember, if we have Client Reps doing other jobs at this event, we’ll do separate imports for each role.)
- Step 1. Export a CSV file from your spreadsheet software. Be sure to use UTF-8 encoding.
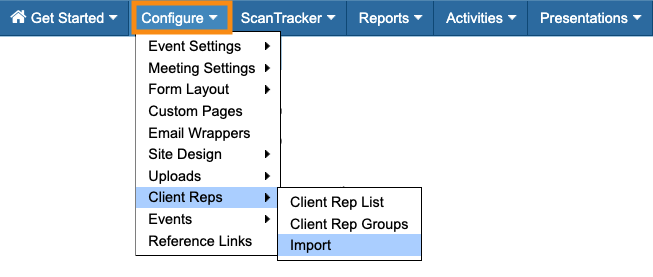
- Step 2. In MeetMax, head to the Configure tab. Choose Client Reps, then Import:
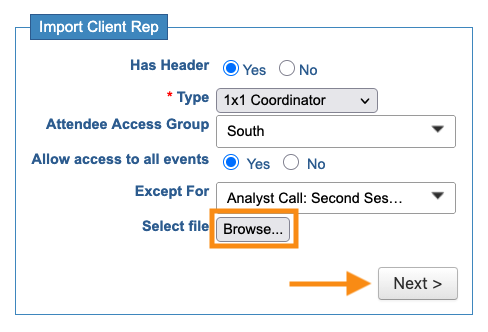
- Step 3. Indicate whether your spreadsheet has a header row or not.
- Then, in the Type menu, choose the role this group of Client Reps will have. Learn more about each role here:
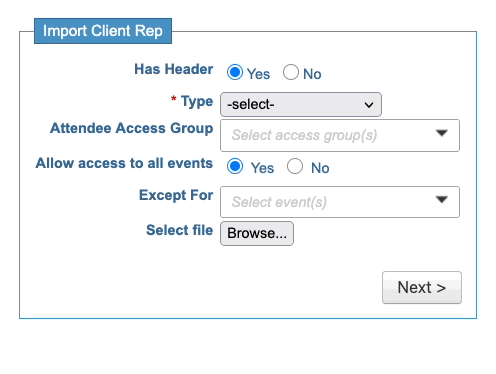
- Step 4. Next, you can use some optional settings, depending on the needs of your event:
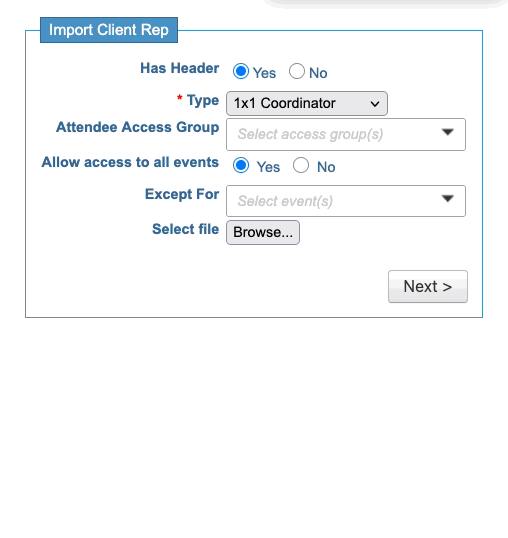
- • Attendee Access Group: If your event is using Client Rep Groups, and you want this list of Client Reps to belong to a particular group, select it here.
- • Allow access to all events: By default, each Client Rep has access to all of your events in MeetMax. You can either toggle that off, or use the Except For menu to exclude this group from specific events.
- Step 5. Click the Browse button to choose the CSV file from your computer.
- Then click Next:
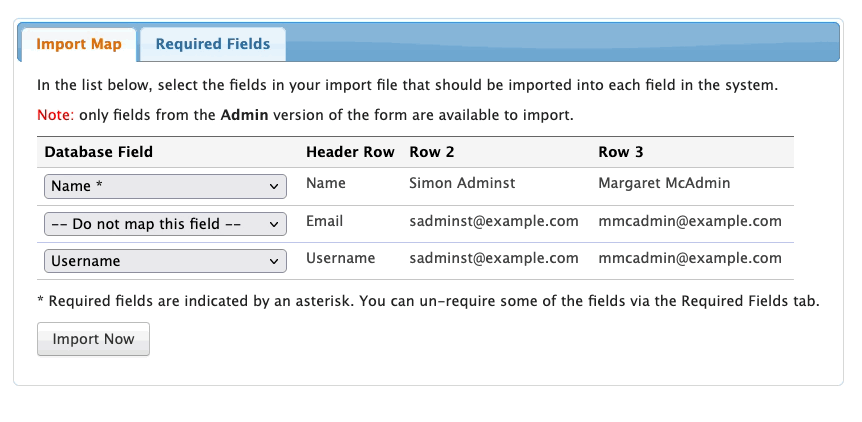
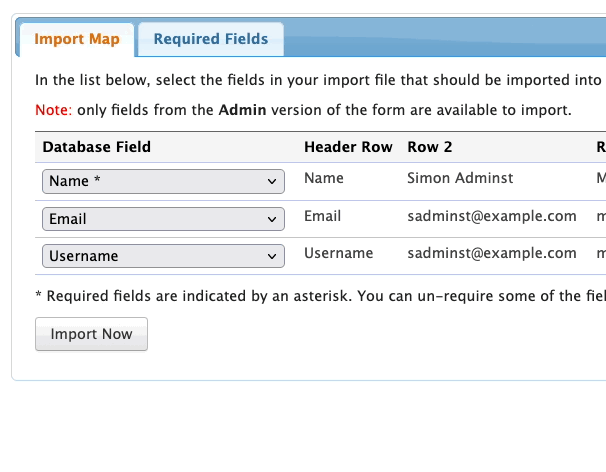
- Step 6. Now, you’ll make sure the columns in your spreadsheet are mapped to the correct MeetMax fields.
- Anywhere you see Do not map this field, use the drop down menu to choose the field that matches your header cell:
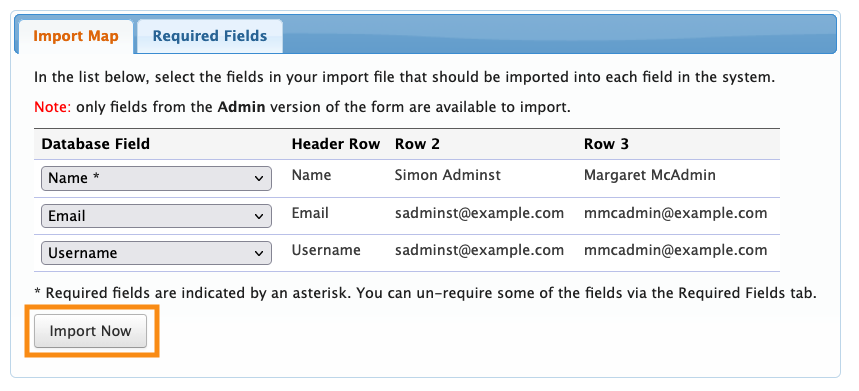
- Step 7. Next, click on the Required Fields tab. Depending on your needs, you can uncheck any of the boxes to remove that requirement during this import.
- Click Continue to move to the next step:
- Step 8. When all looks correct, click Import Now:
- Step 9. When you see the success message, you can head to the Client Rep List to see your imported data:
Having Client Reps set their passwords
Because a Client Rep has access to sensitive details, each newly-imported Client Rep should set their own confidential password.
In the Client Rep List, use the Reset link for each Client Rep you’ve imported:

That generates a password reset email to the account email address. The Client Rep can then click the link in that email and set their own password.
| Your event might already have an email wrapper set up for communications with participants. If that wrapper contains a Login button, keep in mind that this button won’t work for Client Rep login. Instead, your team needs to click the link in the body of the email. That takes them to the correct login page. |

