In this article:
- Where is it?
- Adding declined requests without sorting
- Displaying requests in a request bucket
- Sorting declined requests by reason
- Scheduling a declined request
Where is it?
You’ll set up your declined requests view on the Meeting Times page. That page is available from the Company List:

By default, when you decline a meeting request, it’s no longer visible. But for some events, it’s helpful to keep declined requests handy in case you decide to reinstate them later.
Because different meeting programs have different needs, MeetMax offers several ways to display declined requests.
Adding declined requests without sorting
This option works well for smaller meeting programs. It makes all declined requests visible on the Meeting Times page. They display mixed in with approved requests.
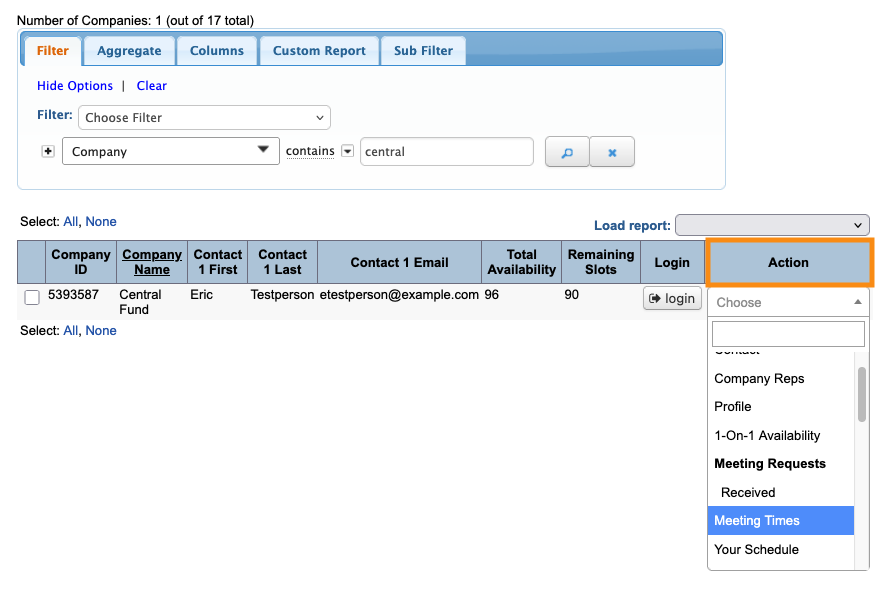
- Step 1. Head to the Company List:

- Step 2. Choose any Company - changes you make here will apply to everyone.
- Use the Action menu to choose Meeting Times:
- Step 3. On the Meeting Times page, head to the right edge. Click the Customize tab:
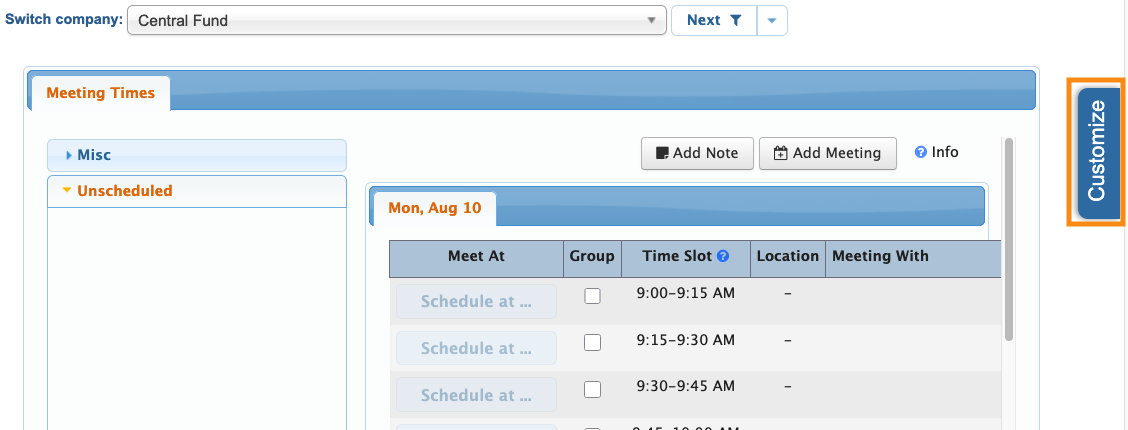
- Step 4. Click on the Display Options section to open it.
- Choose Show declined requests. Then click Submit:
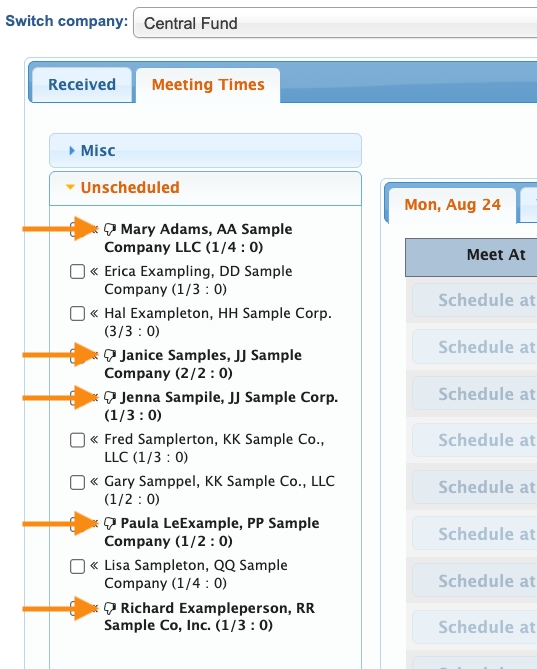
- Step 5. The Meeting Times page now displays declined requests, mixed in with approved requests.
- The declined requests are bolded, have an icon next to them:
Displaying declined requests in a request bucket
For a larger meeting program, it can be helpful to categorize meeting requests into buckets. MeetMax lets you create any categories you need.
You can create separate buckets for declined requests, so it’s easy to find and reconsider them.
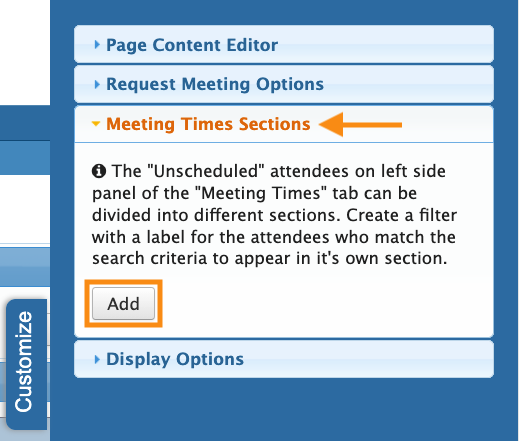
- Step 1. On the Company’s Meeting Times page, head to the right edge and click the Customize tab:

- Step 2. Click on Meeting Times Sections. Then click the Add button:
- Step 3. In the pop-up, give this bucket a Section Label.
- Add a filter to specify declined requests. Then click Submit:
- Step 4. Now, declined requests and approved requests are in separate sections:
Sorting declined requests by reason
For some events, you might not want to have every declined request visible.
In this example, we want to set up a waiting list. That way we can keep a subset of our declined requests, in case we can schedule them later.
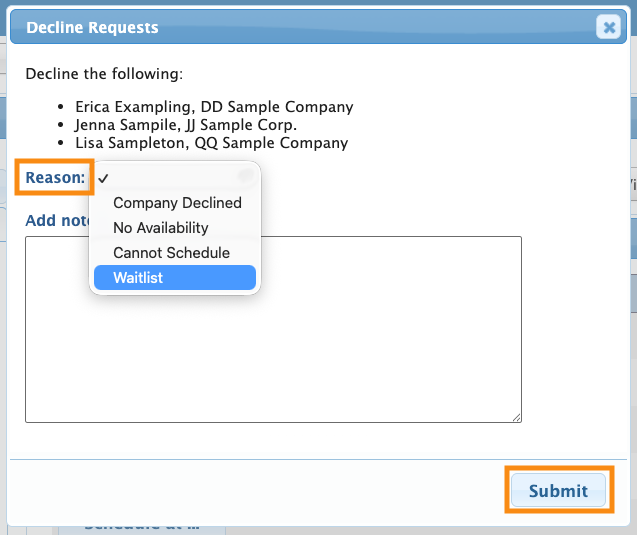
- Step 1. First, you’ll add a new decline reason for your event. In this example, we’ll call it “Waitlist.”
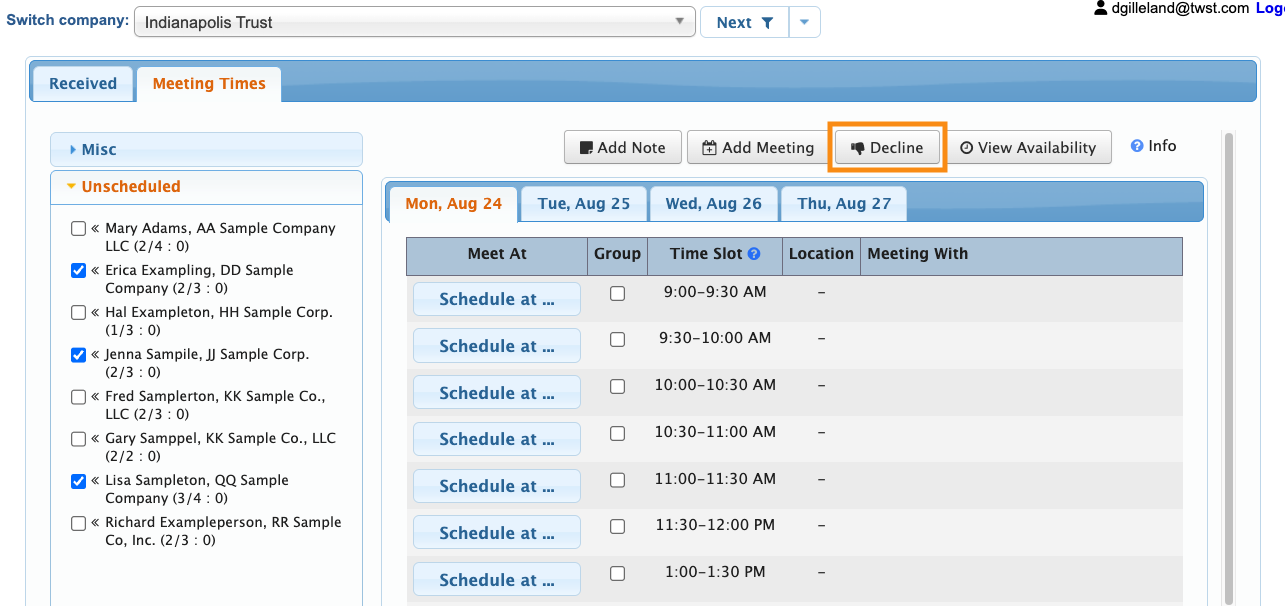
- Step 2. With this reason in place, we can assign it to certain decline requests:
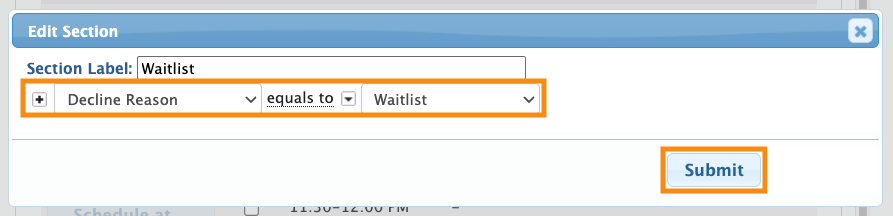
- Step 3. Now, create a request bucket, using the same process in the section above.
- Filter the bucket by your new decline reason:
- Step 4. You can now access these declined requests any time:
Scheduling a declined request
If you want to go ahead and schedule a request that was previously declined, it works just like regular scheduling. Select the request, then choose a time slot: