
In this article:
- Where is it?
- How is it useful?
- How it works
- Location by Time Slots
- Attendees by Time Slots
- Simplifying the report
- Transposing the data
- Printing the report
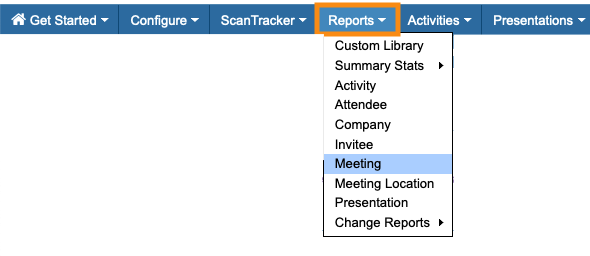
Where is it?
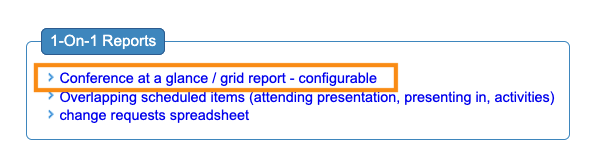
The Conference at a Glance Report lives in the Reports tab. It’s on the Meeting Reports page:
How is it useful?
Once your team has begun scheduling 1x1 meetings, Conference at a Glance becomes very helpful. It’s a highly-customizable overview report.
Here are some common uses:
- Get an overview of where meeting locations have open time slots.
- Get an overview of a particular group of participants: when and where they have meetings.
- Quickly find open times and locations for last-minute scheduling.
- See how many meetings you’ve scheduled on each event day.
You can use this report on-screen, download a PDF, or print out copies to keep on hand at your event.
| This report shows only scheduled meetings. It doesn’t display meeting requests, presentations, or activities. |
How it works
Here are a few important things to know about this report.
- This report opens in a new browser tab, so you can keep your MeetMax account open alongside it.
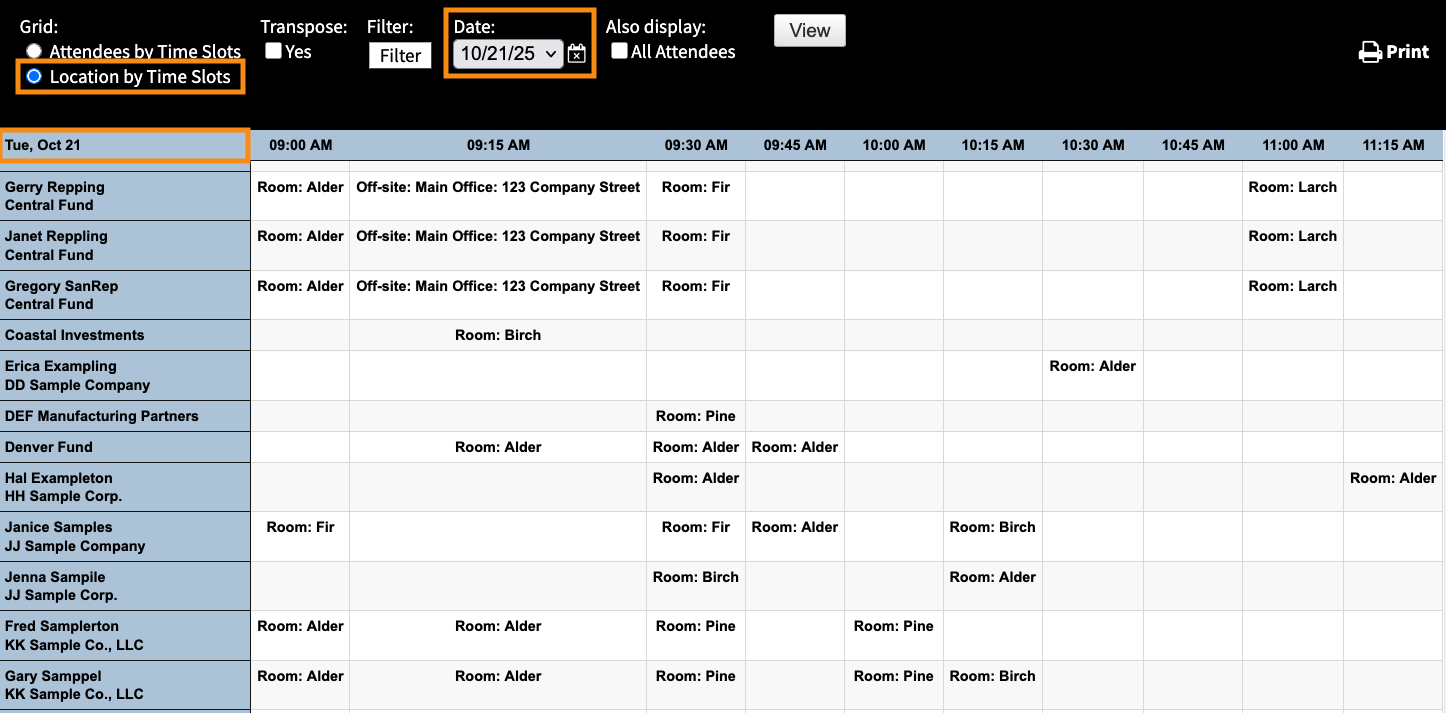
- Conference at a Glance works with one event day at a time. Use the Date menu to choose the day you need:

- Whenever you update the report’s parameters, click the View button to see the changes:

- The Grid settings focus this report in different ways. See the sections below for details:

| This report is designed for viewing on-screen or printing. Unlike other MeetMax reports, you can’t export Conference at a Glance in spreadsheet form, or save custom reports. |
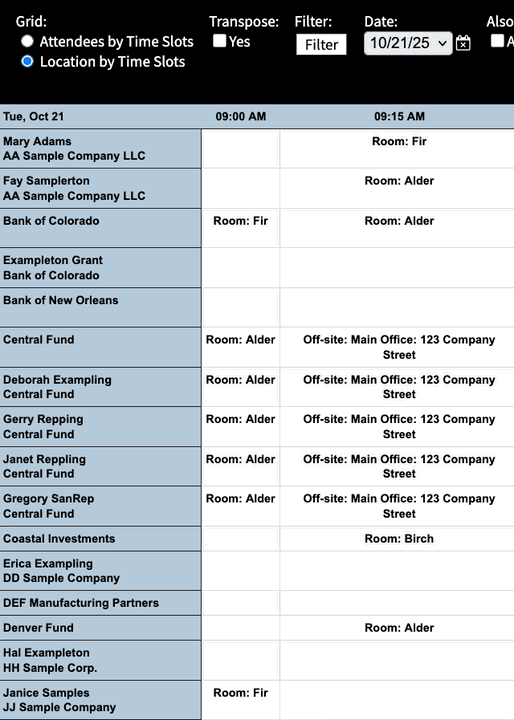
Location by Time Slots
If you need to get a sense of where your open time slots are, use this view.
Unfiltered, it shows all participants, meetings, and time slots for your chosen event day:
Use the Filter button to narrow the data down. (More details on filtering below.)

Here are some common filters:
Attendees by Time Slots
This view offers more details about the participants attending the meetings. You can still see available time slots here, but you can customize what information appears alongside them.
Adding filters
The real power of the Attendees by Time Slots view is in how you filter it.
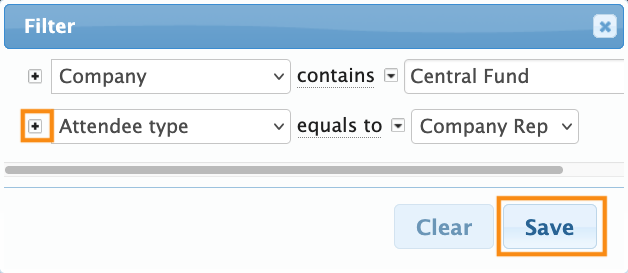
MeetMax offers multiple filter options. Click the Filter button to get started:
As with all MeetMax lists, you can use the + icon to add multiple filters:
Below are some commonly-used filter sets:
- Overview of meetings for all Attendees (or Client Reps) from a specific company.
- Overview of meetings for Attendees assigned to one Client Rep, or Client Rep Group.
- Overview of meetings for a specific group of Attendees, like VIPs.
Clearing filters
Ready to start a different report? Click the Filter button again. In the pop-up, click the Clear button:
![]()
Simplifying the report
By default, this report includes everyone - Attendees, Companies, and Company Reps.
Depending on how your meeting program is structured, you might want to hide certain participants to reduce visual clutter.
Location by Time Slots view
In this view, click the All Attendees checkbox. It reveals some extra settings:

- Hide auto-created attendees: If your event has all Company Reps automatically “tied” to their Company’s meetings, that results in a lot of names on each meeting. This setting hides the Rep names and displays their Company name.
- Hide colleagues: If many of your meetings include multiple people from the same company, use this setting to hide those colleagues. You’ll only see the name of the person who requested the meeting.
- Hide attendee names: This setting hides all participant names, but displays the companies they represent.
Attendees by Time Slots view
In this view, you’ll have more options:

- In the All Attendees menu, you’ll have the same three options we covered above.
- Hide ‘other’ non-target attendees: If your event will have group meetings, with multiple people from different companies attending, this report can become cluttered. This setting lets you hide everyone except the person who originally requested the meeting.
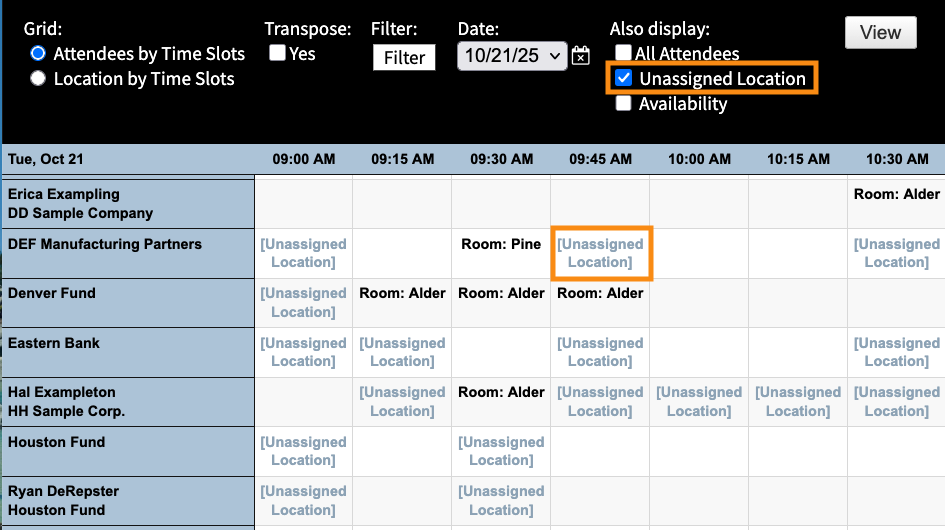
- Unassigned Location: This setting highlights all meetings that don’t yet have a location assigned:
- Availability: This setting highlights the time slots where each participant is available for meetings:
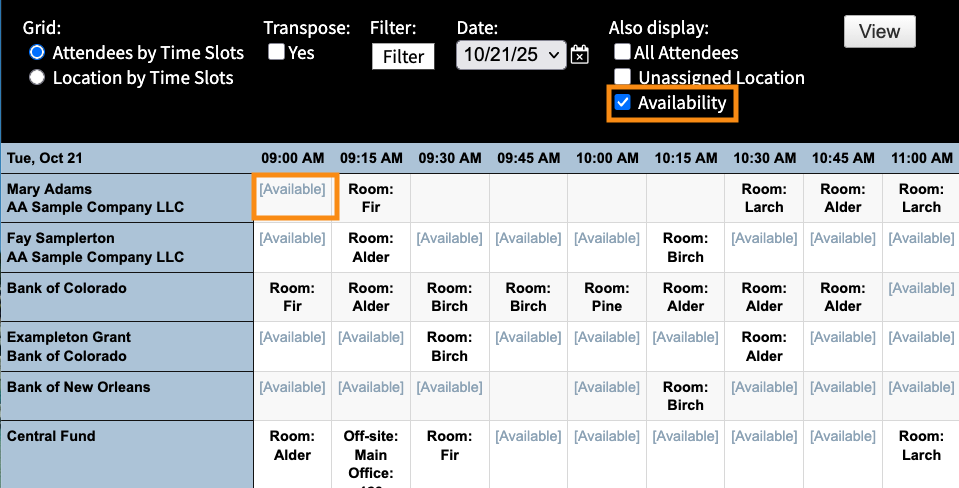
| If you see a blank time slot here, the participant is already signed up for a presentation or activity, or they’ve set a blackout time. |
Transposing the data
The Transpose option changes the location of columns and rows.
You’ll usually use the report with this option turned off.
- Participants are in the left column.
- Time slots are across the top.
![]()
For certain views, you might find it easier to click the Yes box.
- Time slots are in the left column.
- Participants are along the top.
![]()
Printing the report
When you have the view you need, click the Print button.
From there, you can either print copies, or save the view as a PDF:

| If you need reports you can export in spreadsheet form, check out this page. |

