

Badging Express: Connecting to power and Internet

In Step 1 of the set-up process, you’ll connect power sources and set up internet access.
In this article:
- Matching cords to components
- Connecting to power and Internet
- Connecting the tablets to Wi-Fi
- Activating the badge printers
| Make sure you have the right power and internet configuration at your venue. |
Matching cords to components
Each component has one or more power cords. We’ve color-coded the cords and their connection points.
Use the images below to match the cords to their components:
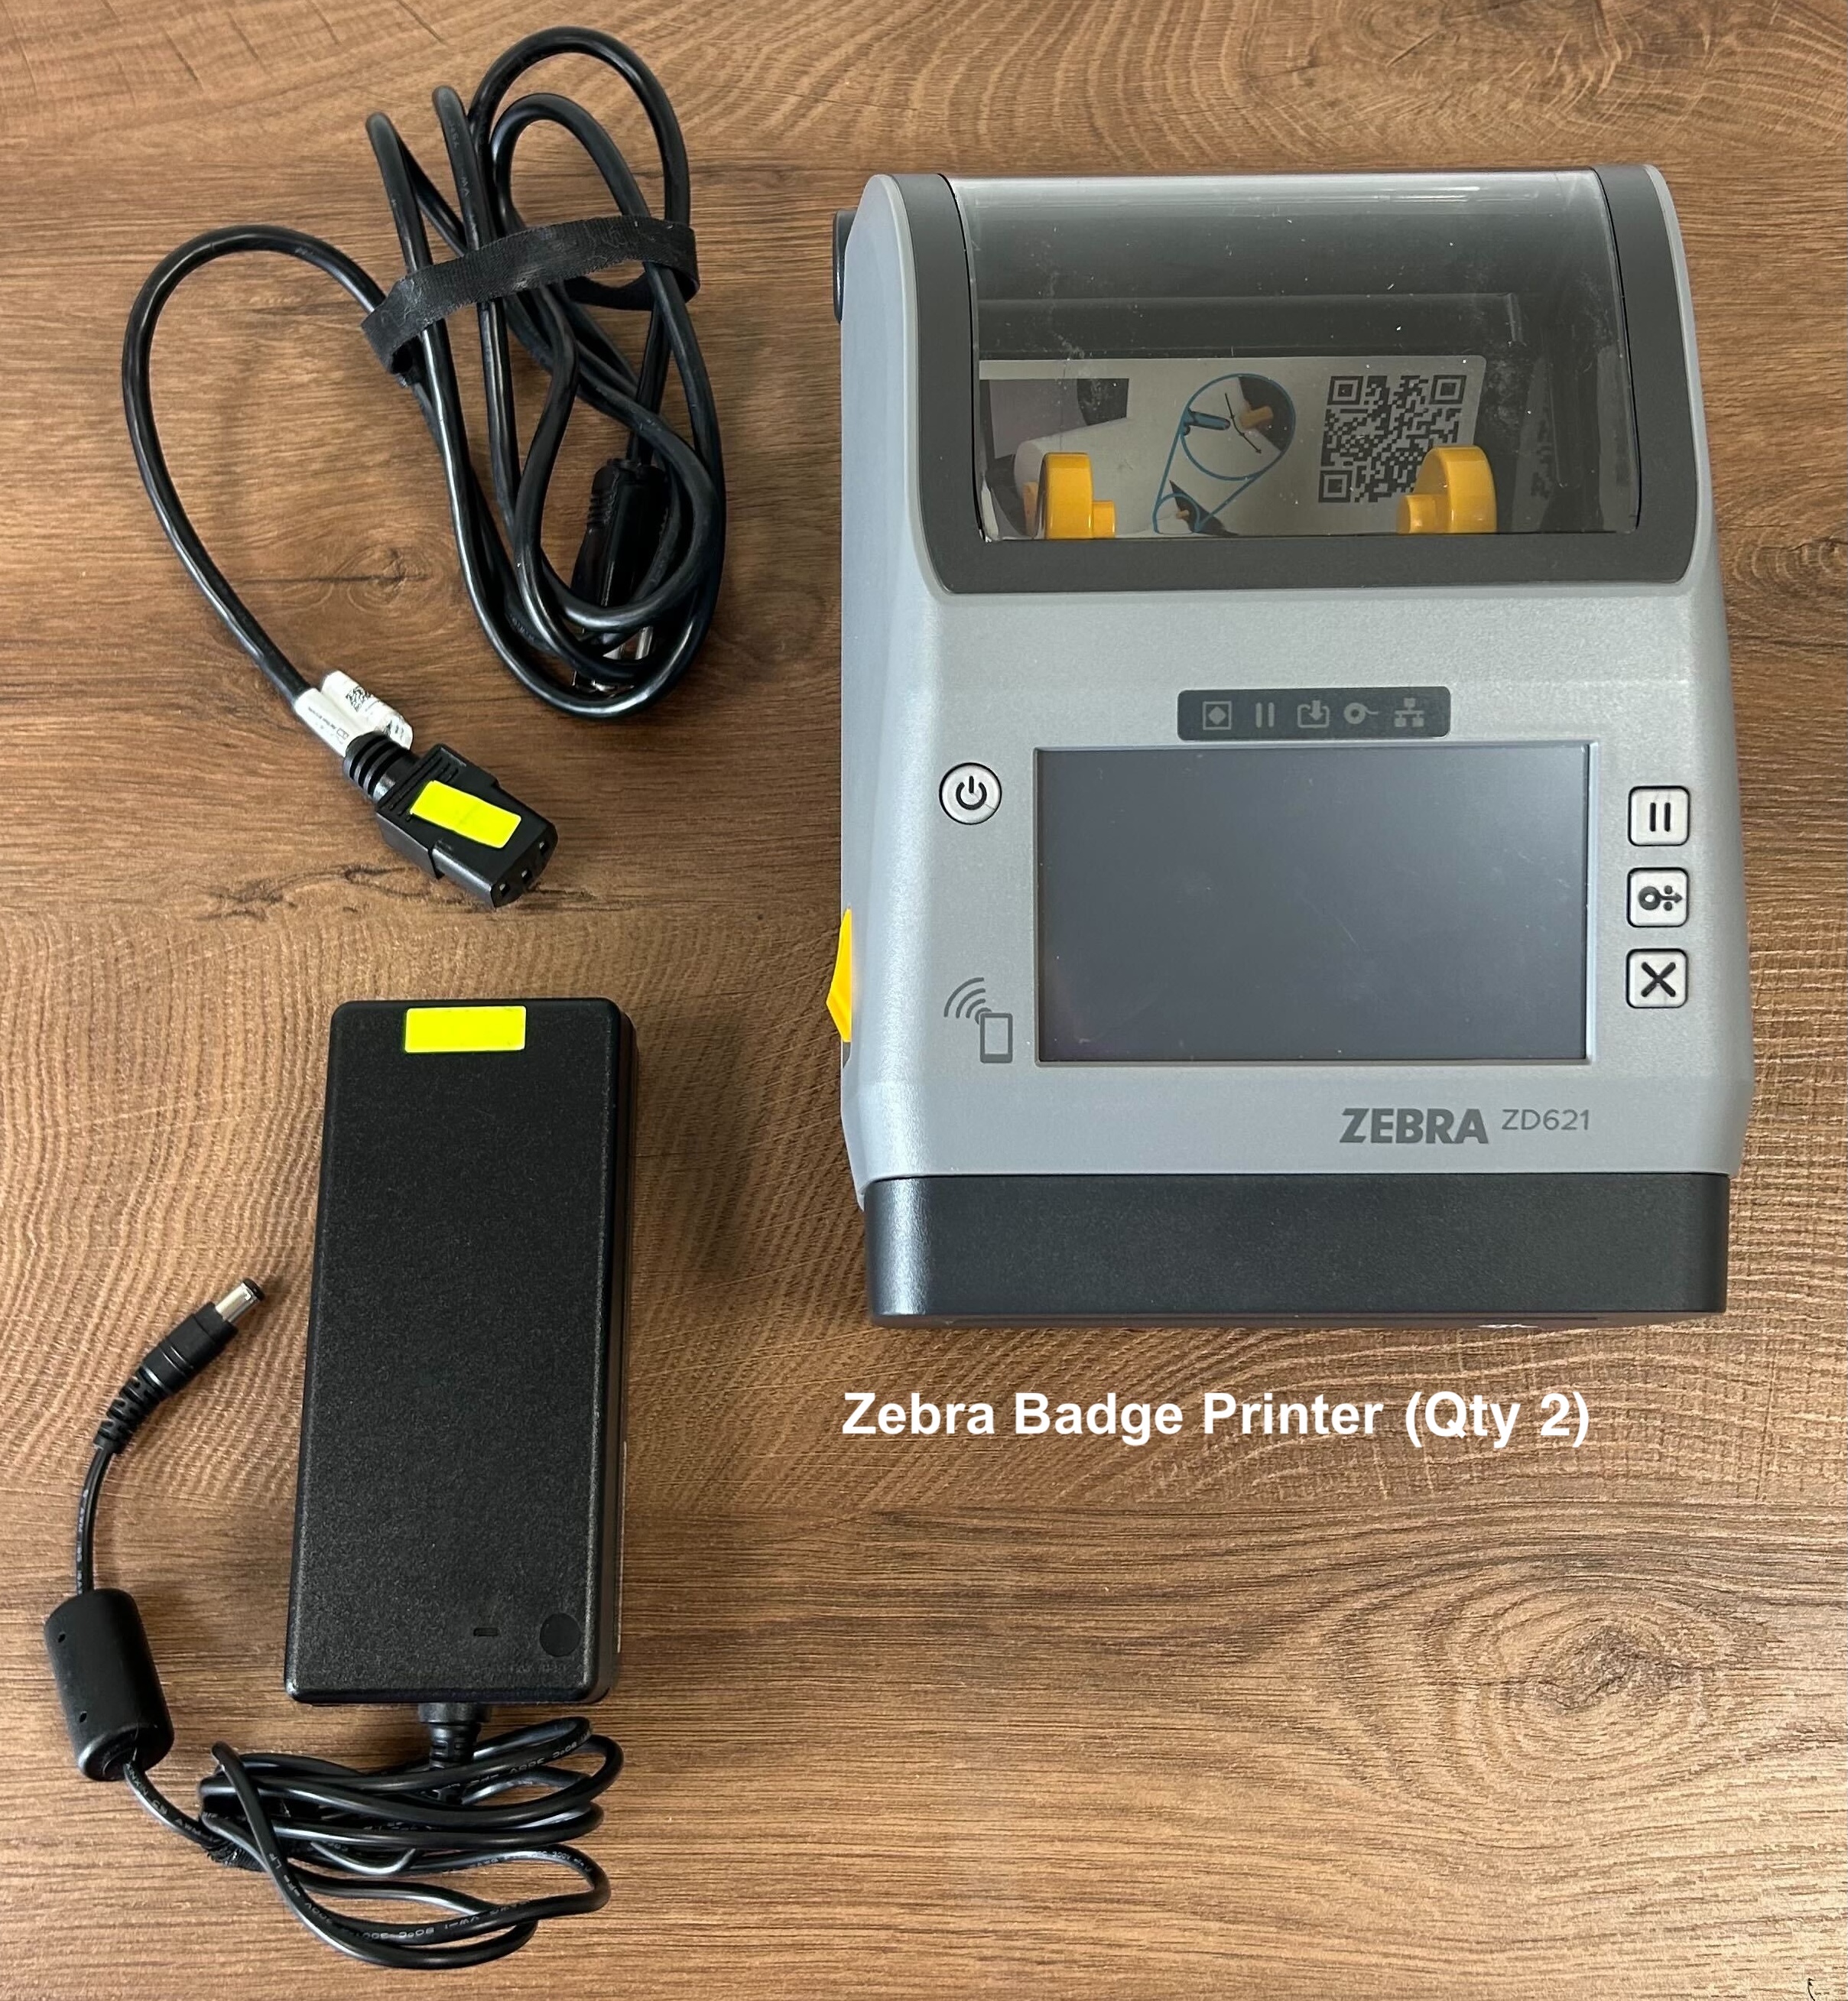
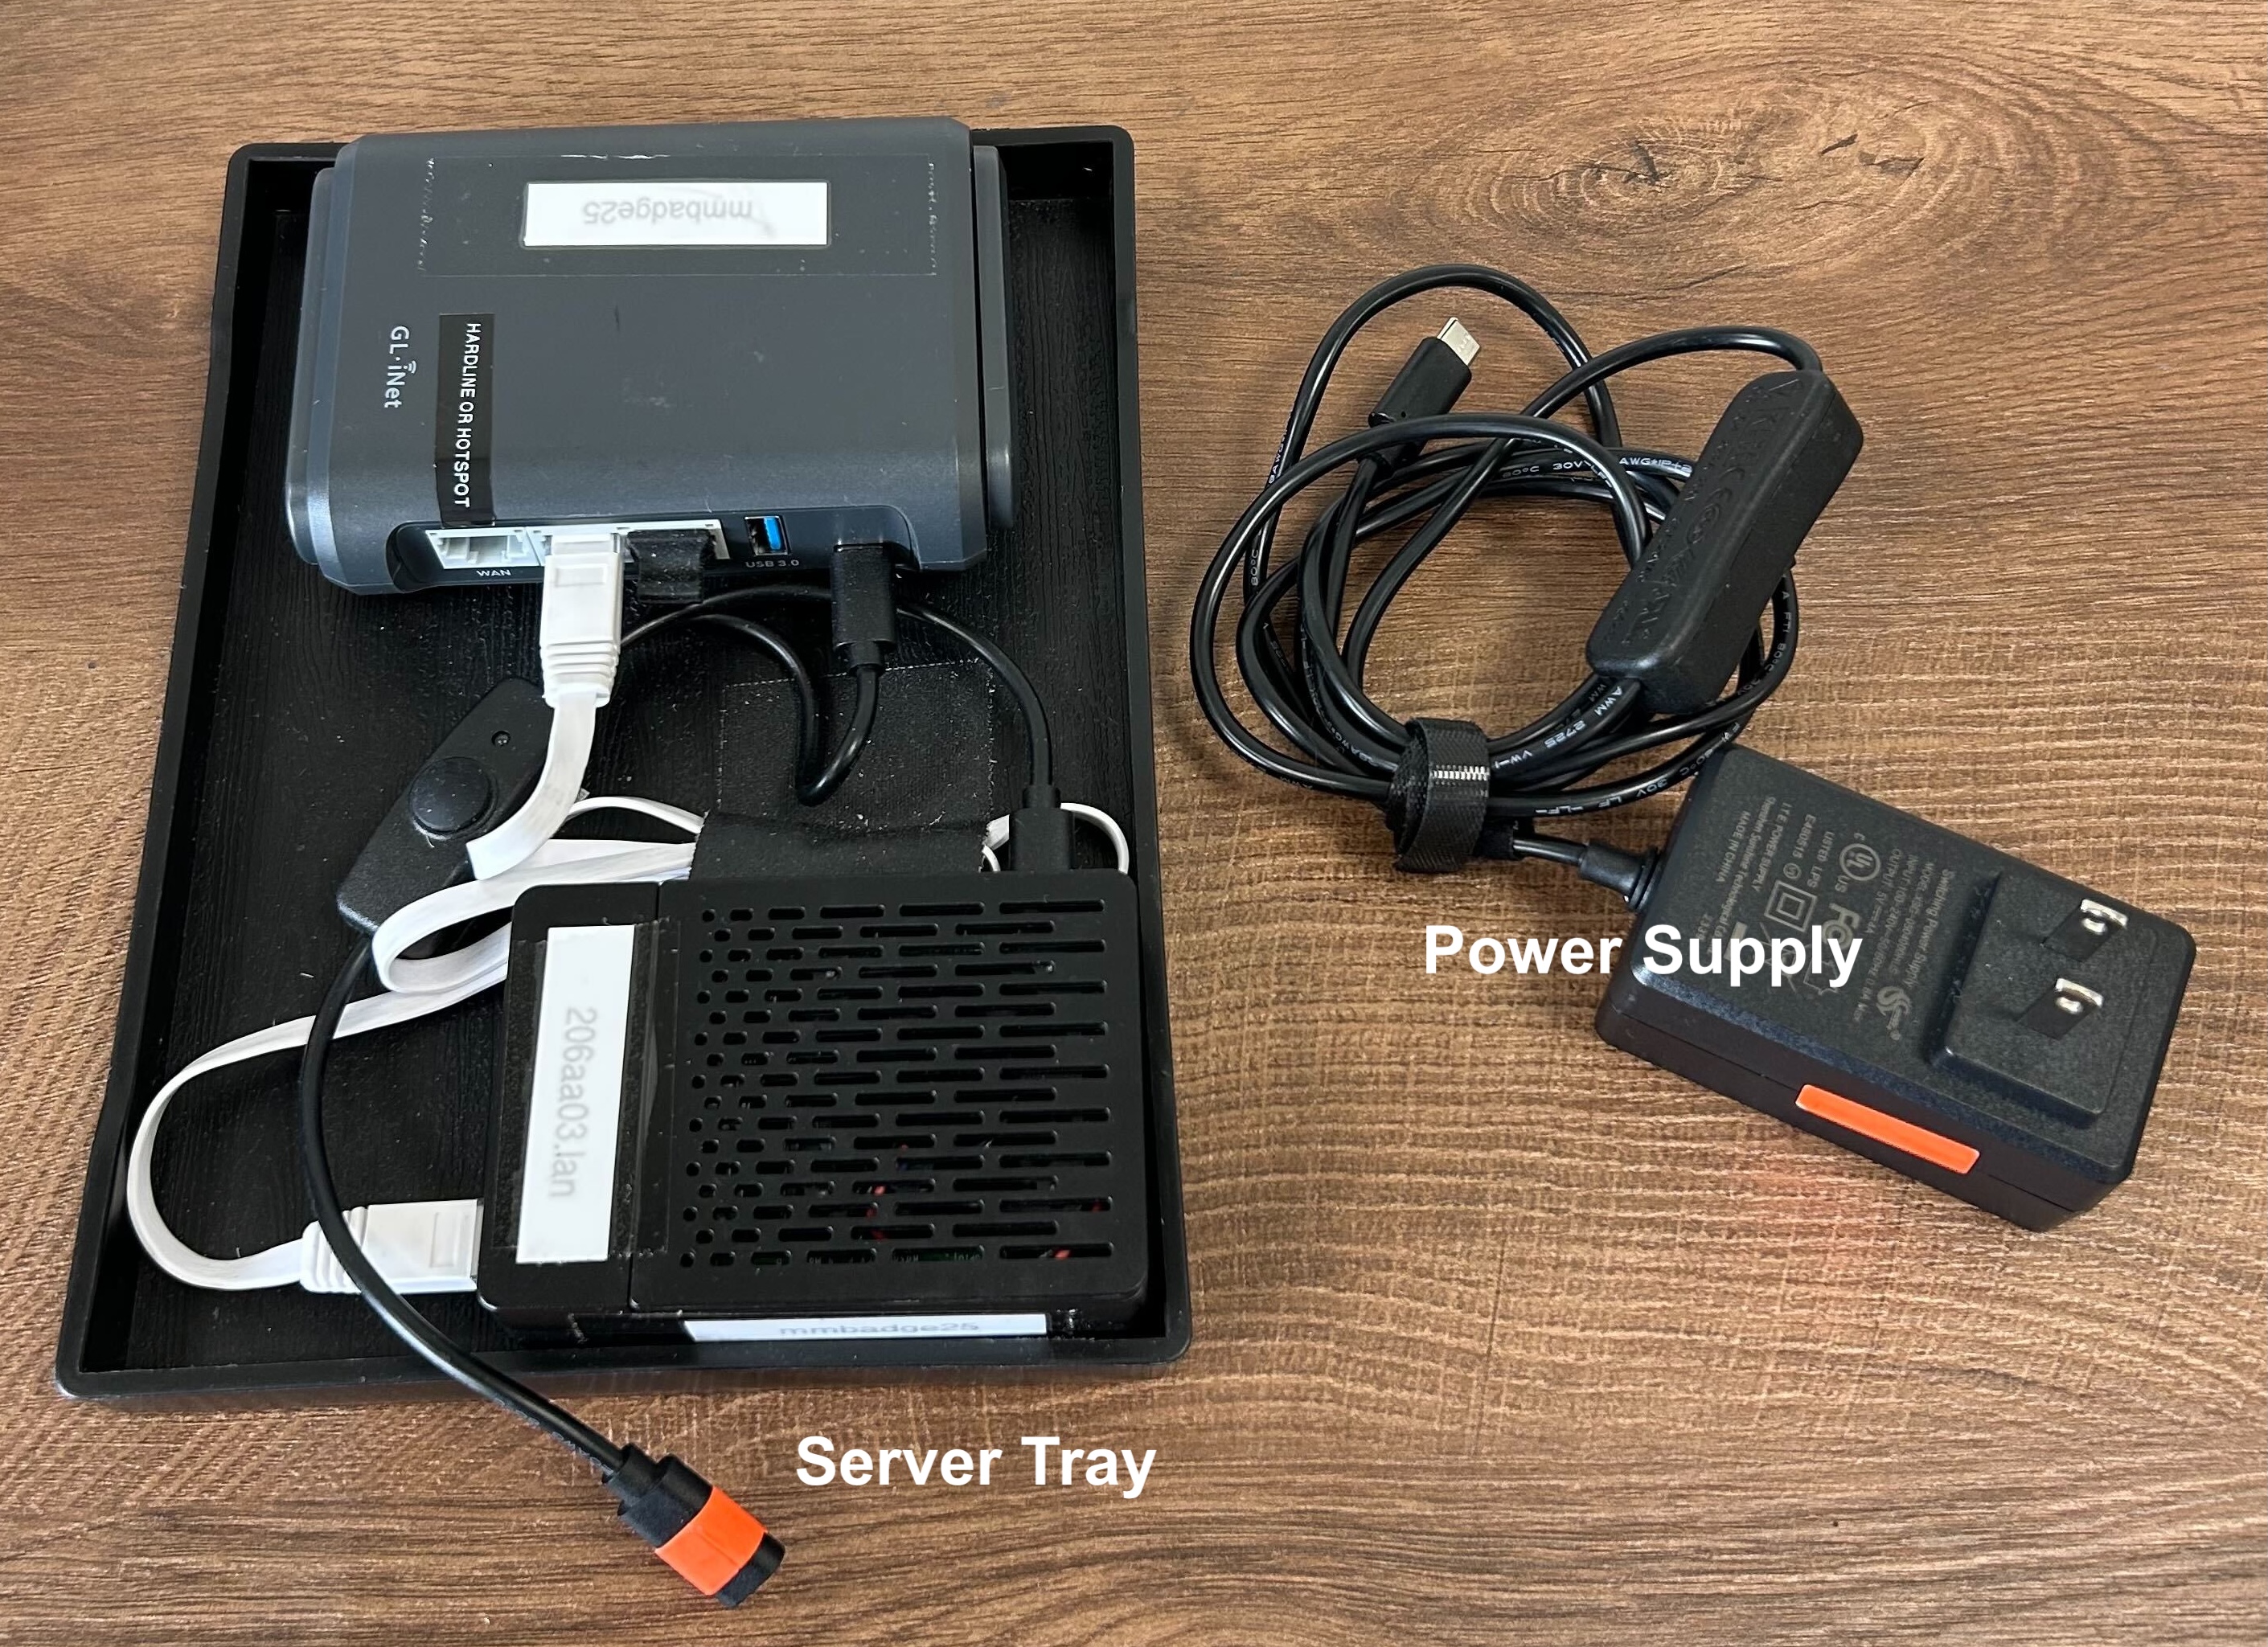
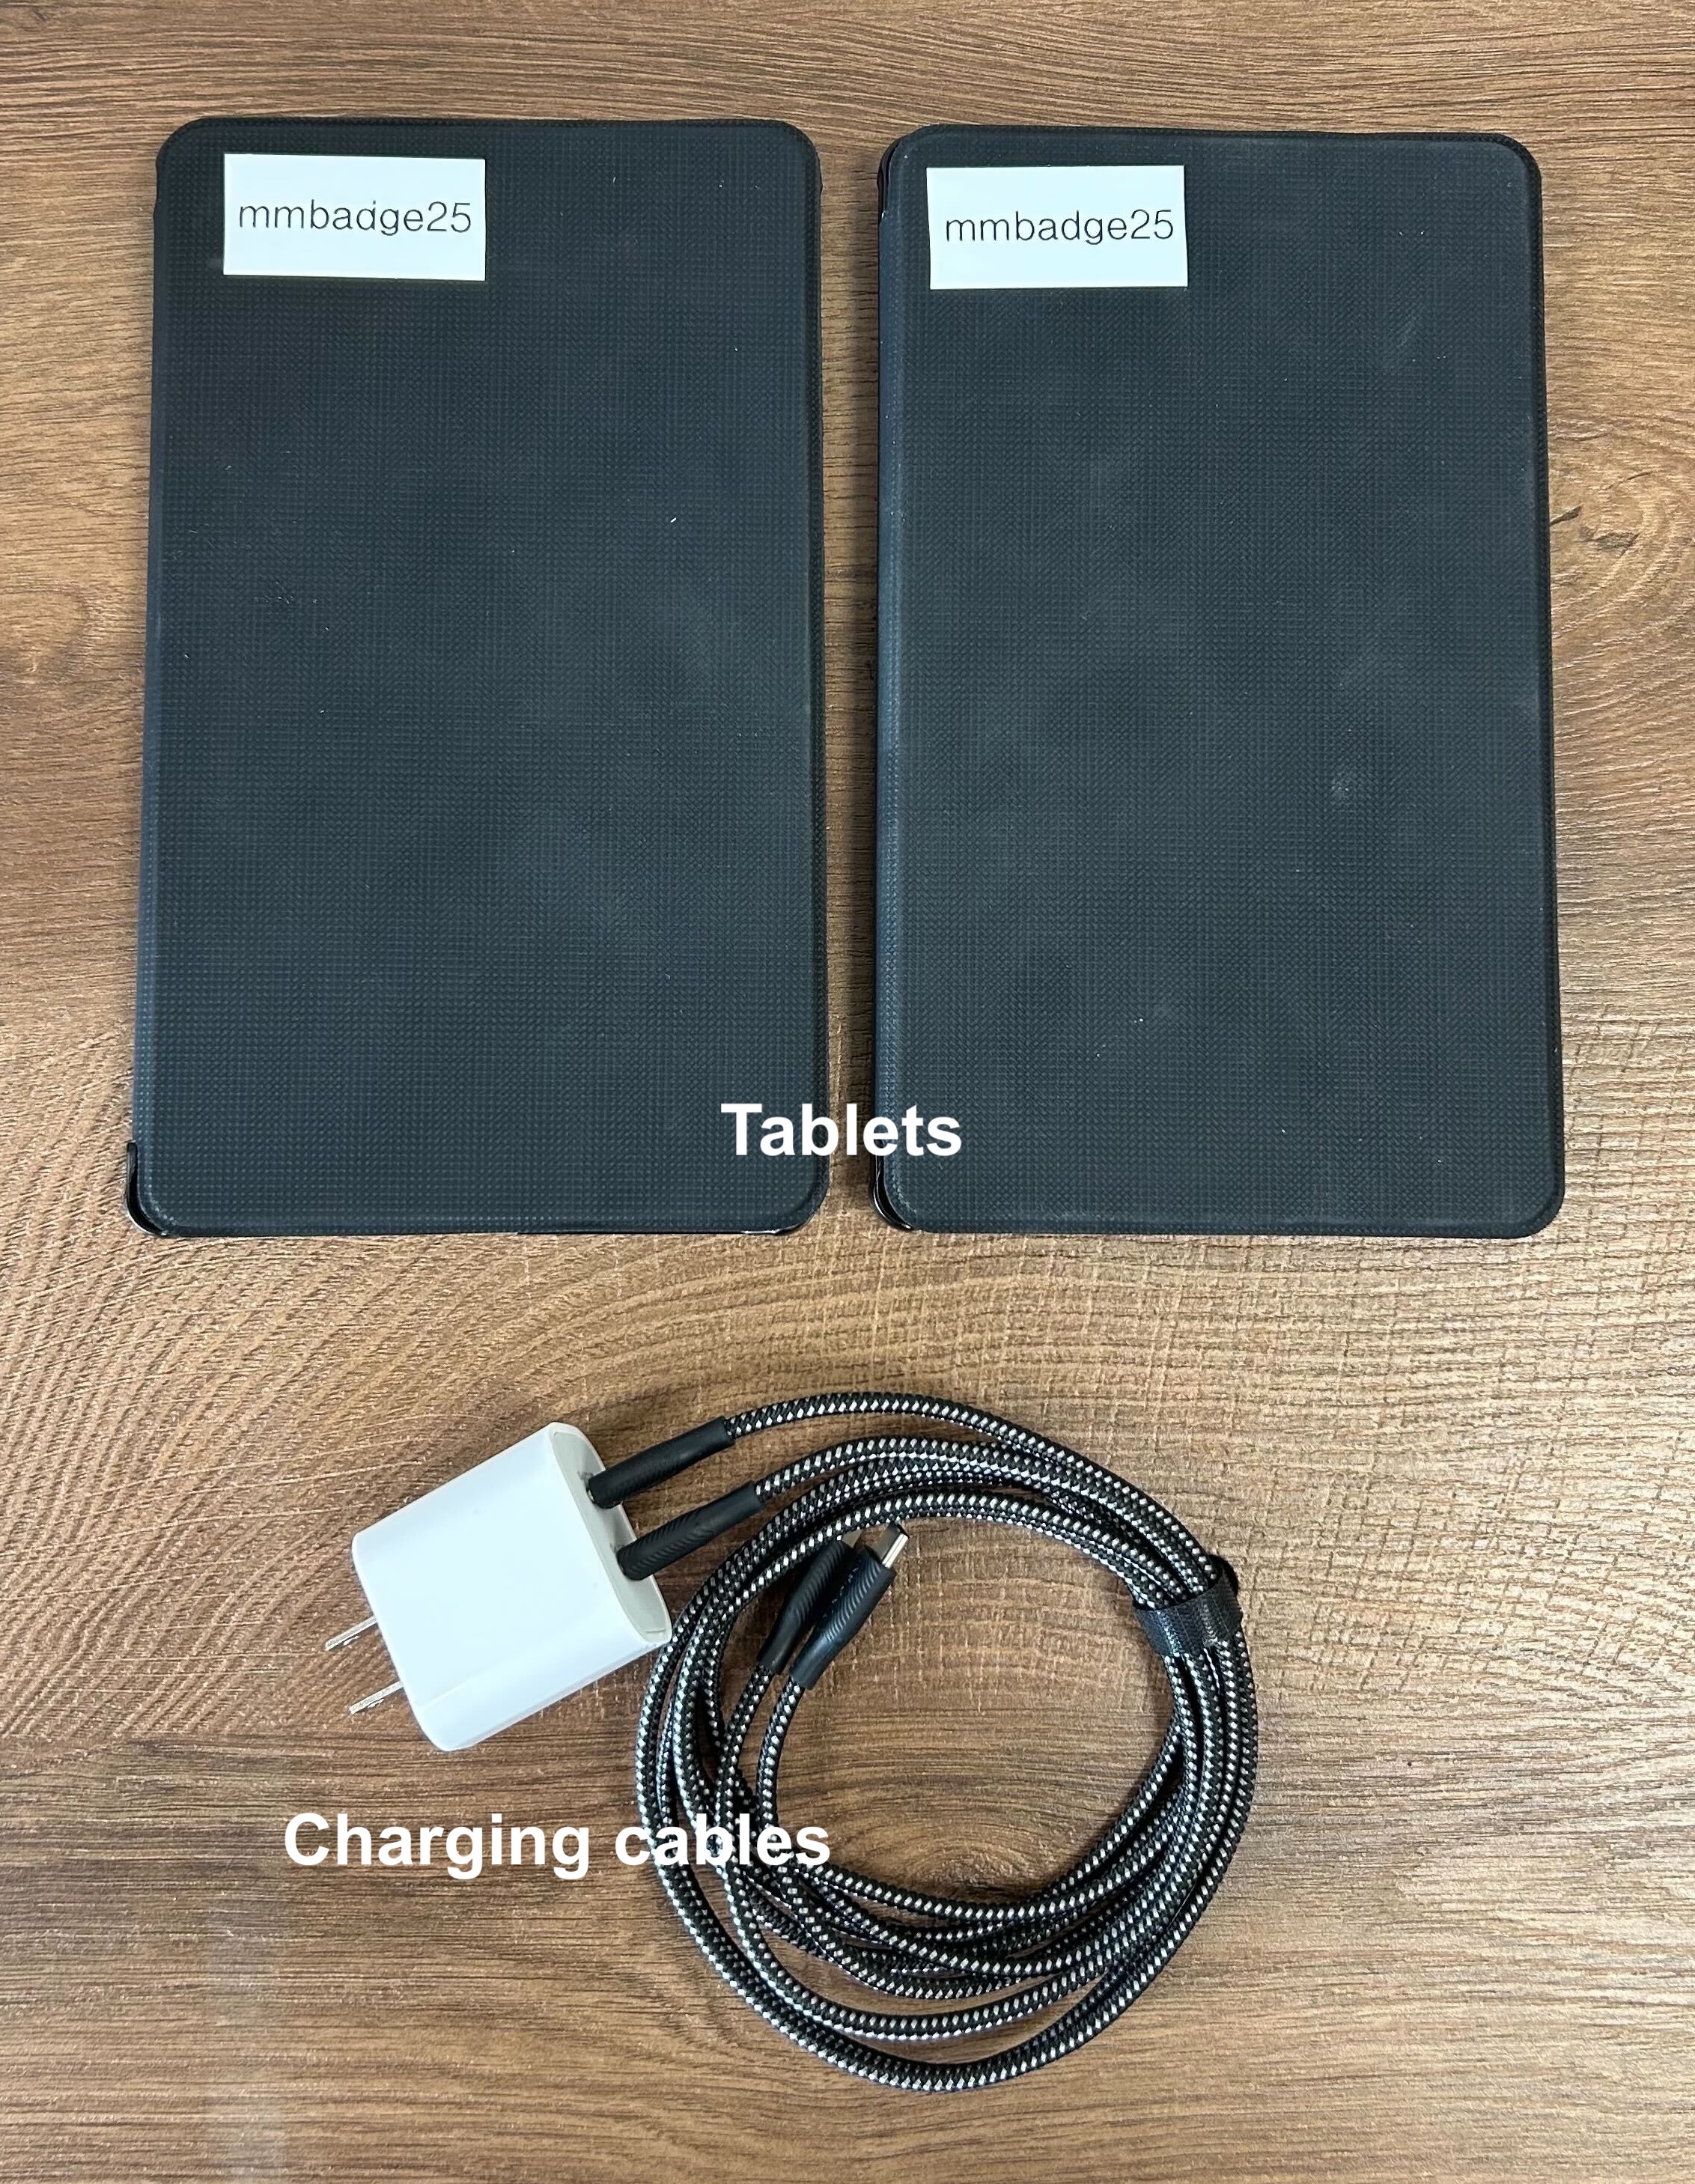
Connecting to power and internet
| As mentioned in this article, your connection must be hard-wired (no Wi-Fi). You’ll need 5 mps upload and download speed. The connection can’t use a login or splash page. | |
| If internet service is unreliable at your location, or your venue has no wired internet, we can rent you a mobile hotspot. Reach out to our Support team if you need help. |
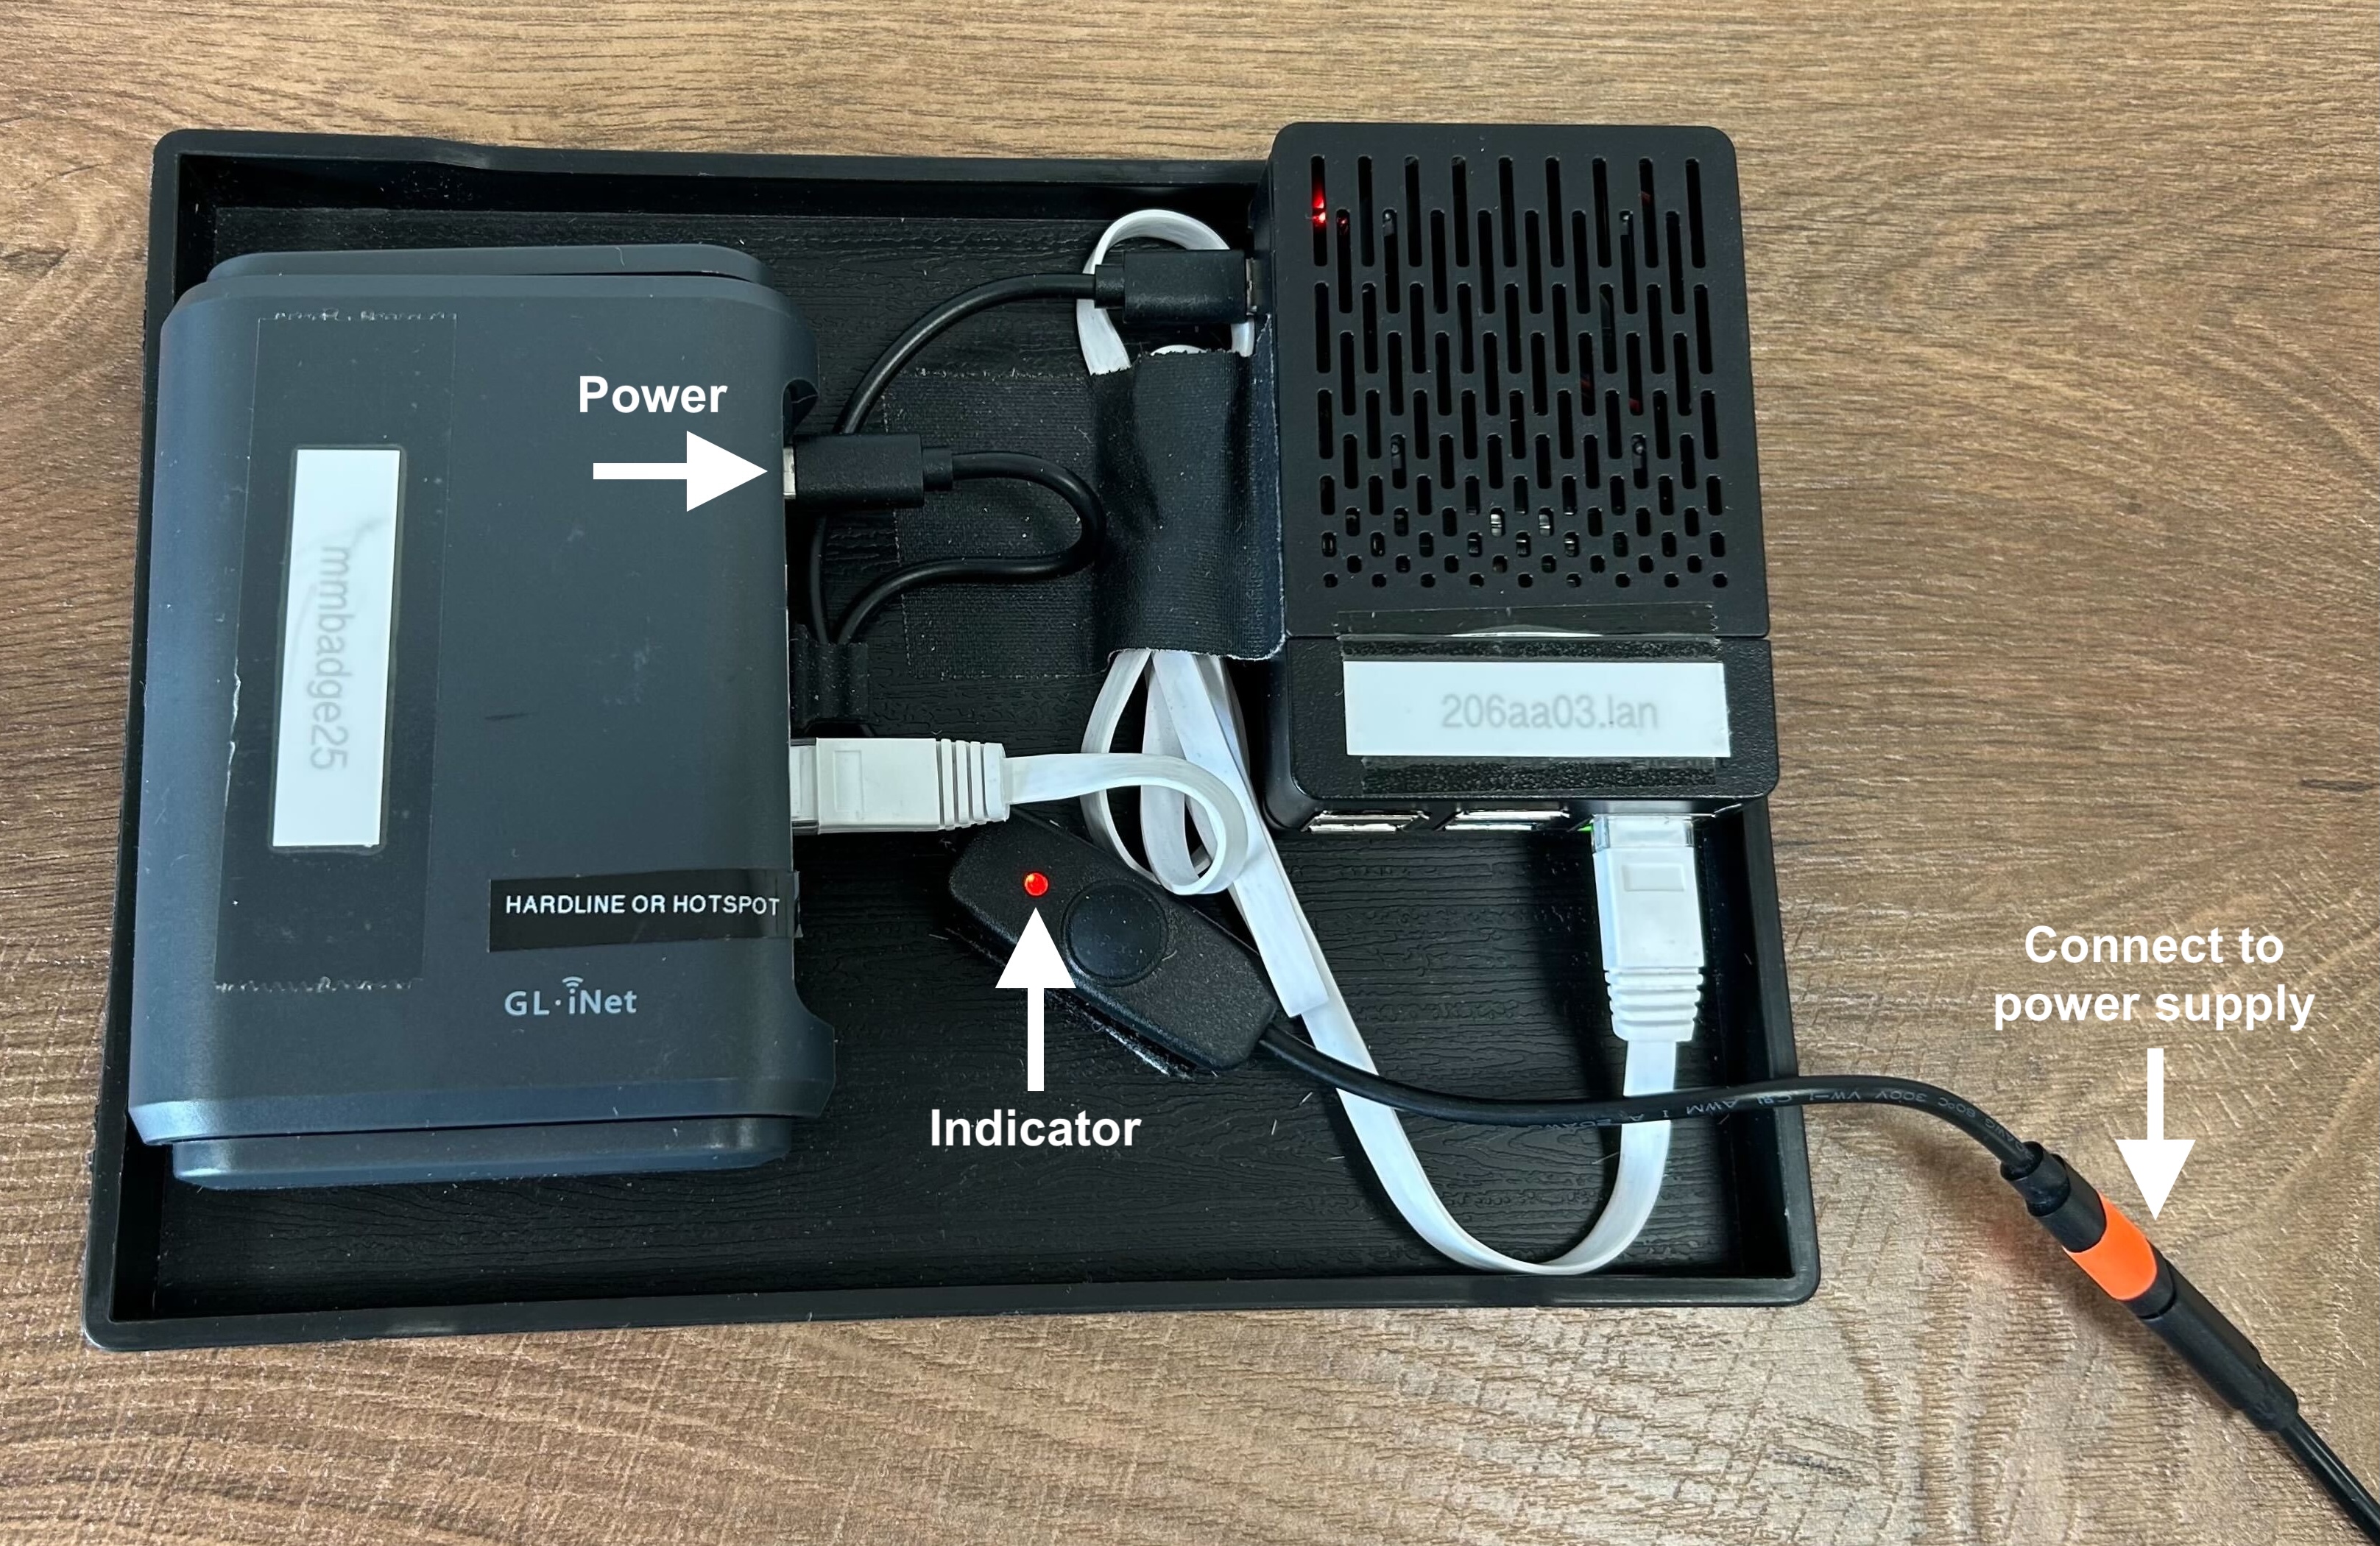
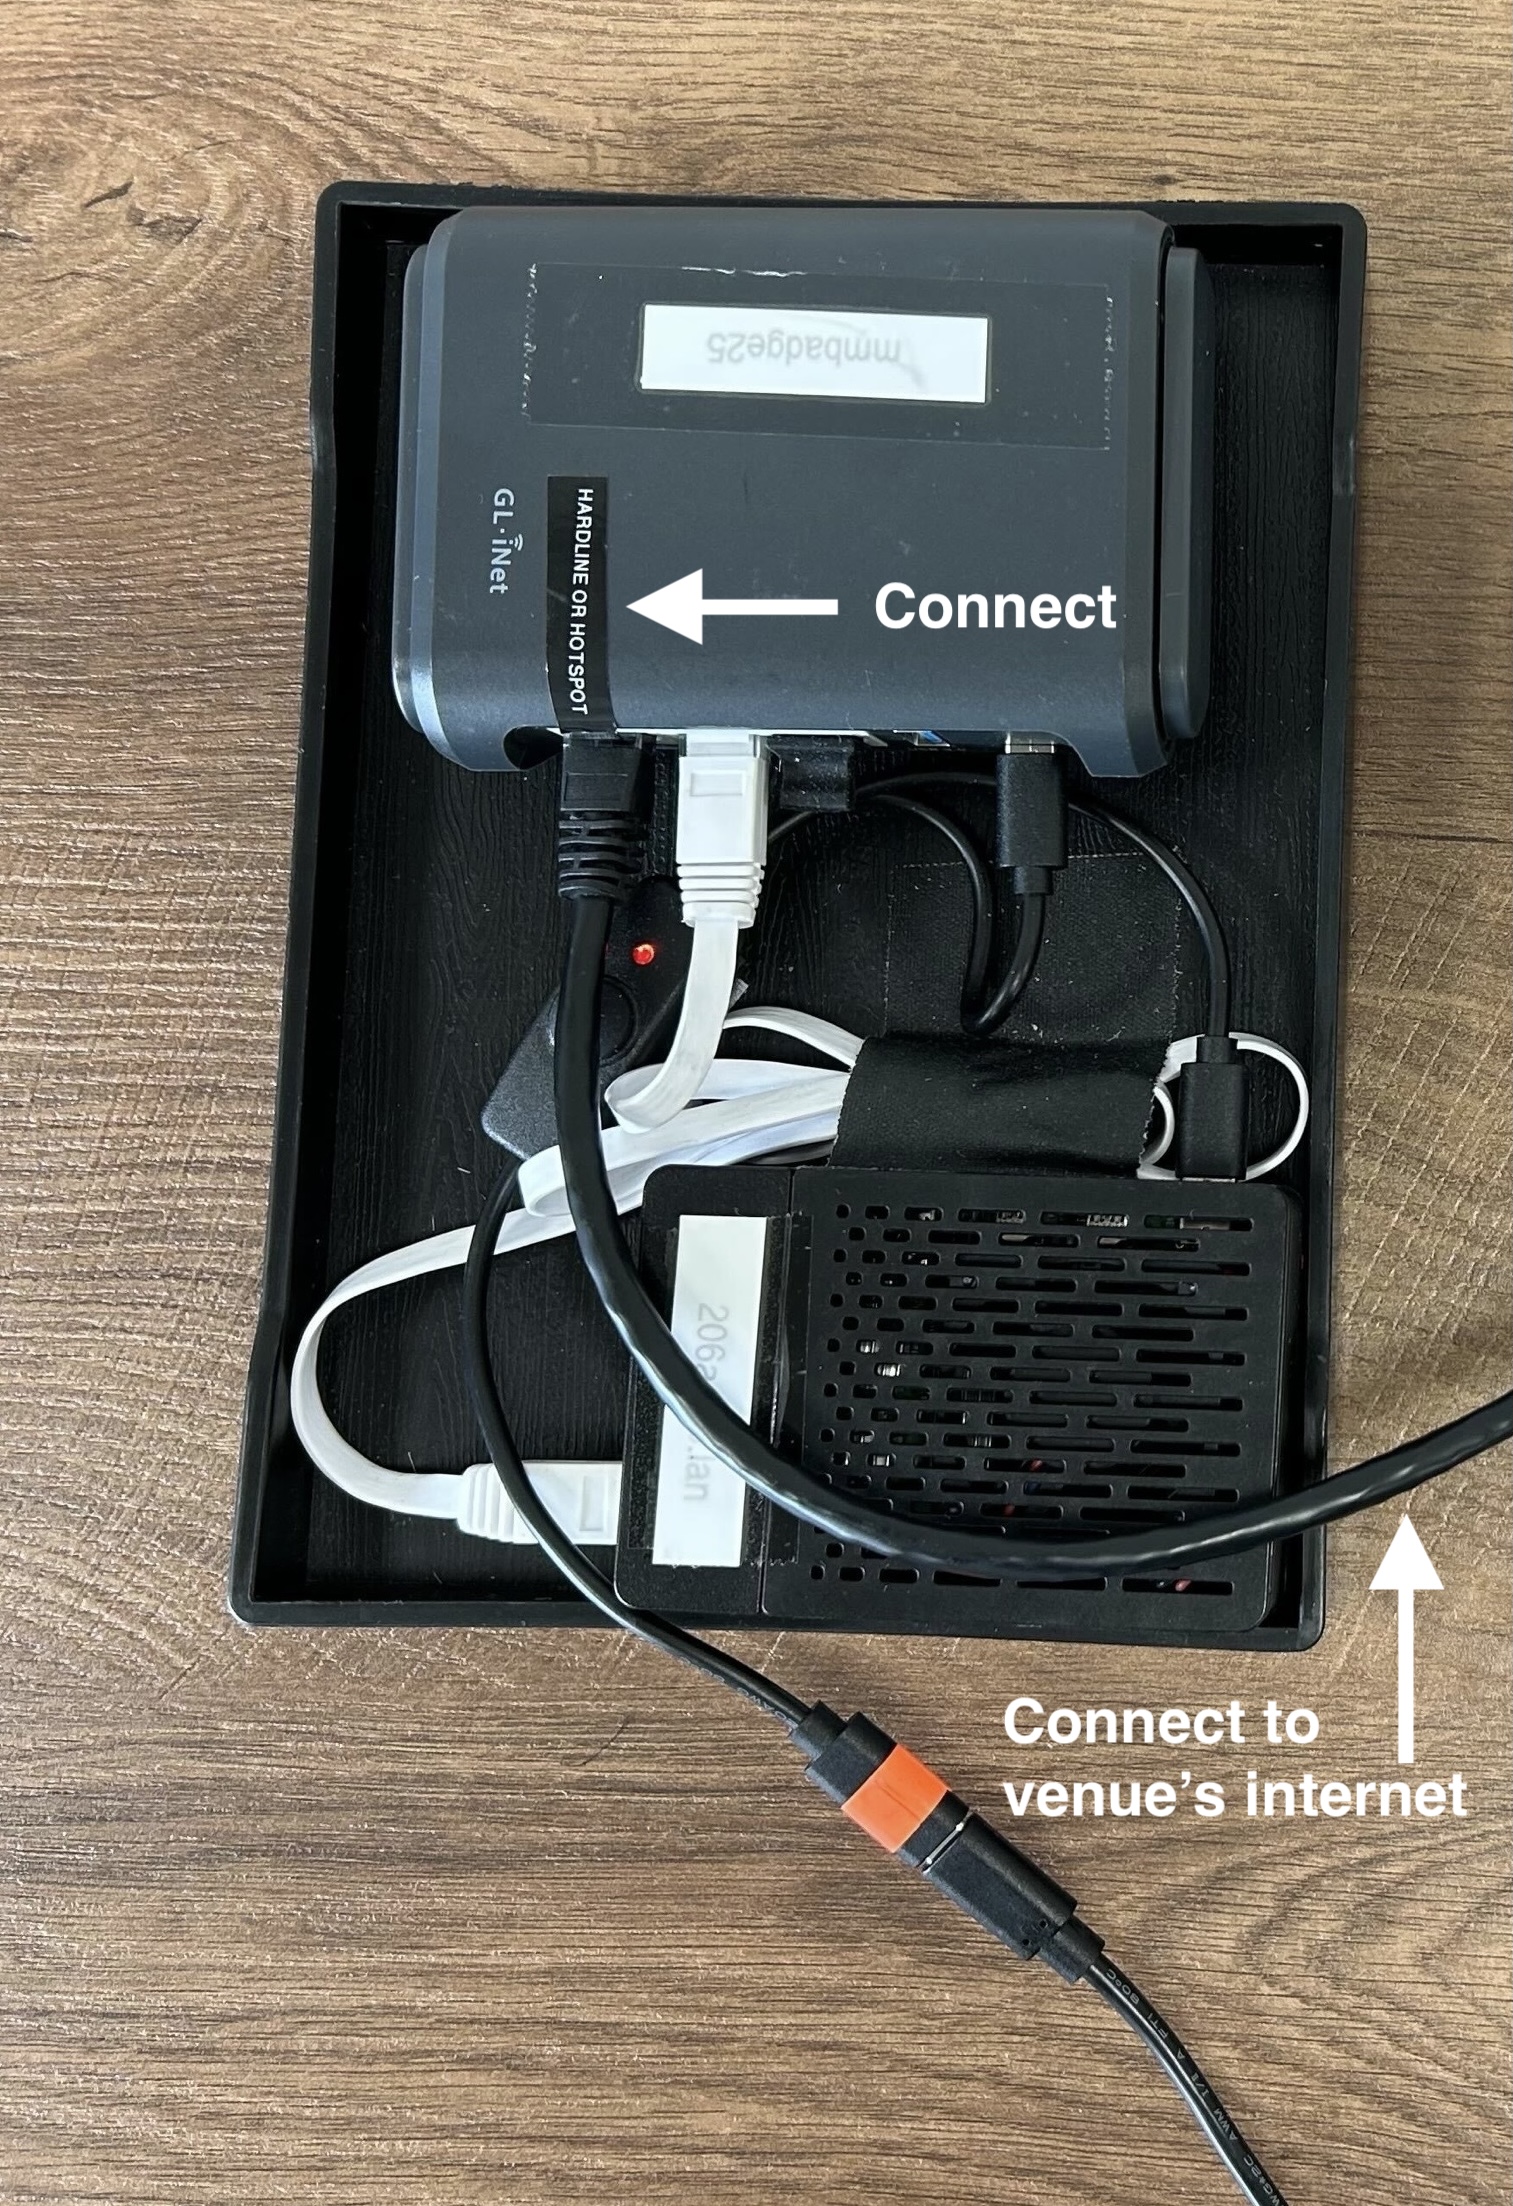
- Step 1. On the Server Tray, locate the connected power cord. Plug its marked end into the power supply.
- Plug the power supply into a wall outlet. You should see the red indicator light shown below:
- Step 2. Plug the Ethernet cord into the marked connector, as shown below. Plug the cord’s other connector into the venue’s internet:
Connecting the tablets to Wi-Fi
The two Tablets should connect automatically to the correct Wi-Fi. If they don’t, follow the steps below.
- Step 1. On either tablet, tap the Settings icon.
- (If you don’t see it on the home screen, swipe up to open the list of apps. In the search bar at the top, type “Settings.”)
- Step 2. Tap on the WLAN/Wi-Fi slider to turn it on.
- Step 3. Tap on WLAN/Wi-Fi again to open a list of available networks.
- Choose the network titled mmbadge__. (You’ll see a number here, that matches the number on your Express Badging case.)
- Step 4. Enter the password: mmbadge__ (using the same number as above).
- If needed, repeat these steps with the other tablet.
-
If you’ve rented a Hotspot, don’t connect to it at this stage. Use the mmbadge__ network.
What you should see:
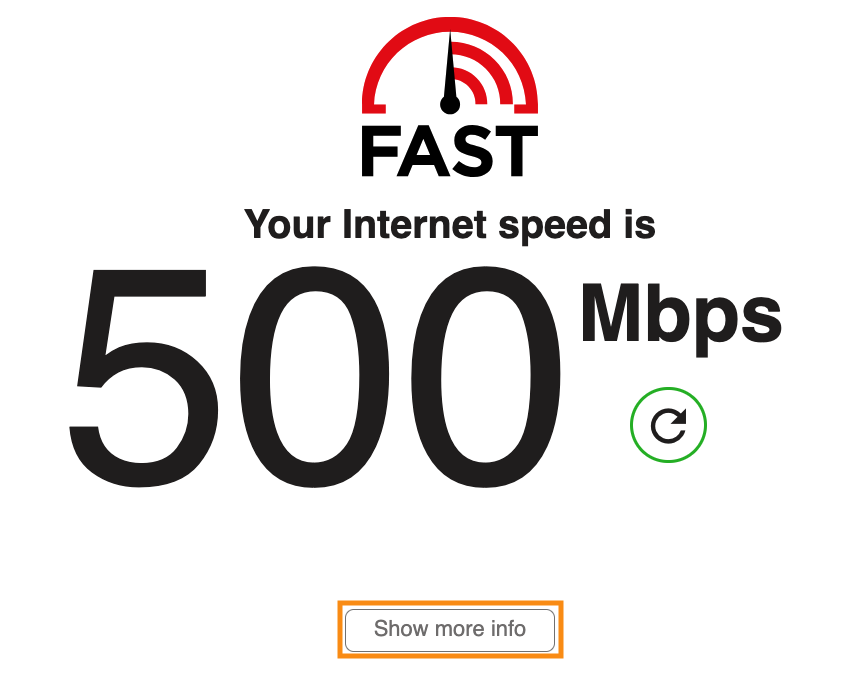
To verify that you’re connected, use the web browser on either tablet to visit Fast.com. The site will automatically perform a test of your current download speed. It might take a few minutes.
At the end of the test, you should see your current download speed:
Click the Show more info button. That reveals your current upload speed:
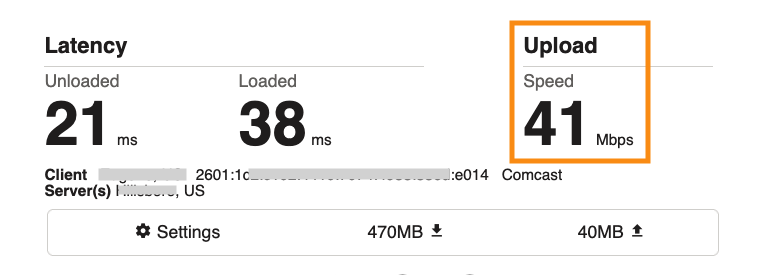
If both are at least 3 Mbps, you’re all set.
Activating the badge printers
| You’ll activate and load both printers, but use only one of them for printing badges. If that printer should fail, the second one is on hand as back-up. You’d contact Support to connect your back-up printer to the MeetMax network. |
- Step 1. Connect each Zebra printer to its power cord. Plug the cords into a wall outlet.
- Step 2. On either printer, press and hold the Power button:
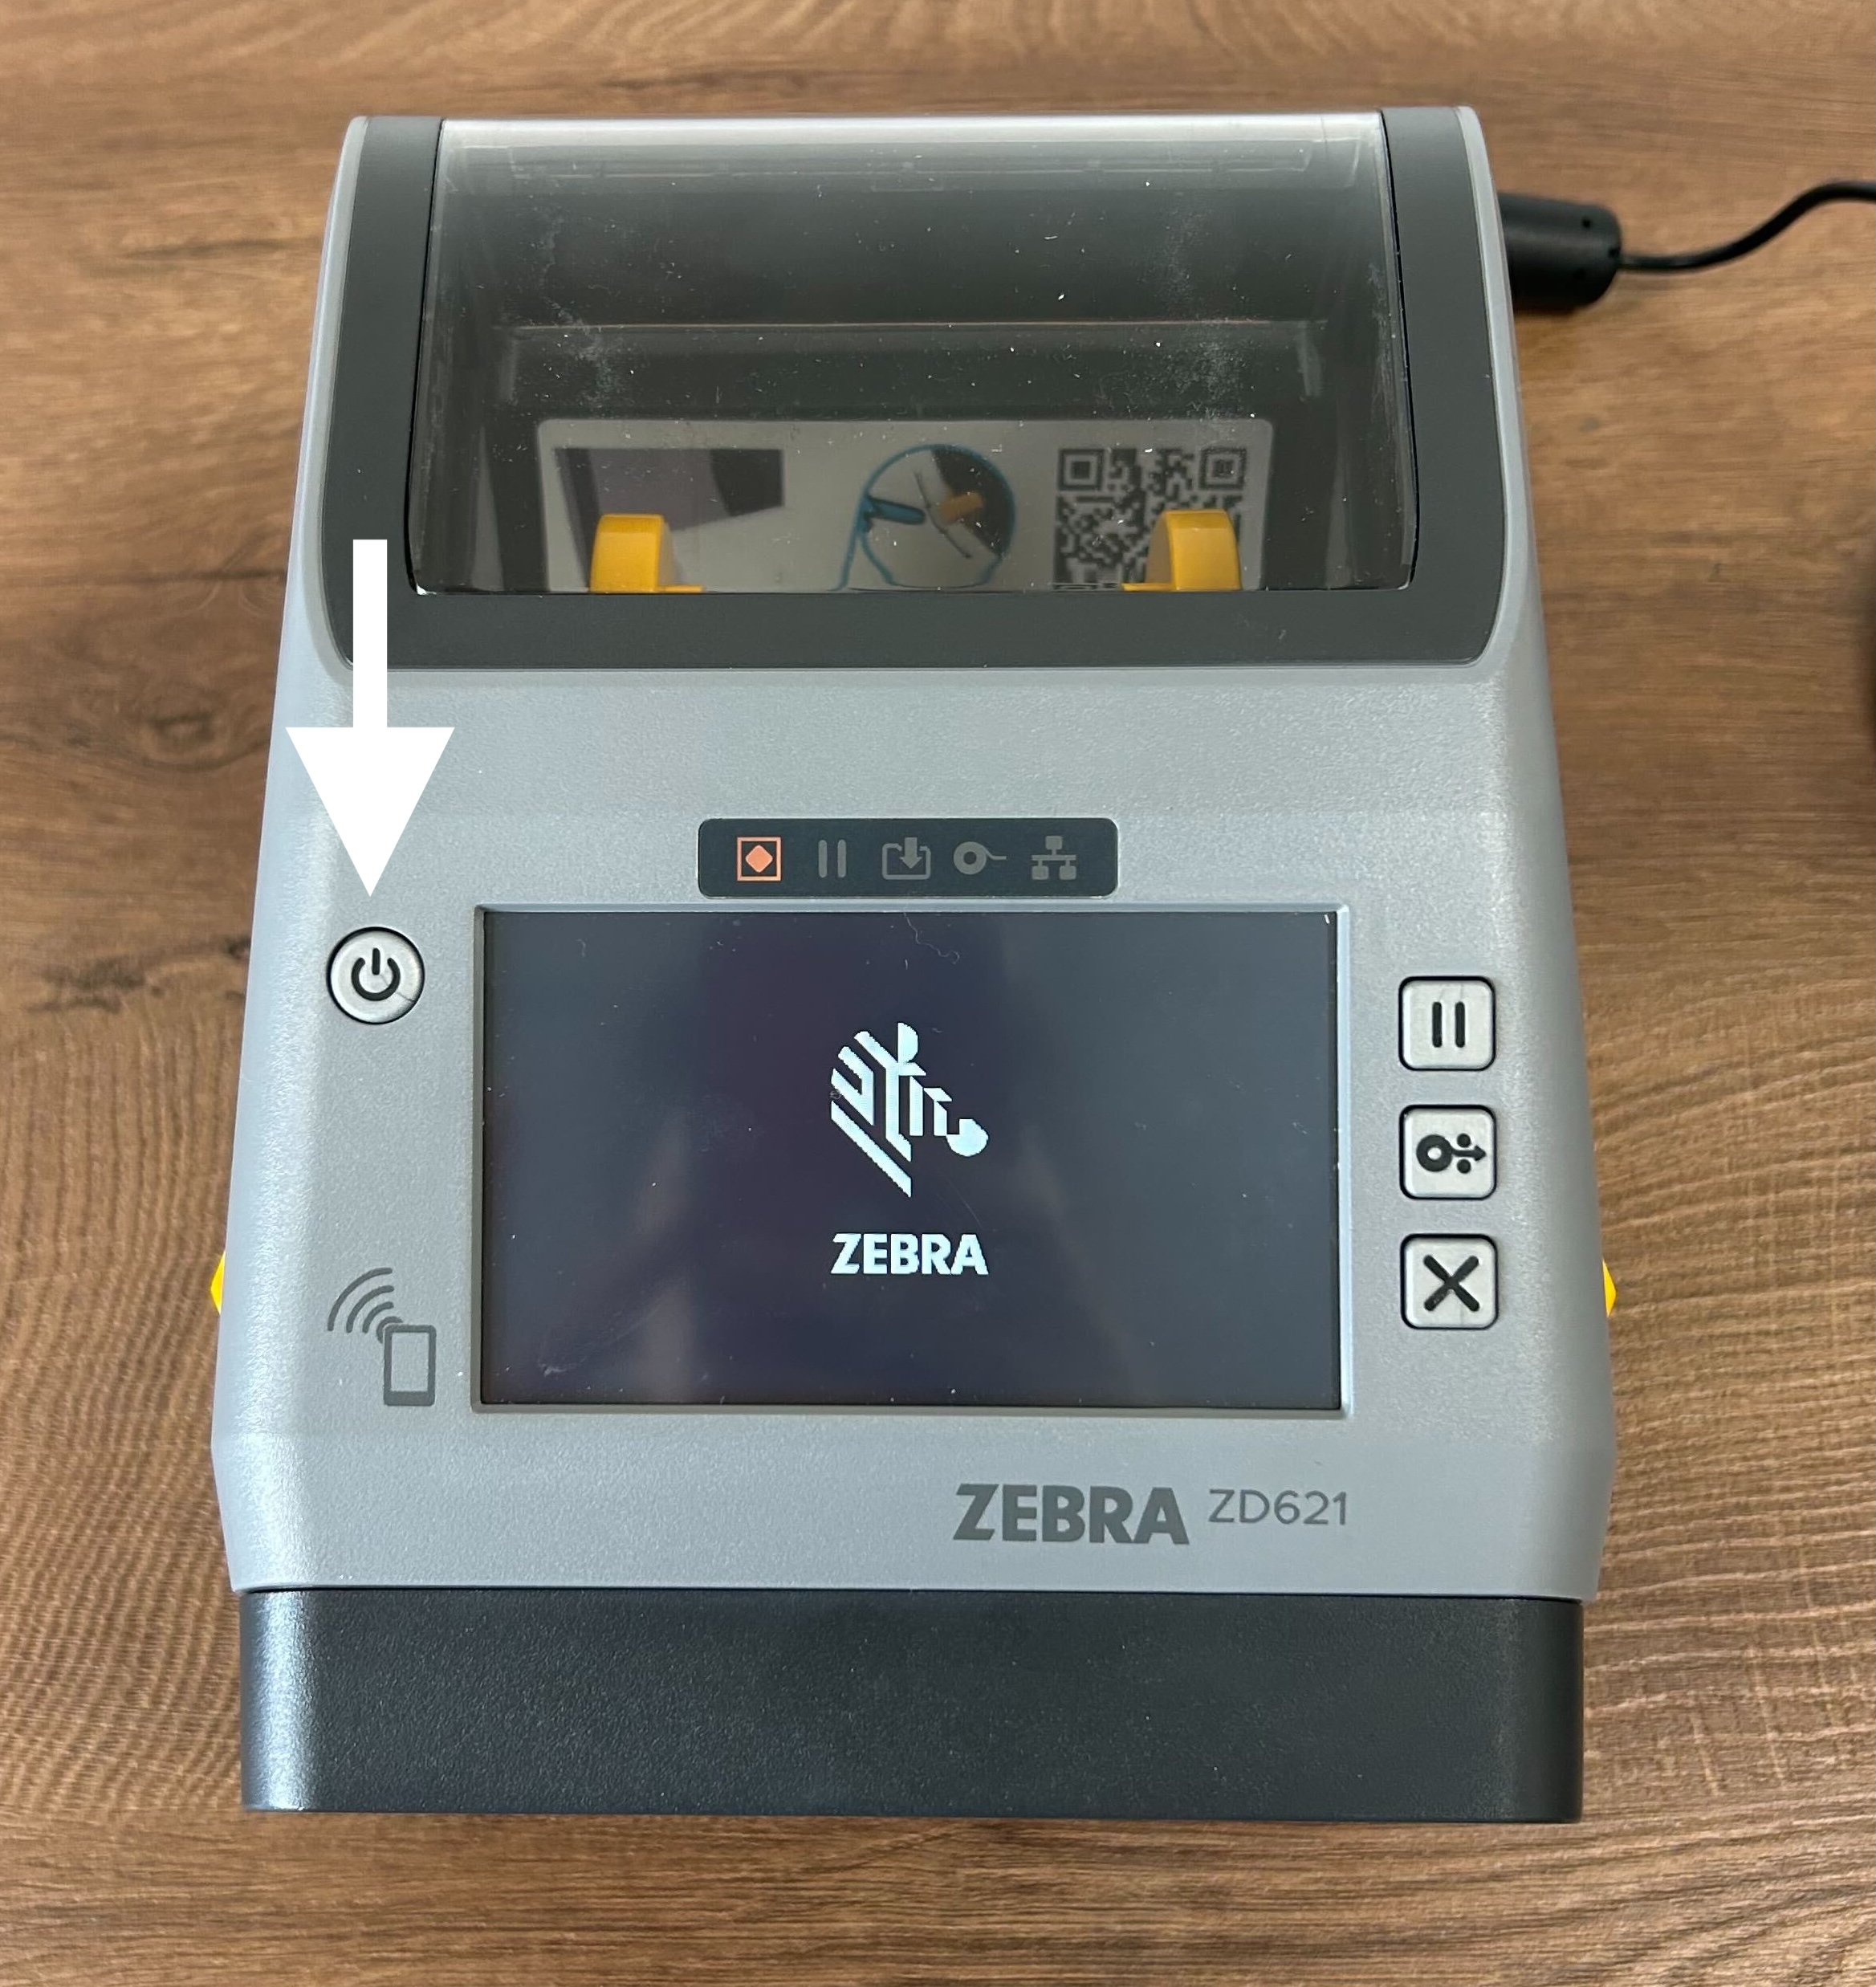
- Step 3. When you see the display below, release the power button:
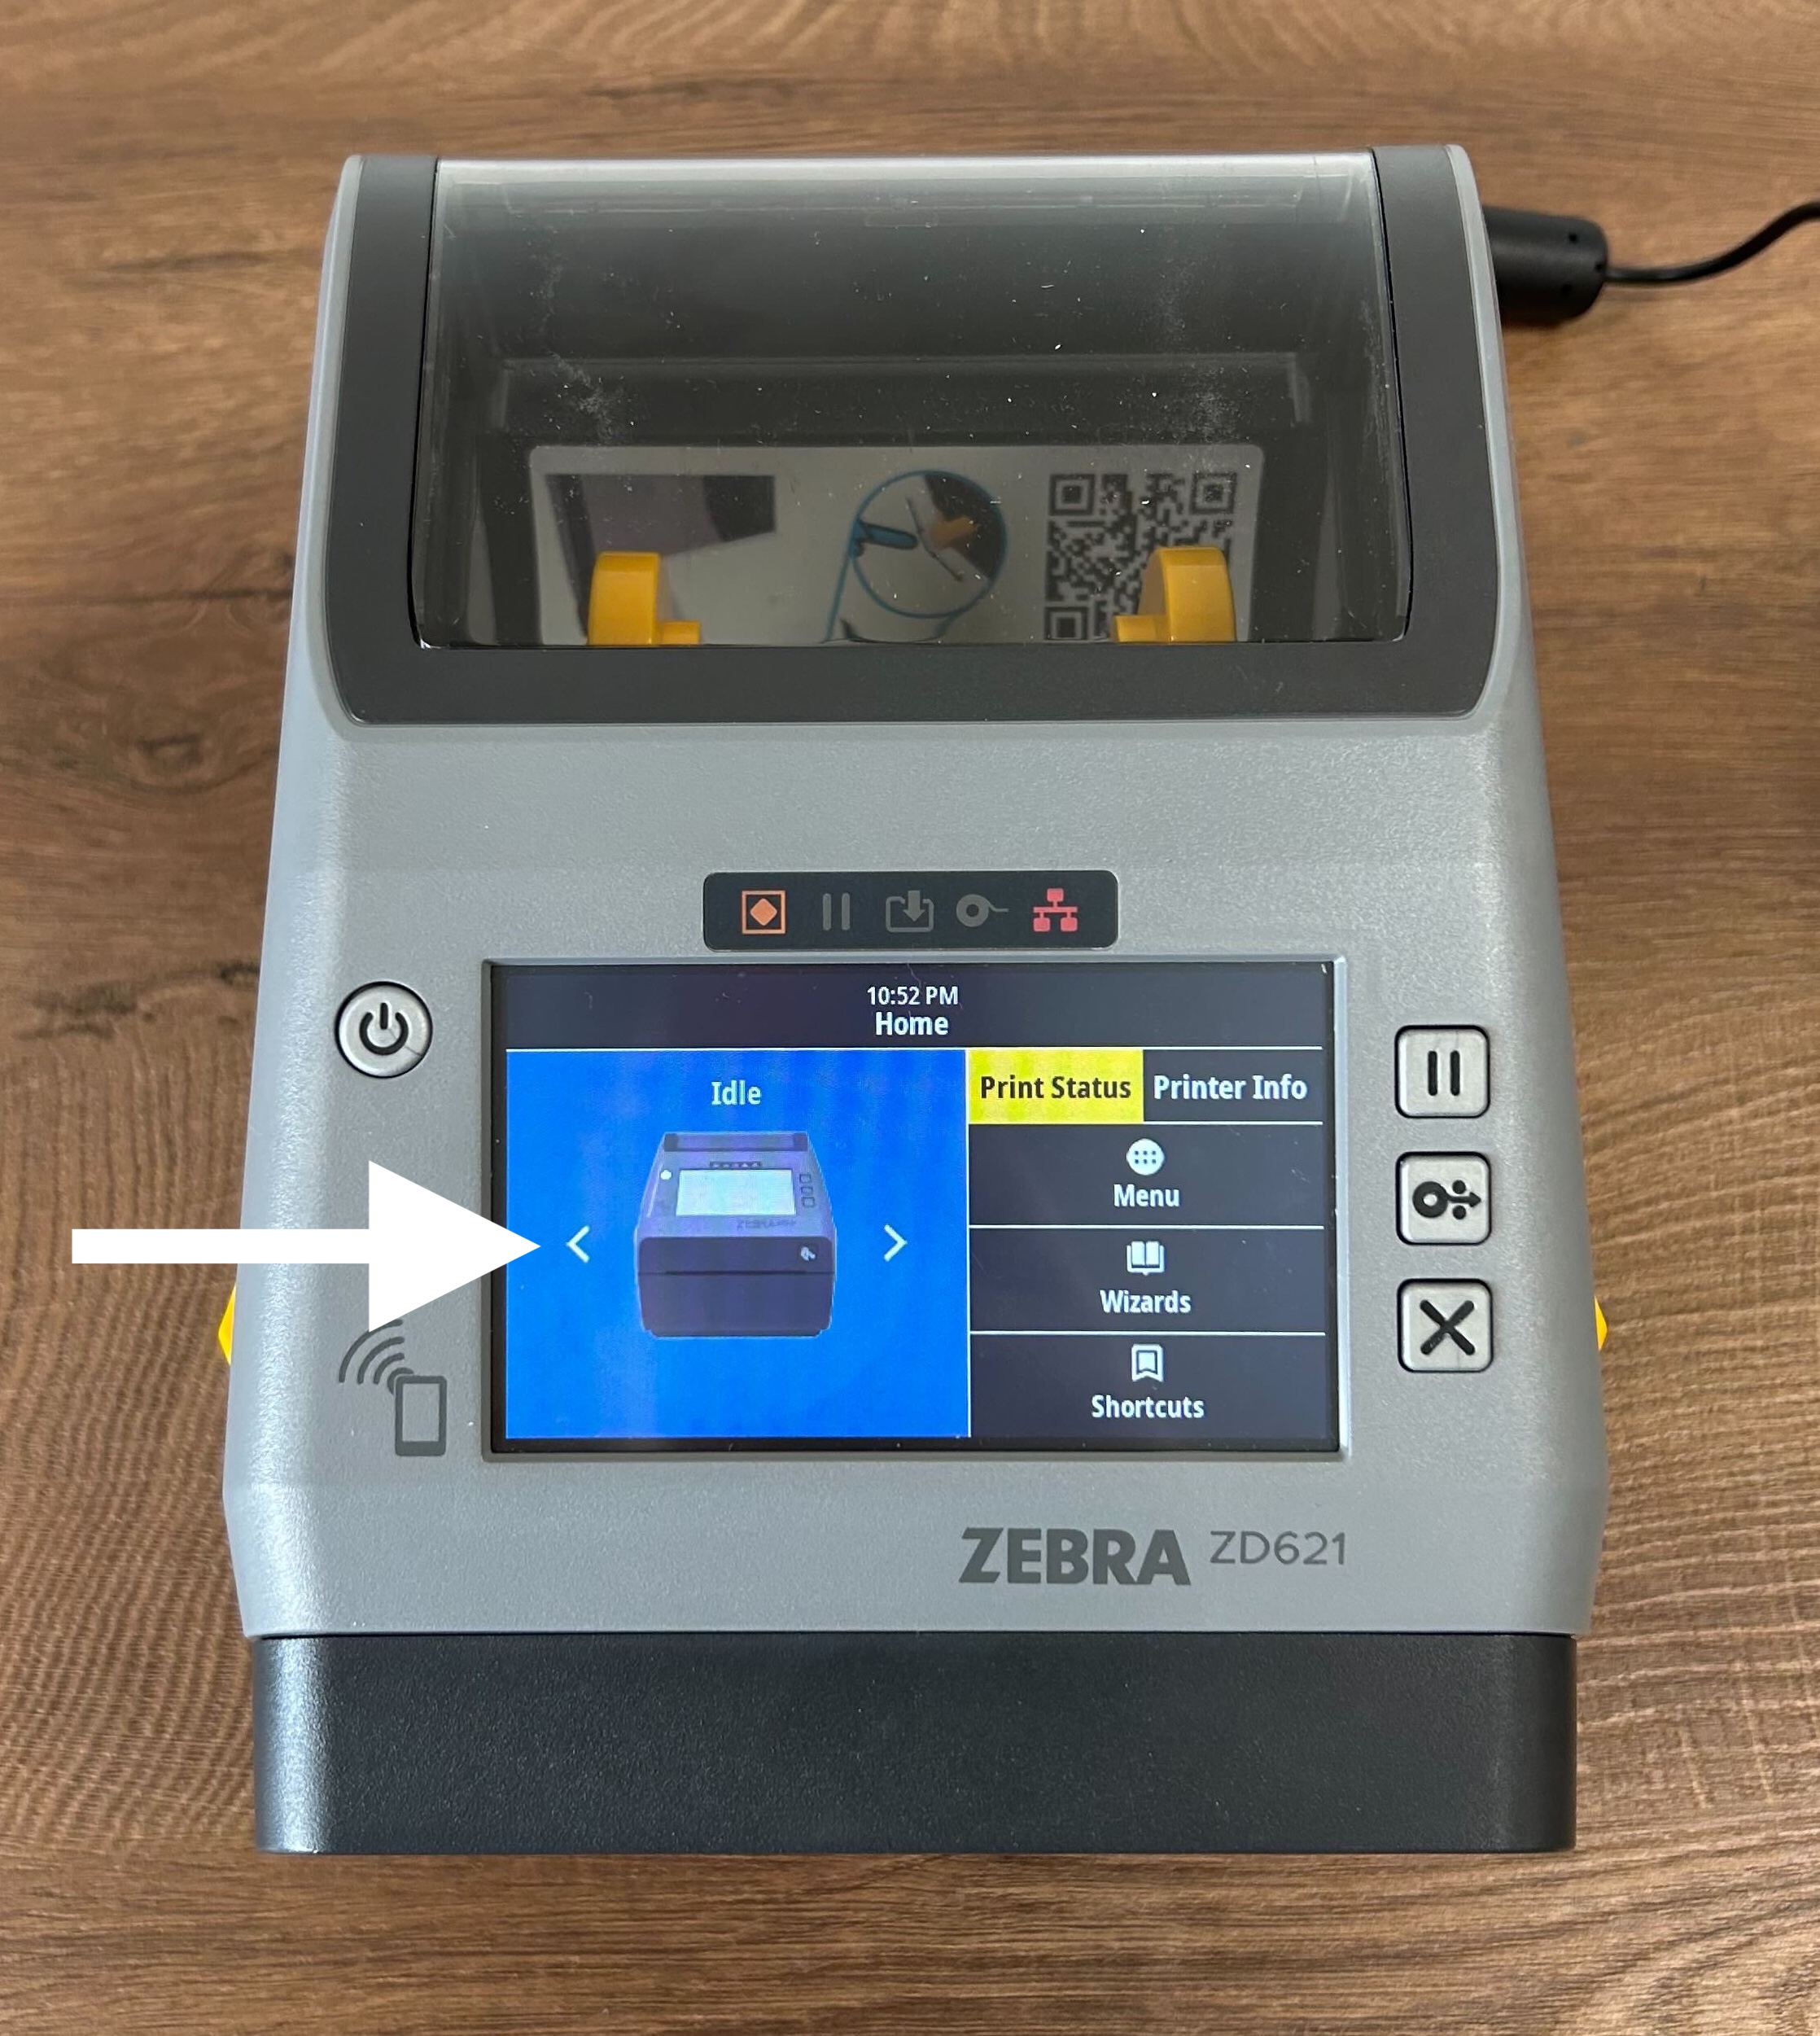
- Step 4. The system will take about 5 minutes to start up.
- When it’s ready, you’ll see the row of indicators turn green, as shown below:
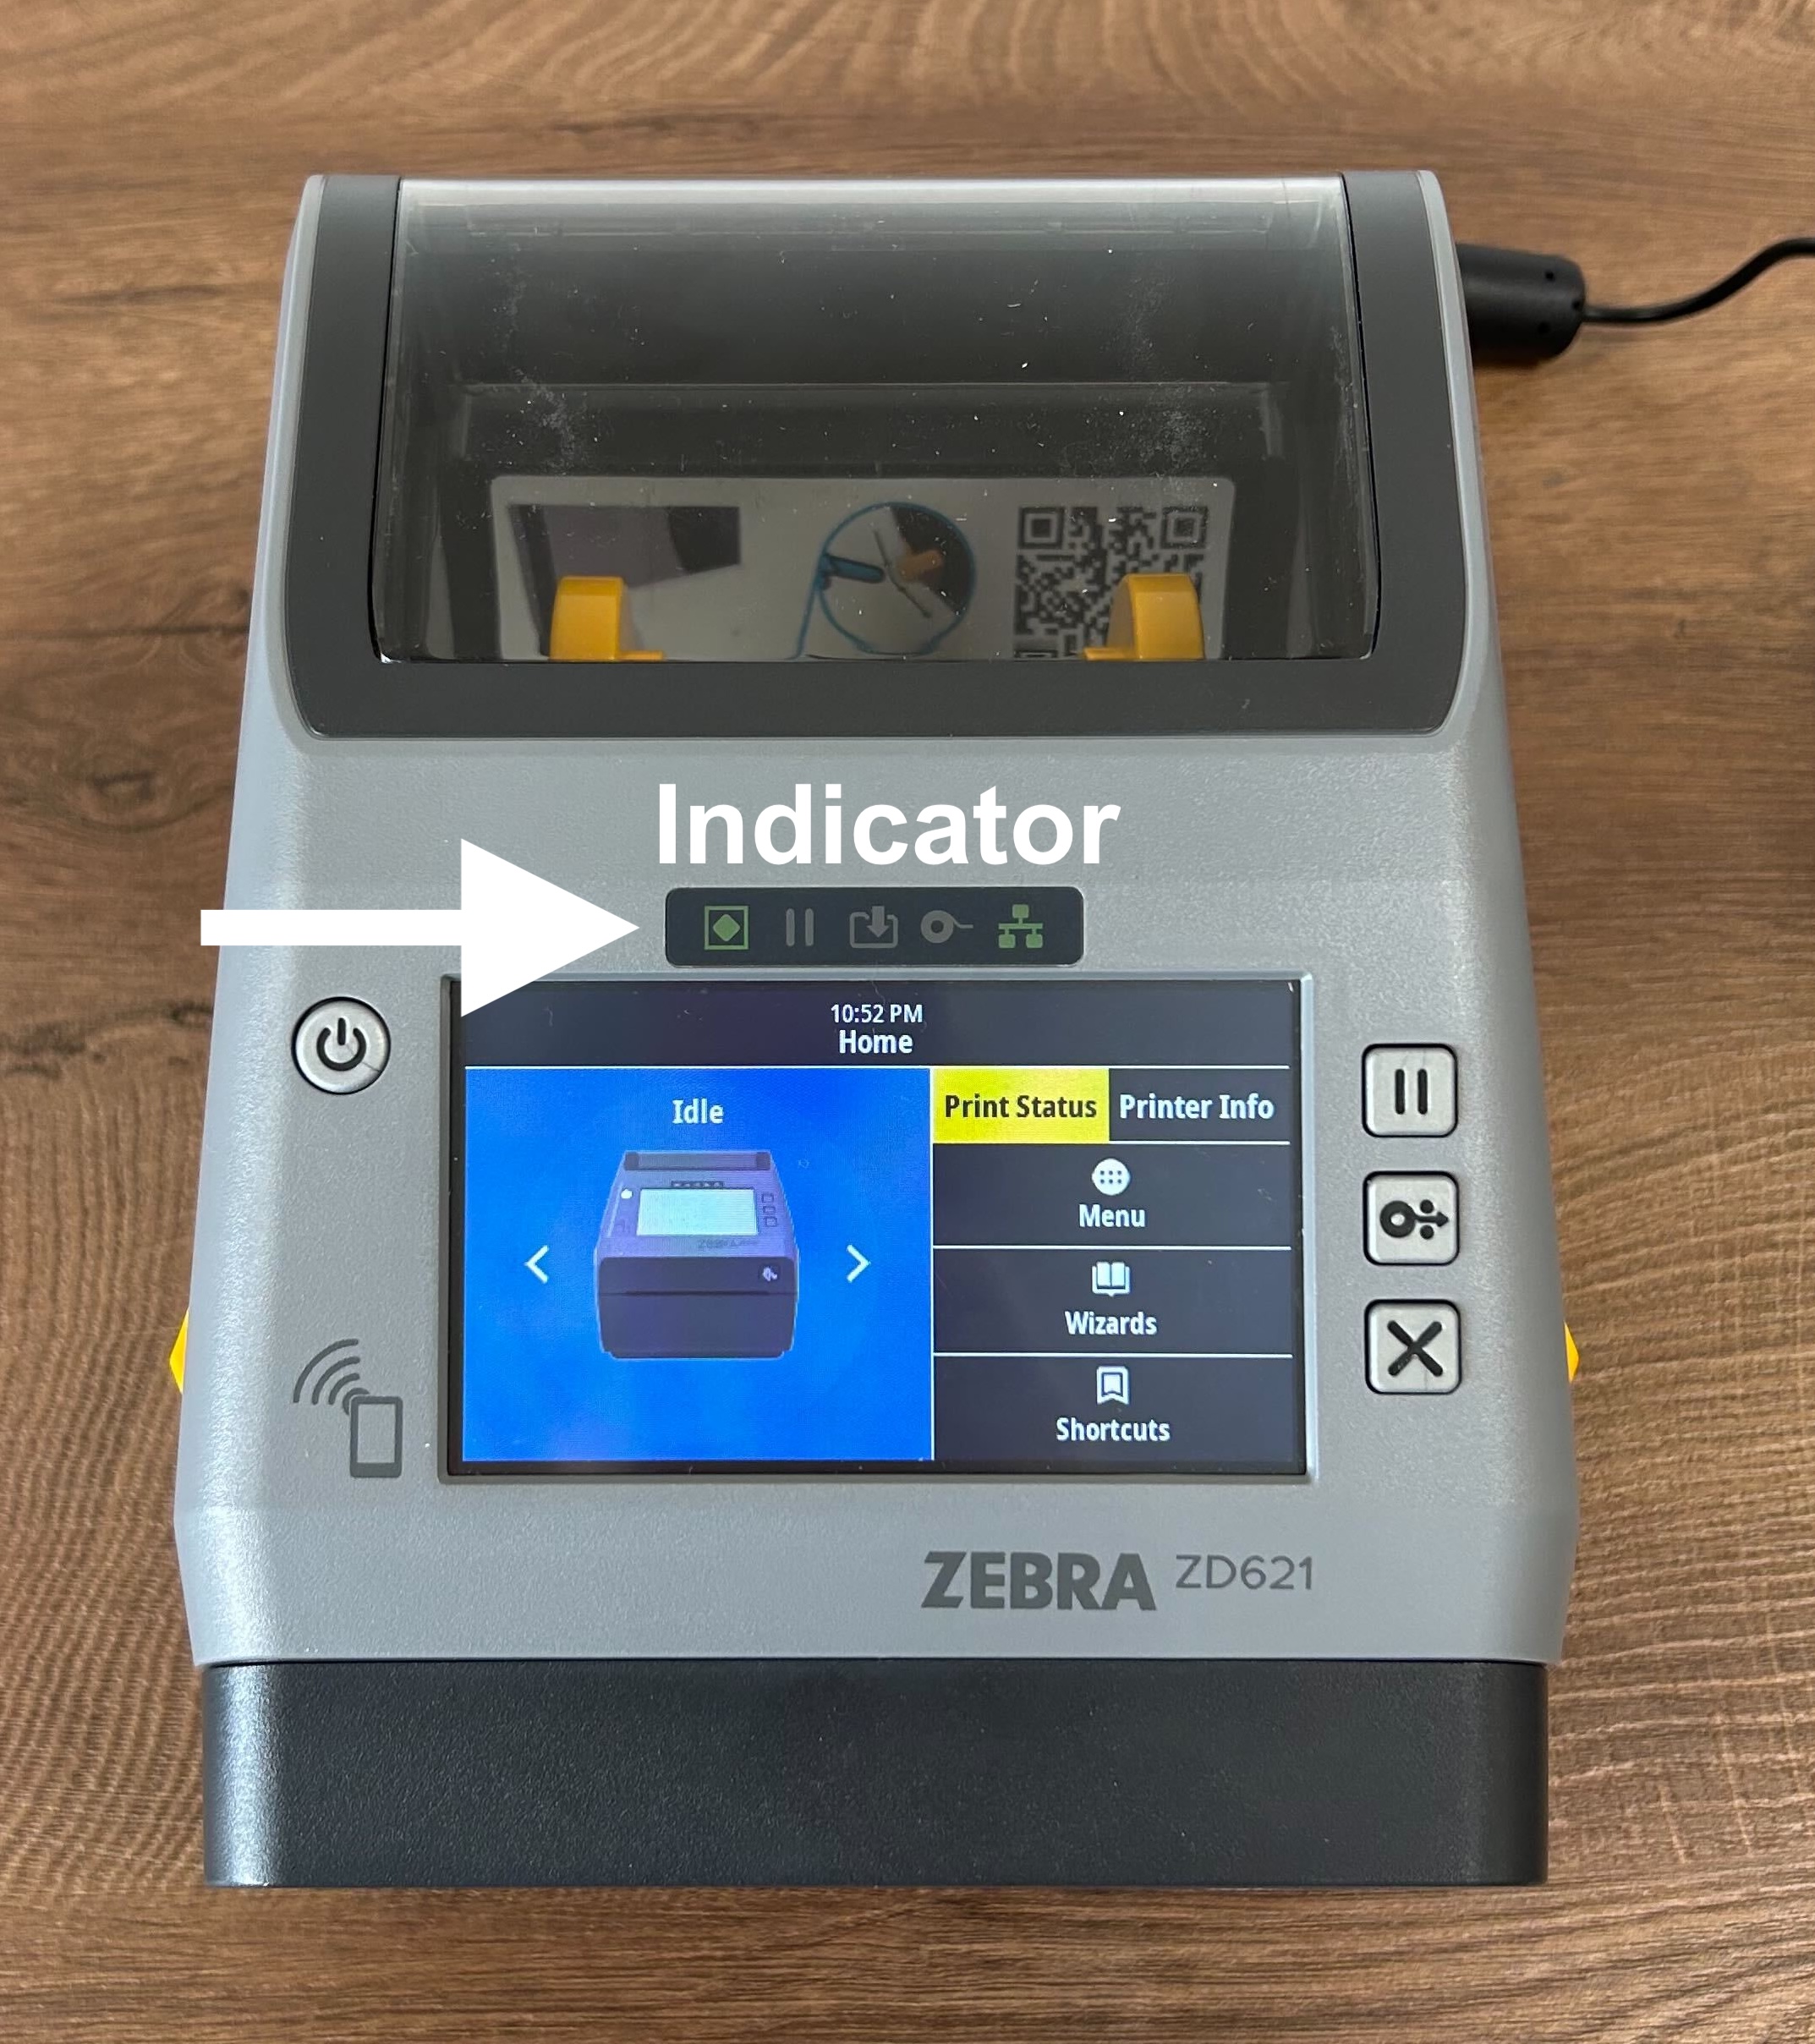
- Step 5. Repeat this process with the other (backup) printer
What’s next
Now, it’s time to connect to the check-in system.

