

Badging Express: Preparing for check-ins

In Step 2 of the set-up process, you’ll log the tablets into the check-in system, and print a test badge.
In this article:
Accessing the check-in system
| We’re assuming here that you’ve already connected to power and internet. |
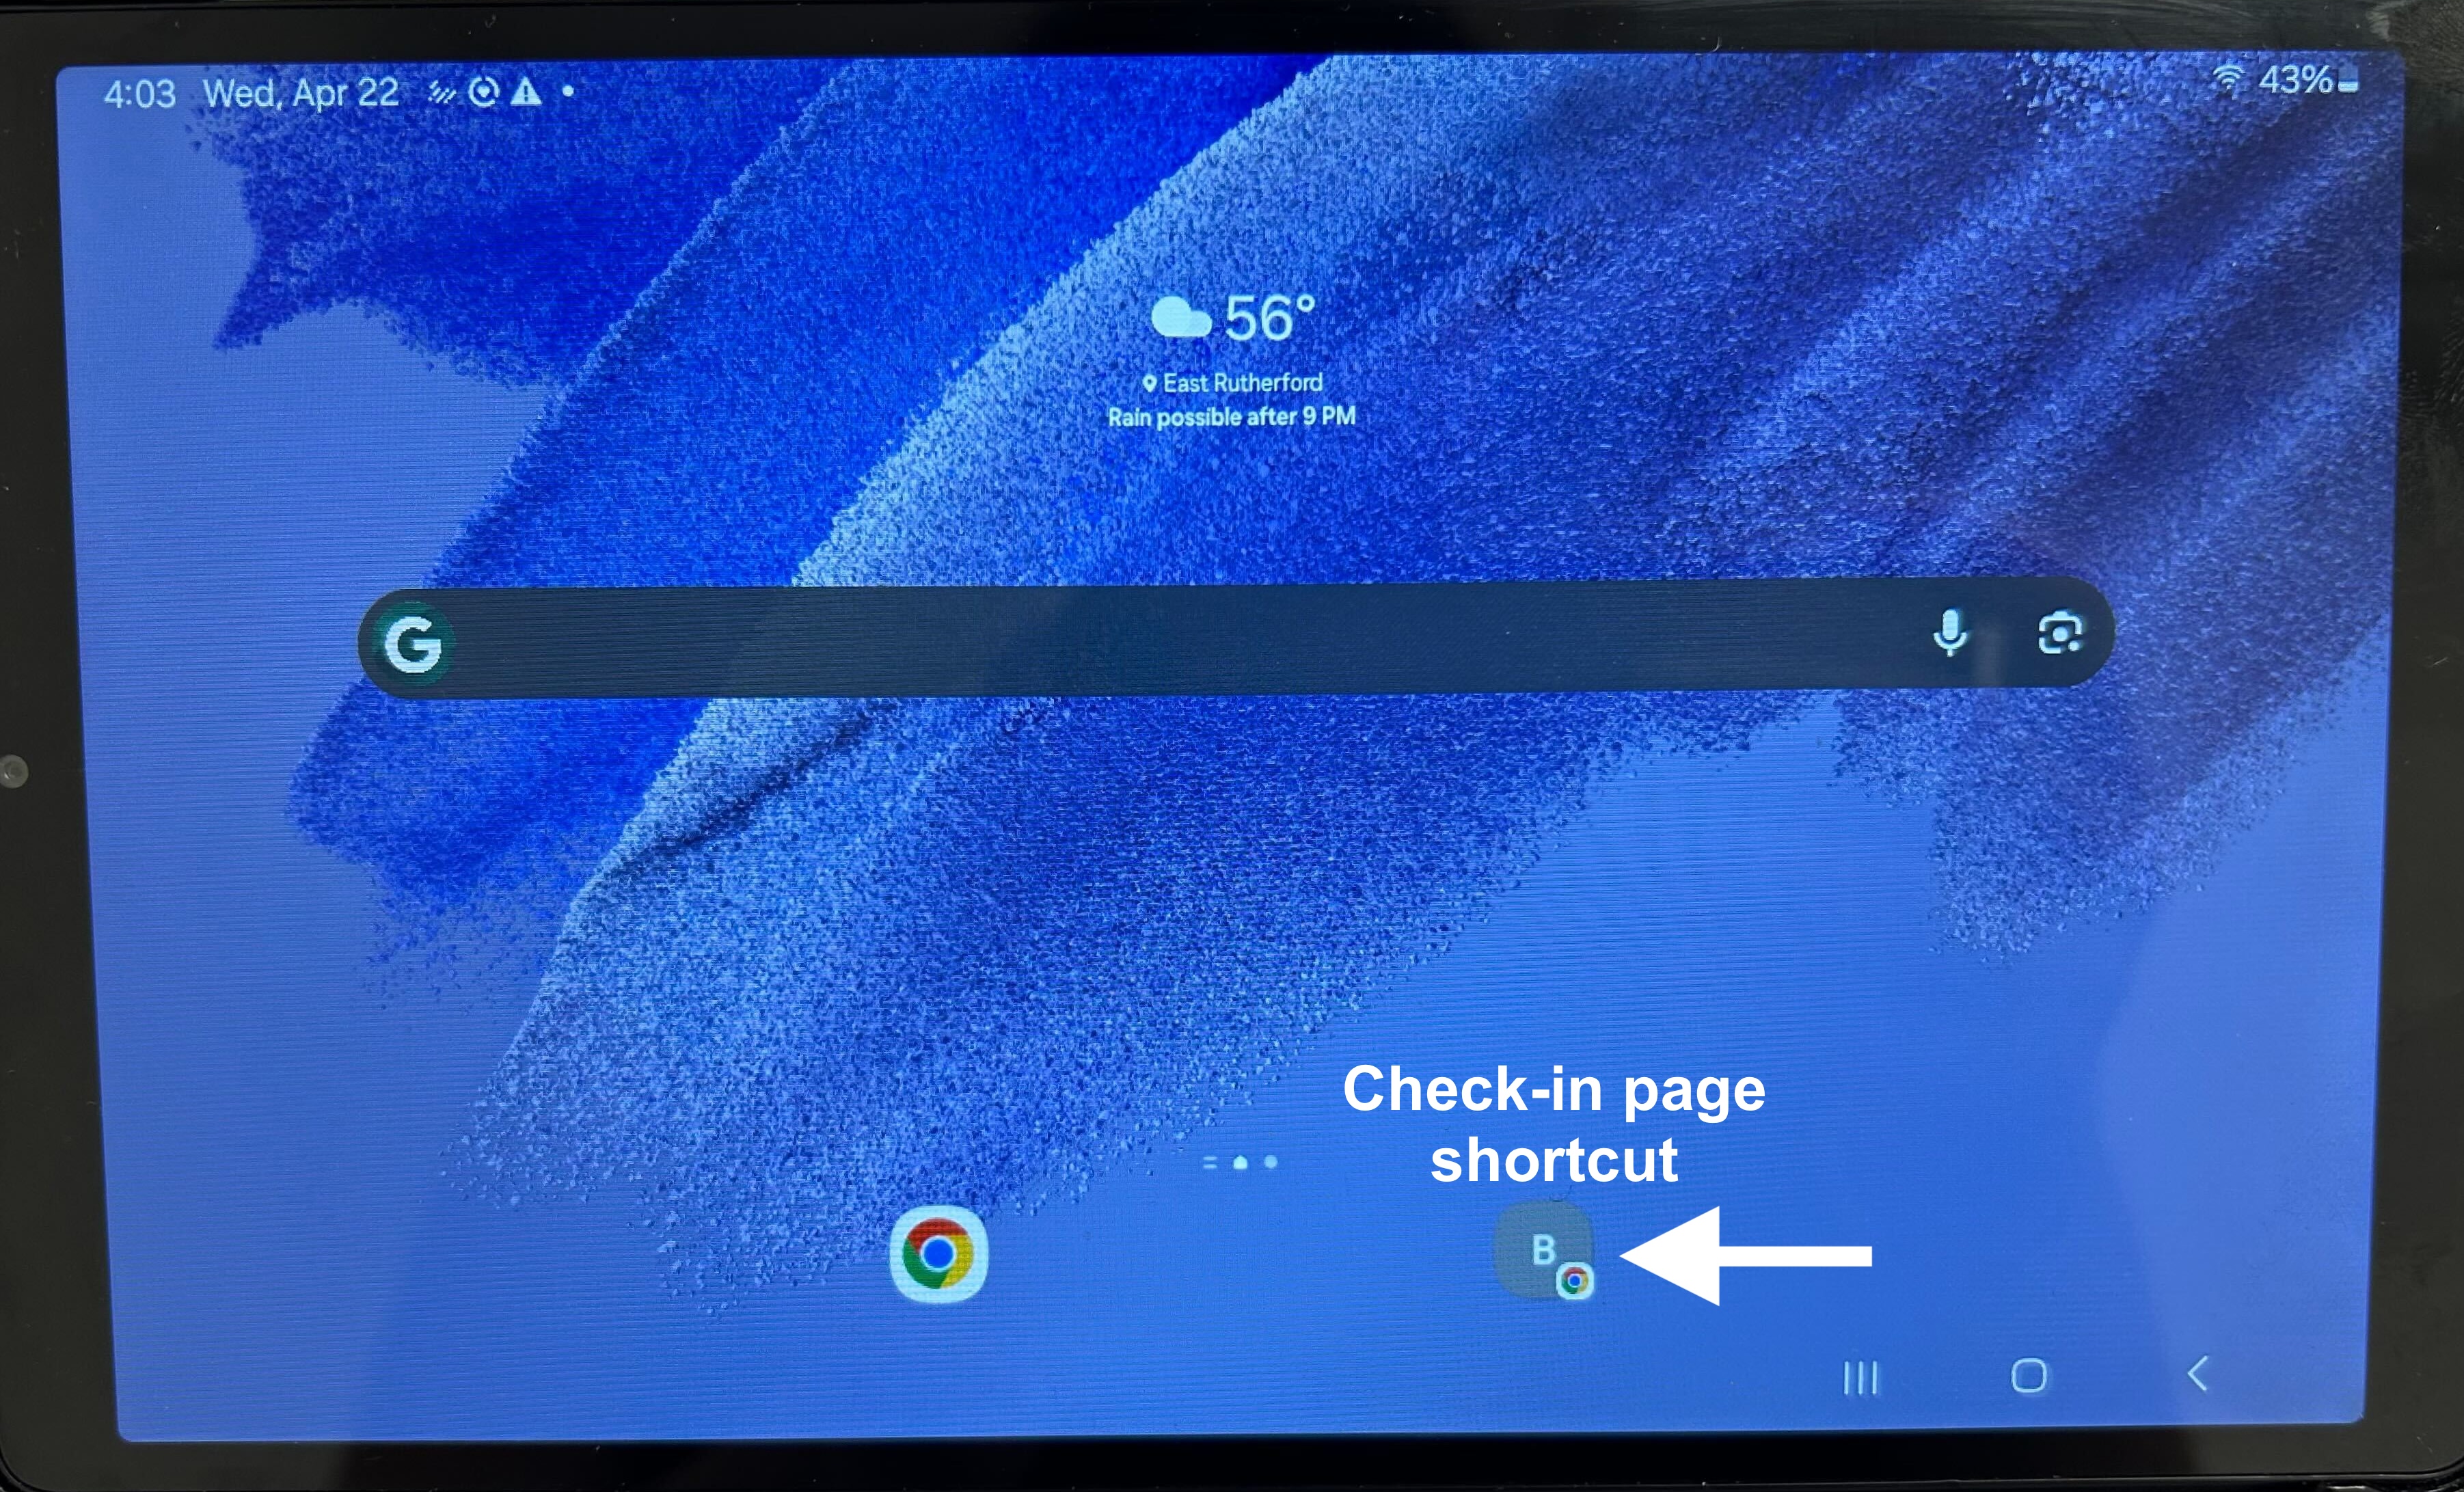
- Step 1. On either tablet, locate the saved shortcut to the check-in page. Tap on it:
-
If you don’t see this shortcut on your tablet, open the web browser and enter the following into the URL bar: 192.168.8.2 - Step 2. Repeat this process with the other tablet.
What you should see
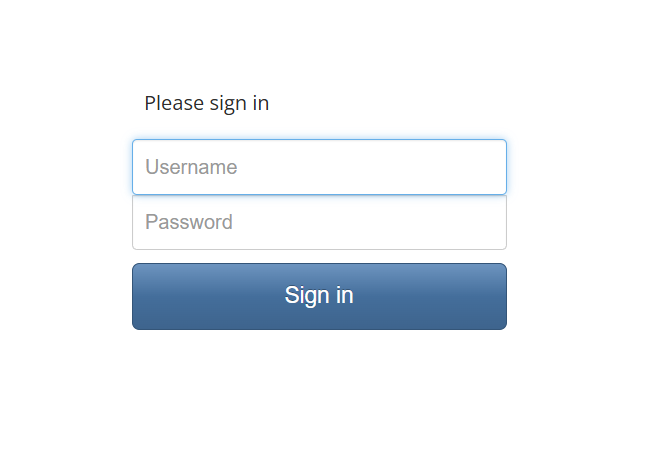
Both tablets should now be displaying the MeetMax login form:
Logging in
- Step 1. Choose either tablet, and enter these login credentials:
- • Username: clerk01
- • Password: clerk01
- Step 2. Enter these login credentials on the other tablet:
- • Username: clerk02
- • Password: clerk02
What you should see
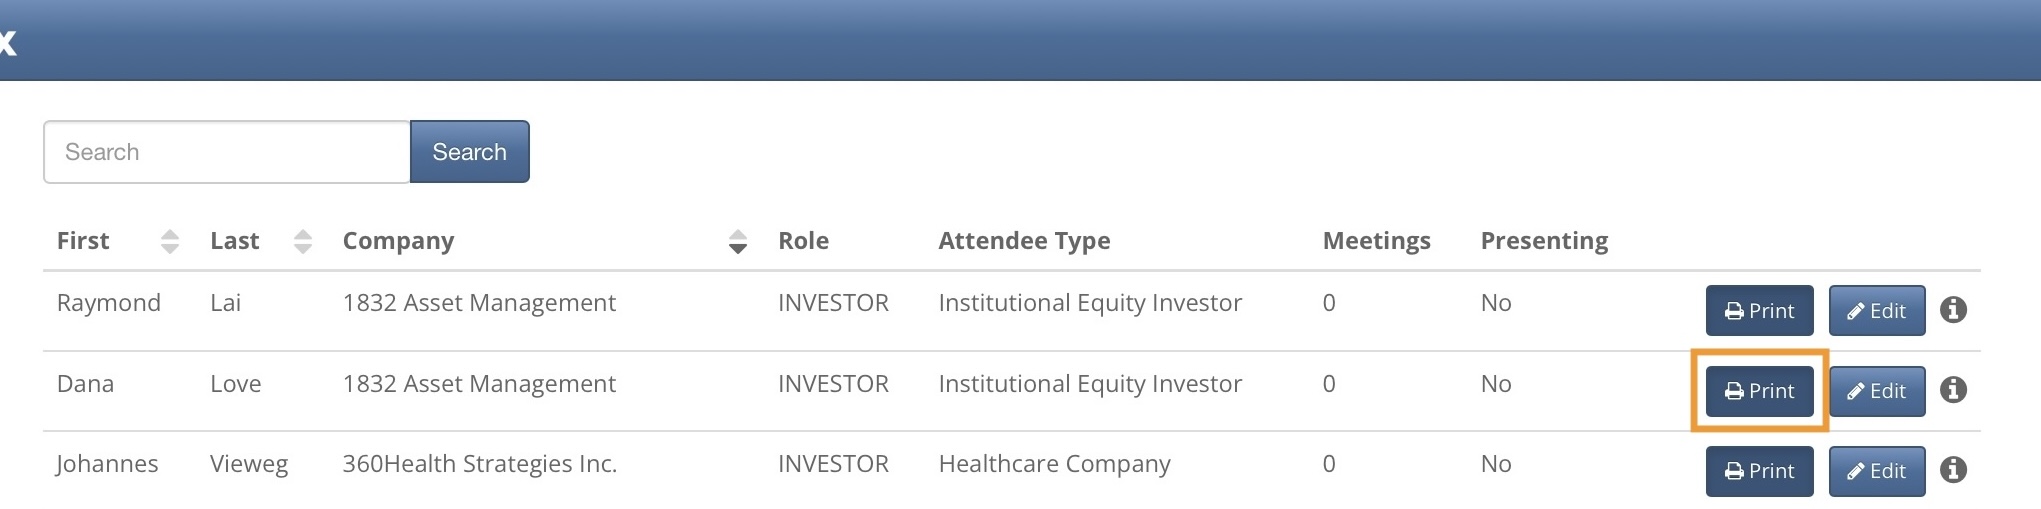
Once they’re logged in, each tablet should display your Attendee List. Each person should have a Print button:
Loading the badge stock
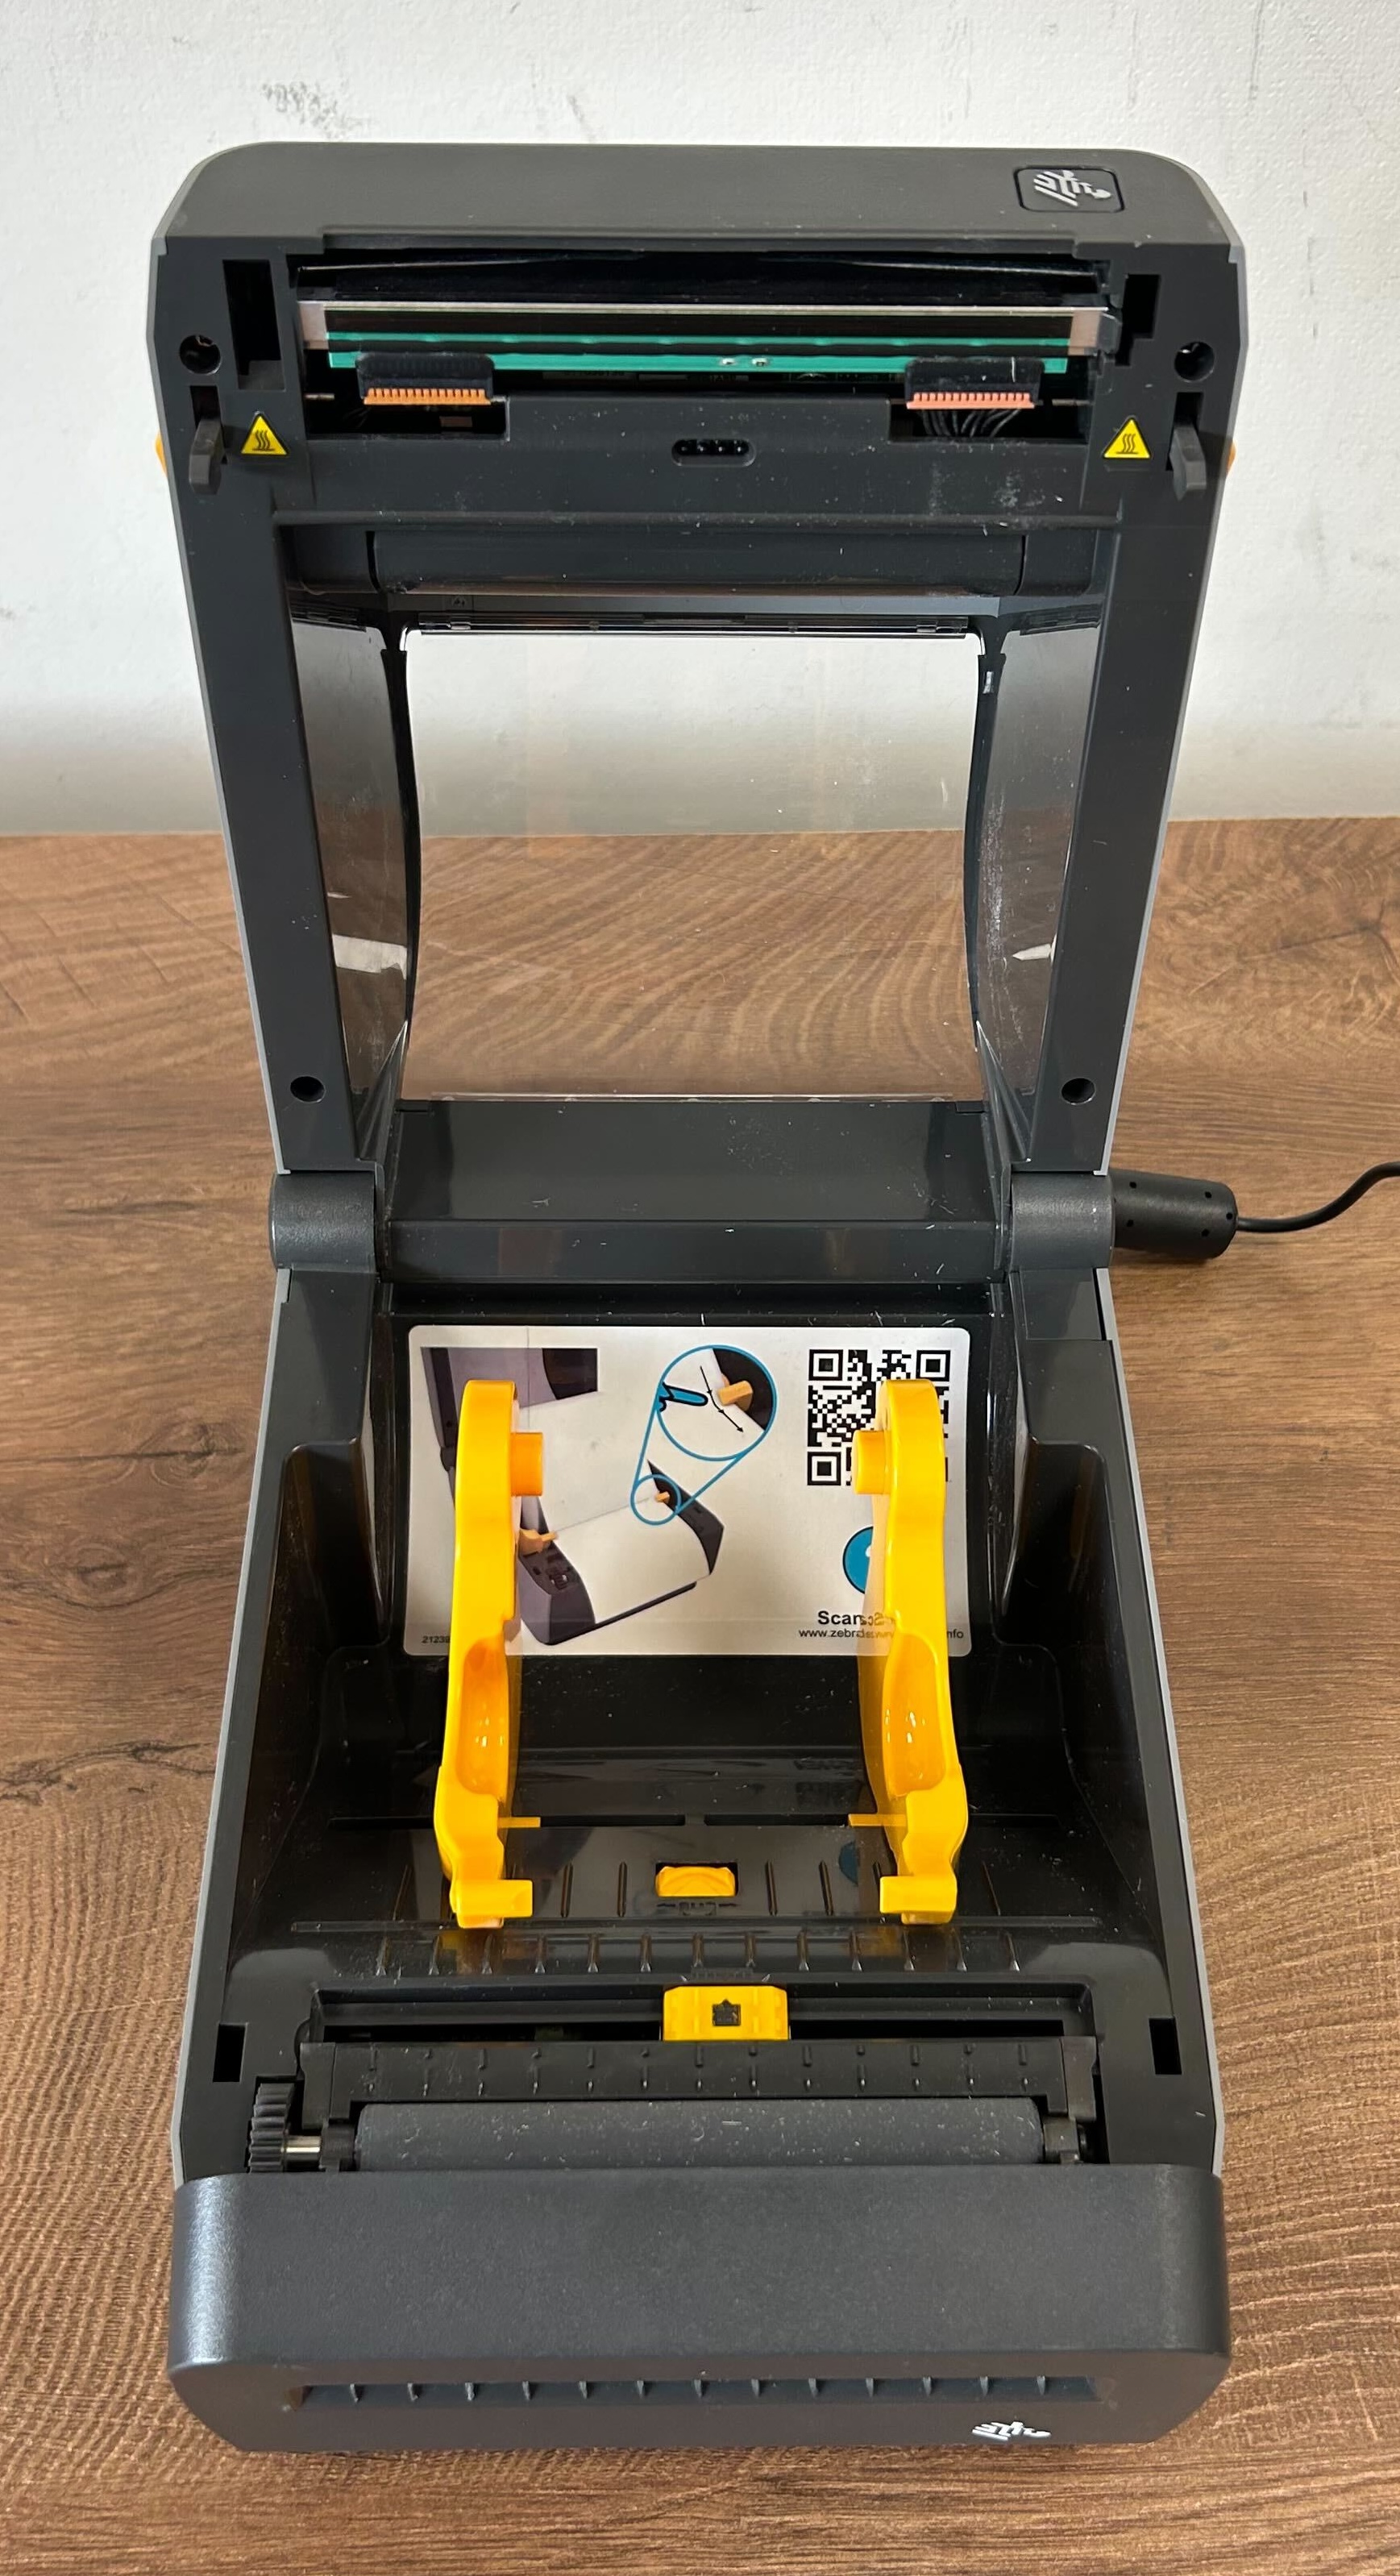
- Step 1. On either printer, locate the yellow tabs on each side of the unit.
- Pull the tabs toward you to open the top of the printer:
- Step 2. Check the back of the badge stock. You’ll see a marker showing the direction to load it into the printer.
- Step 3. Rotate the yellow wheel to expand or retract the yellow prongs, as shown below.
- Then install the badge stock between them:
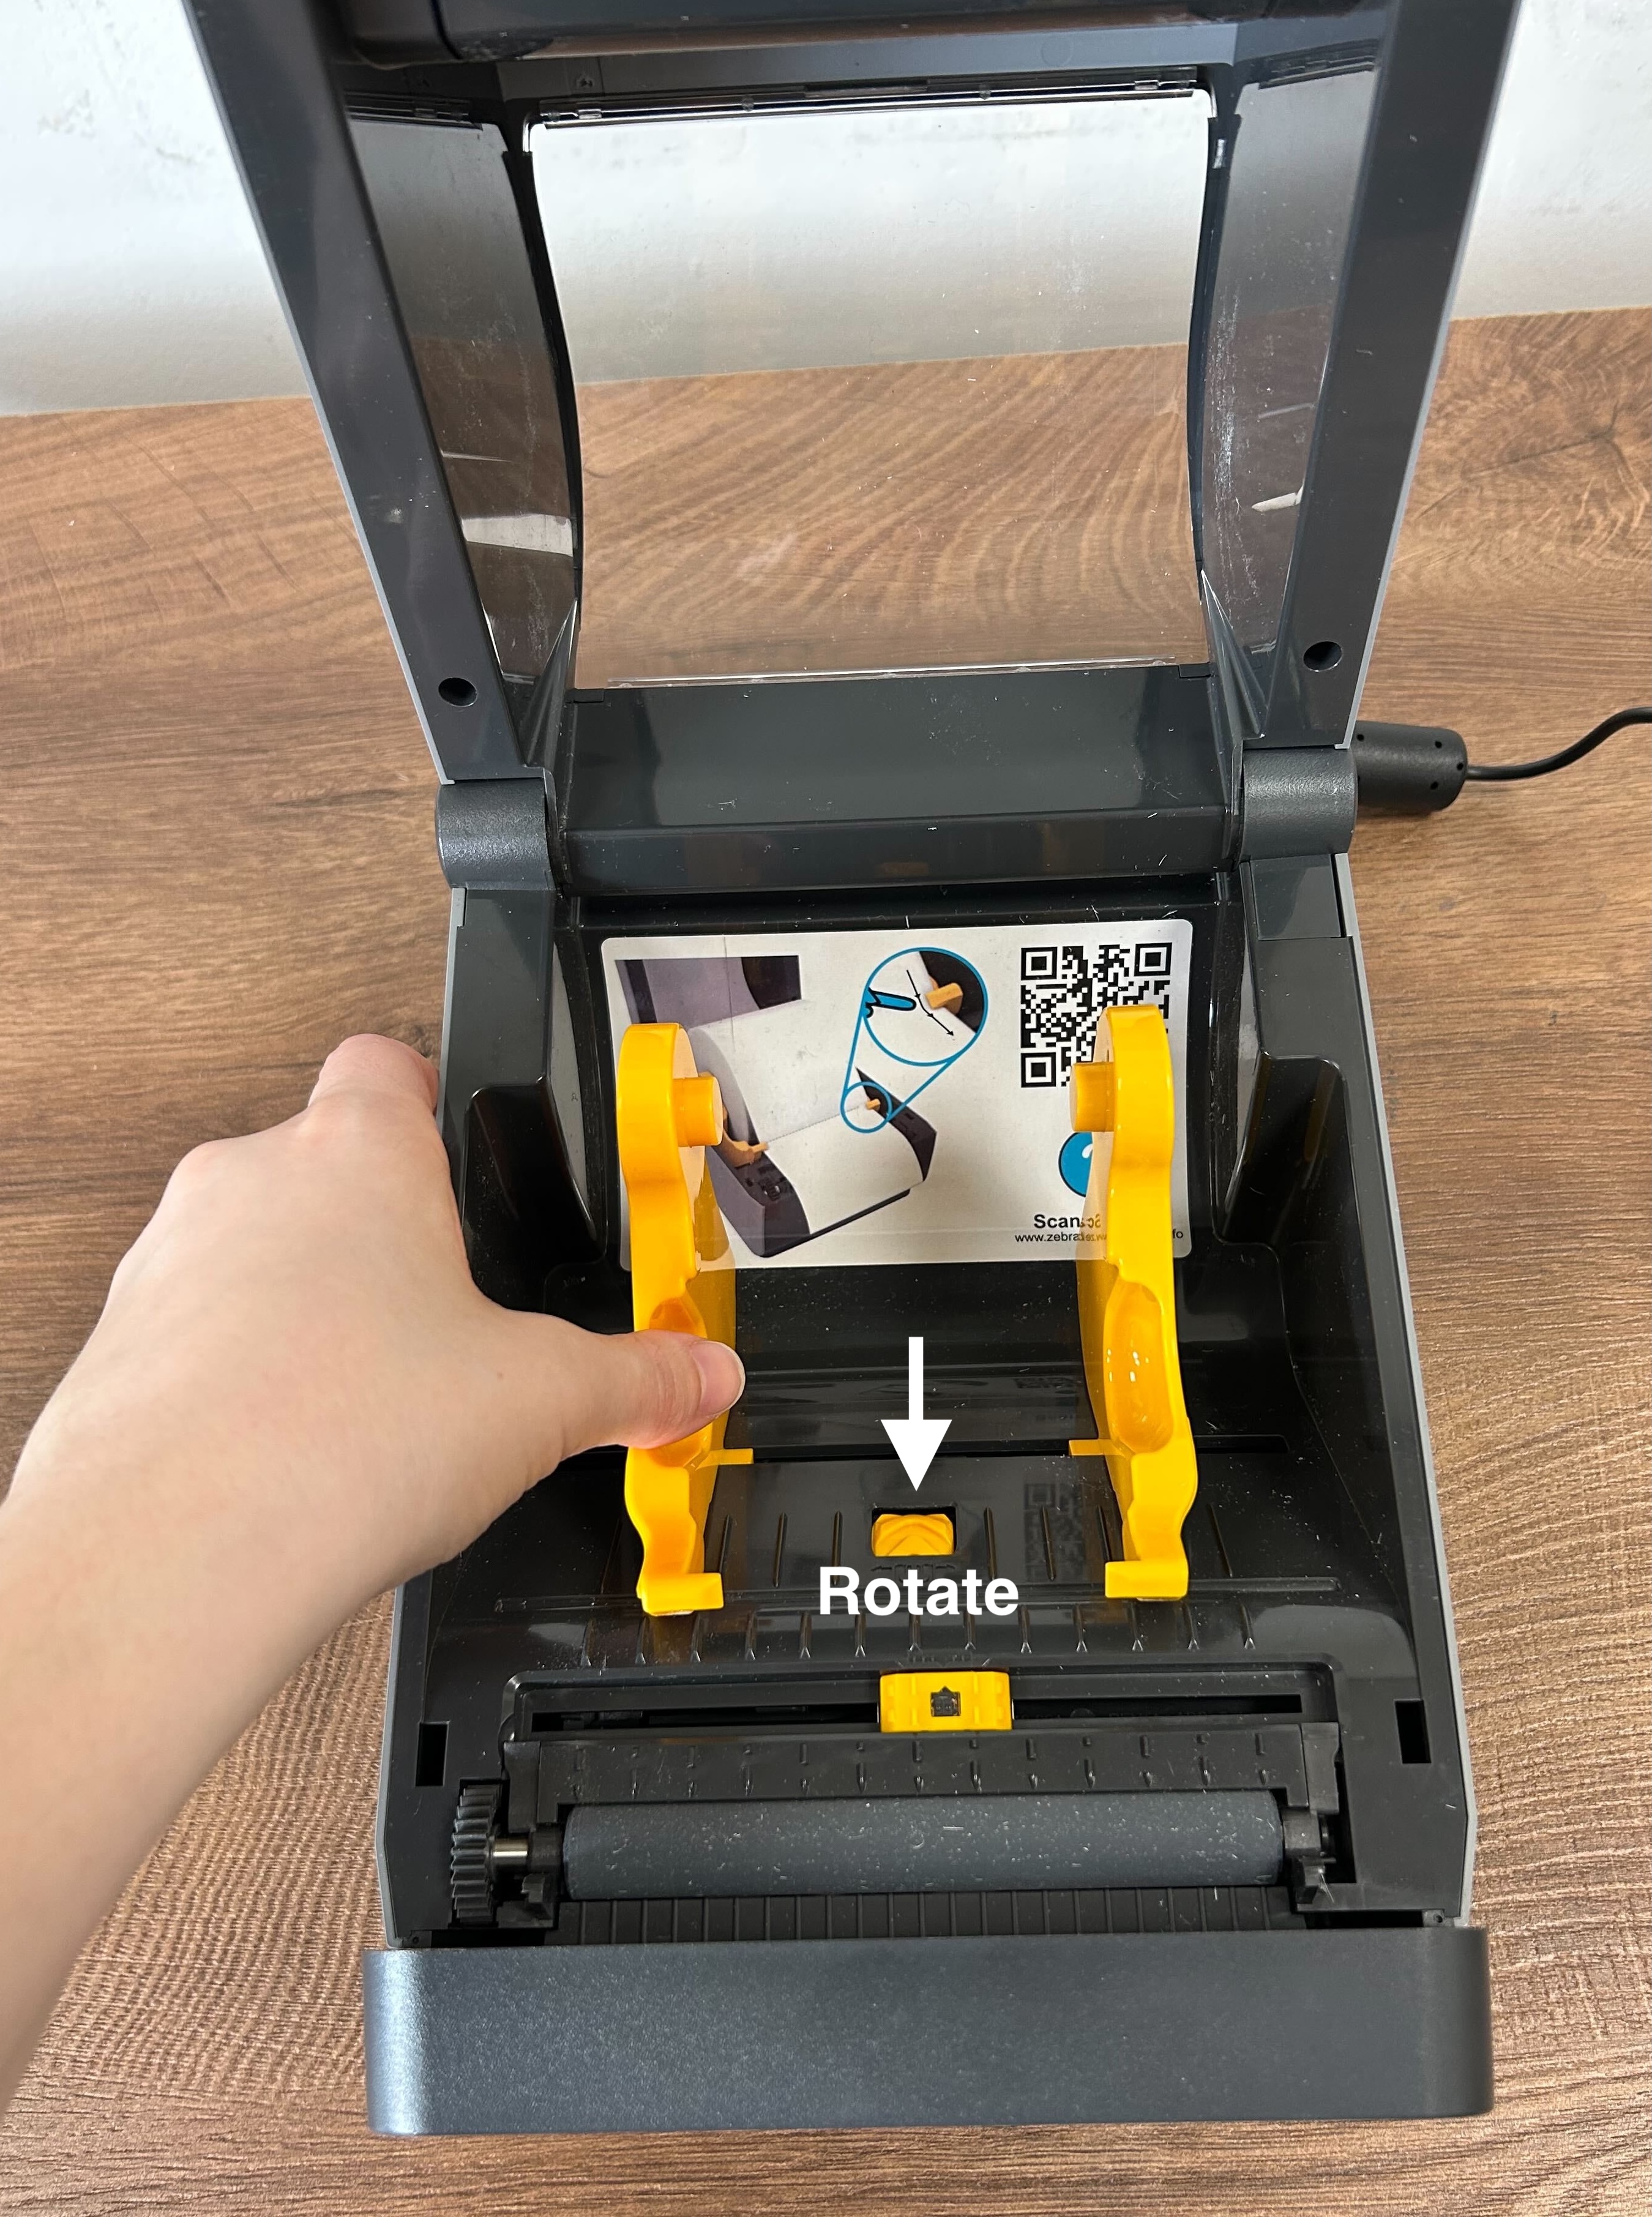
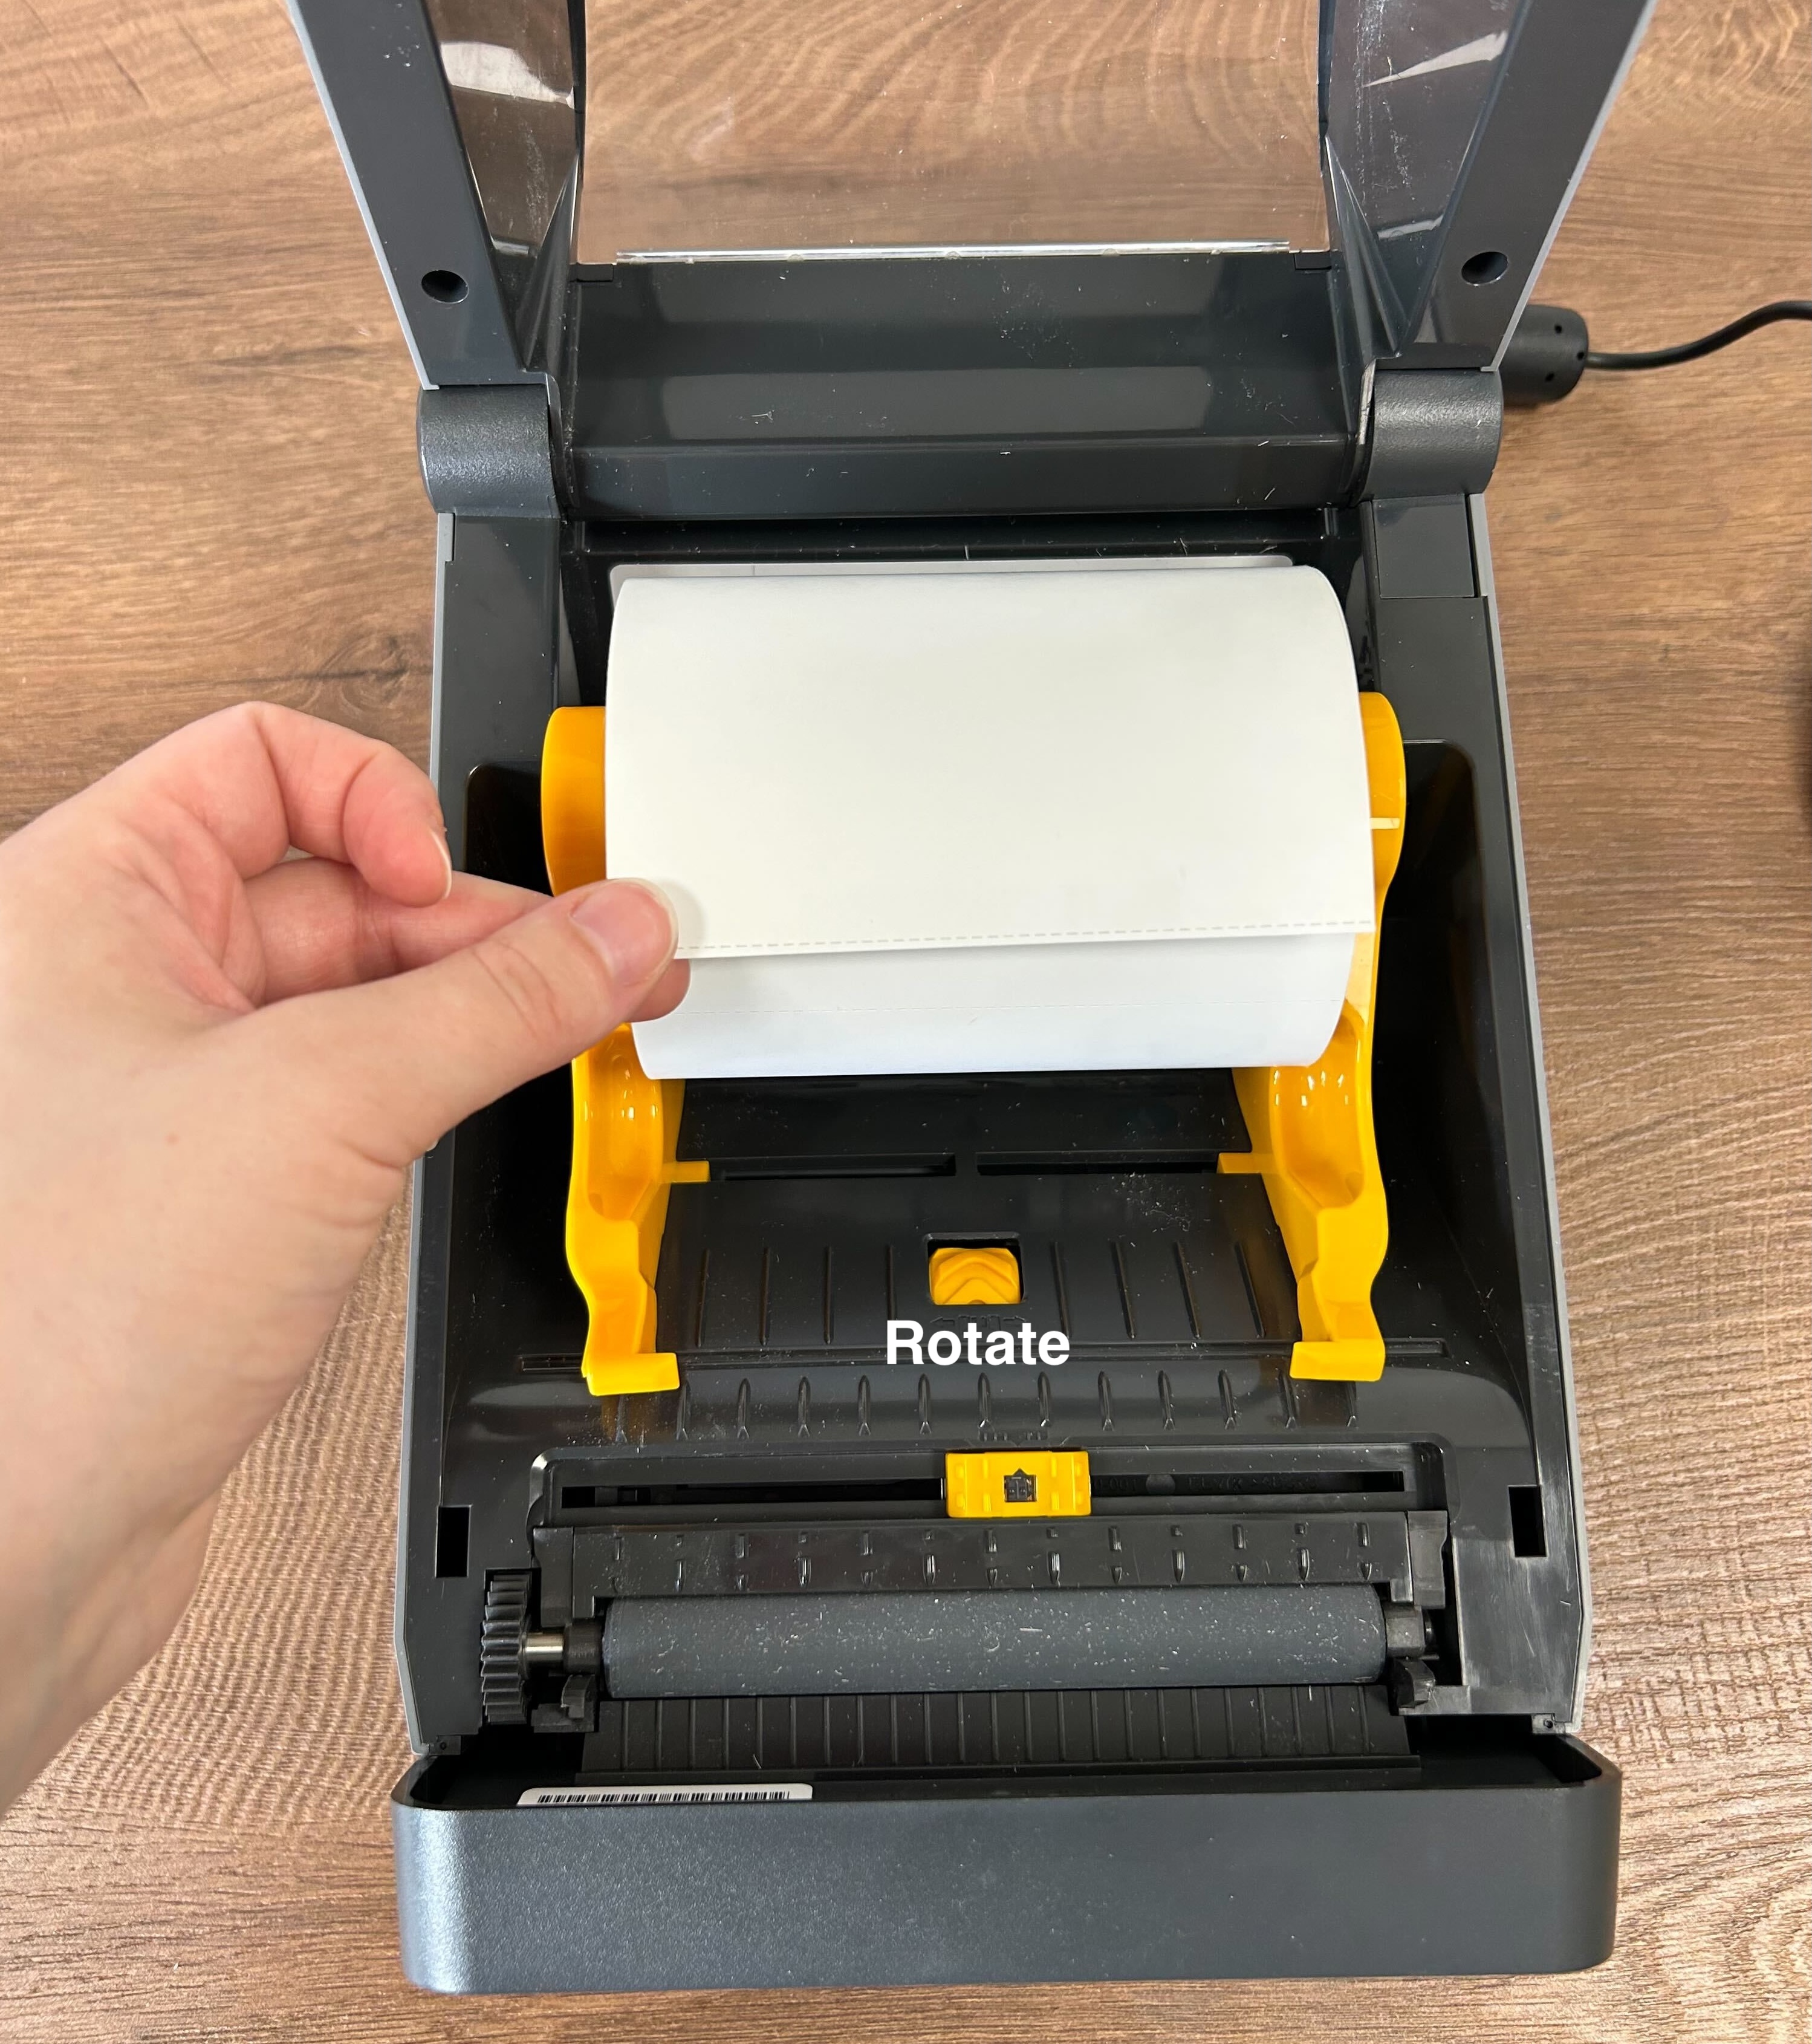
- Step 4. Feed the badge stock under the yellow guides, as shown below.
- Now, feed the badge stock through the opening at the bottom front edge of the printer. Pull the end of the stock through as shown below:
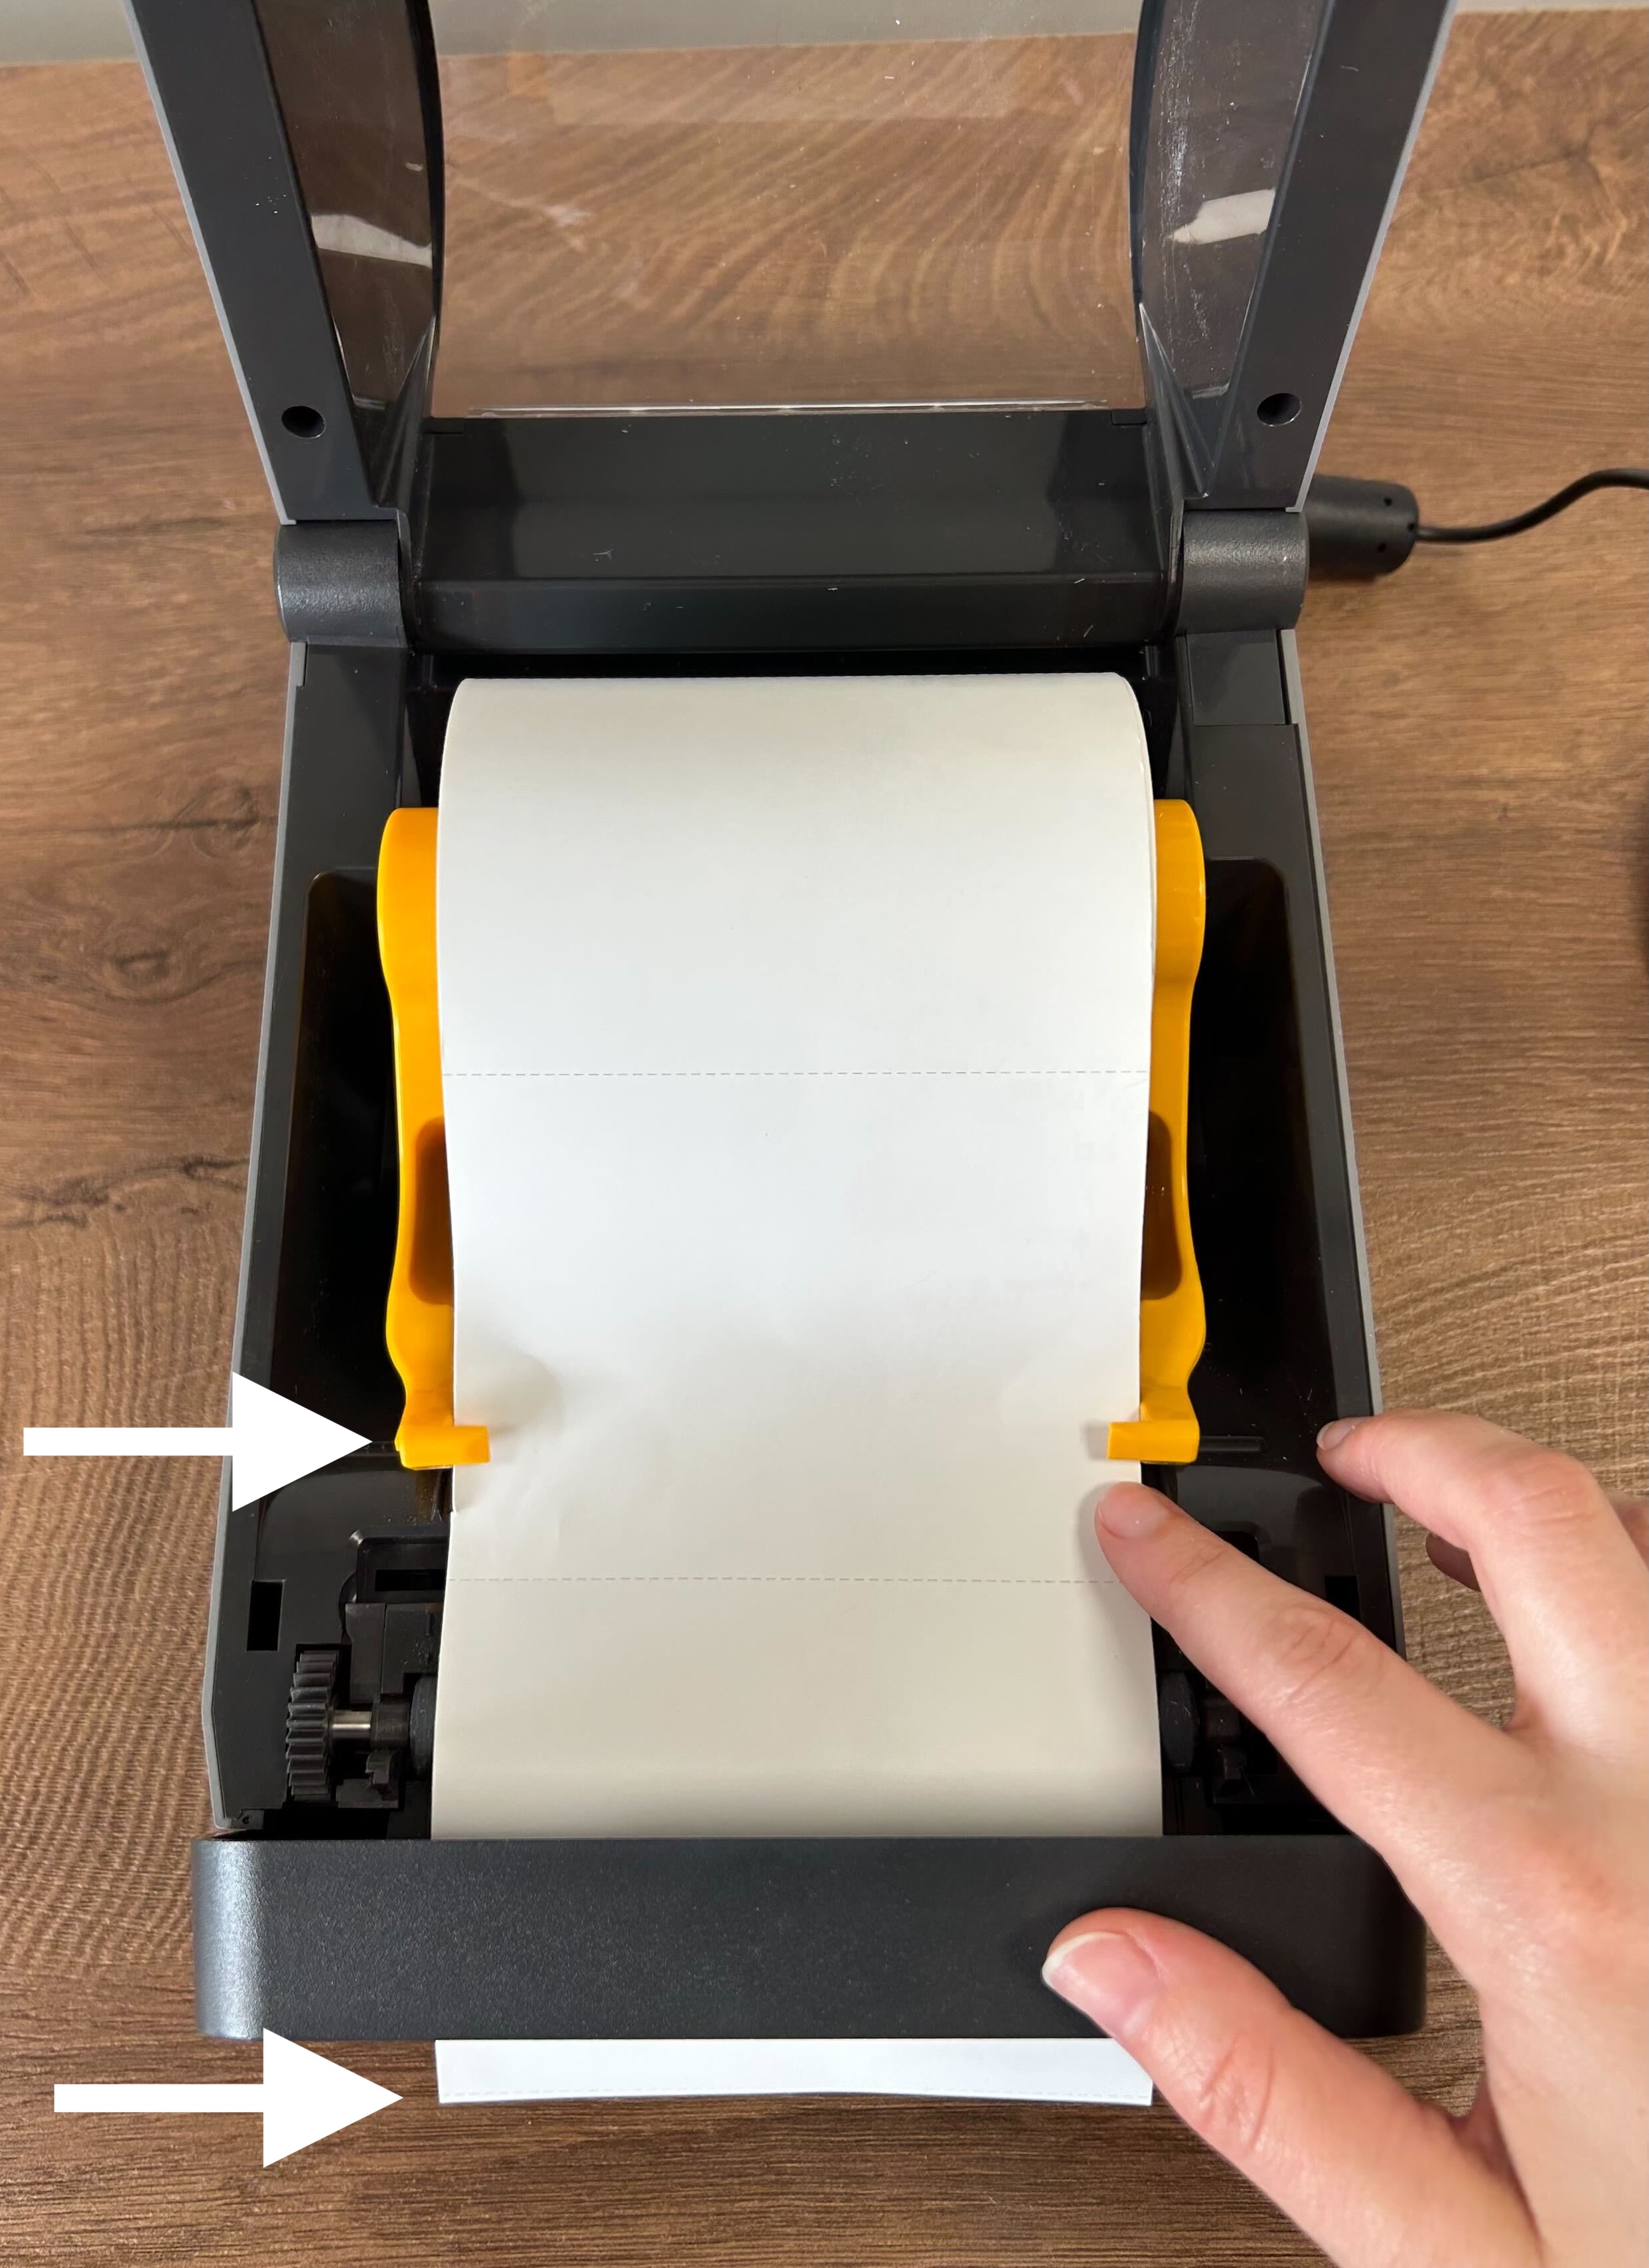
- Step 5. Close the printer lid firmly.
- Step 6. Next, press the Pause and X buttons at the same time. This causes the printer to calibrate.
- The printer will feed out a length of badge stock, then cut it. You can discard the cut-off stock.
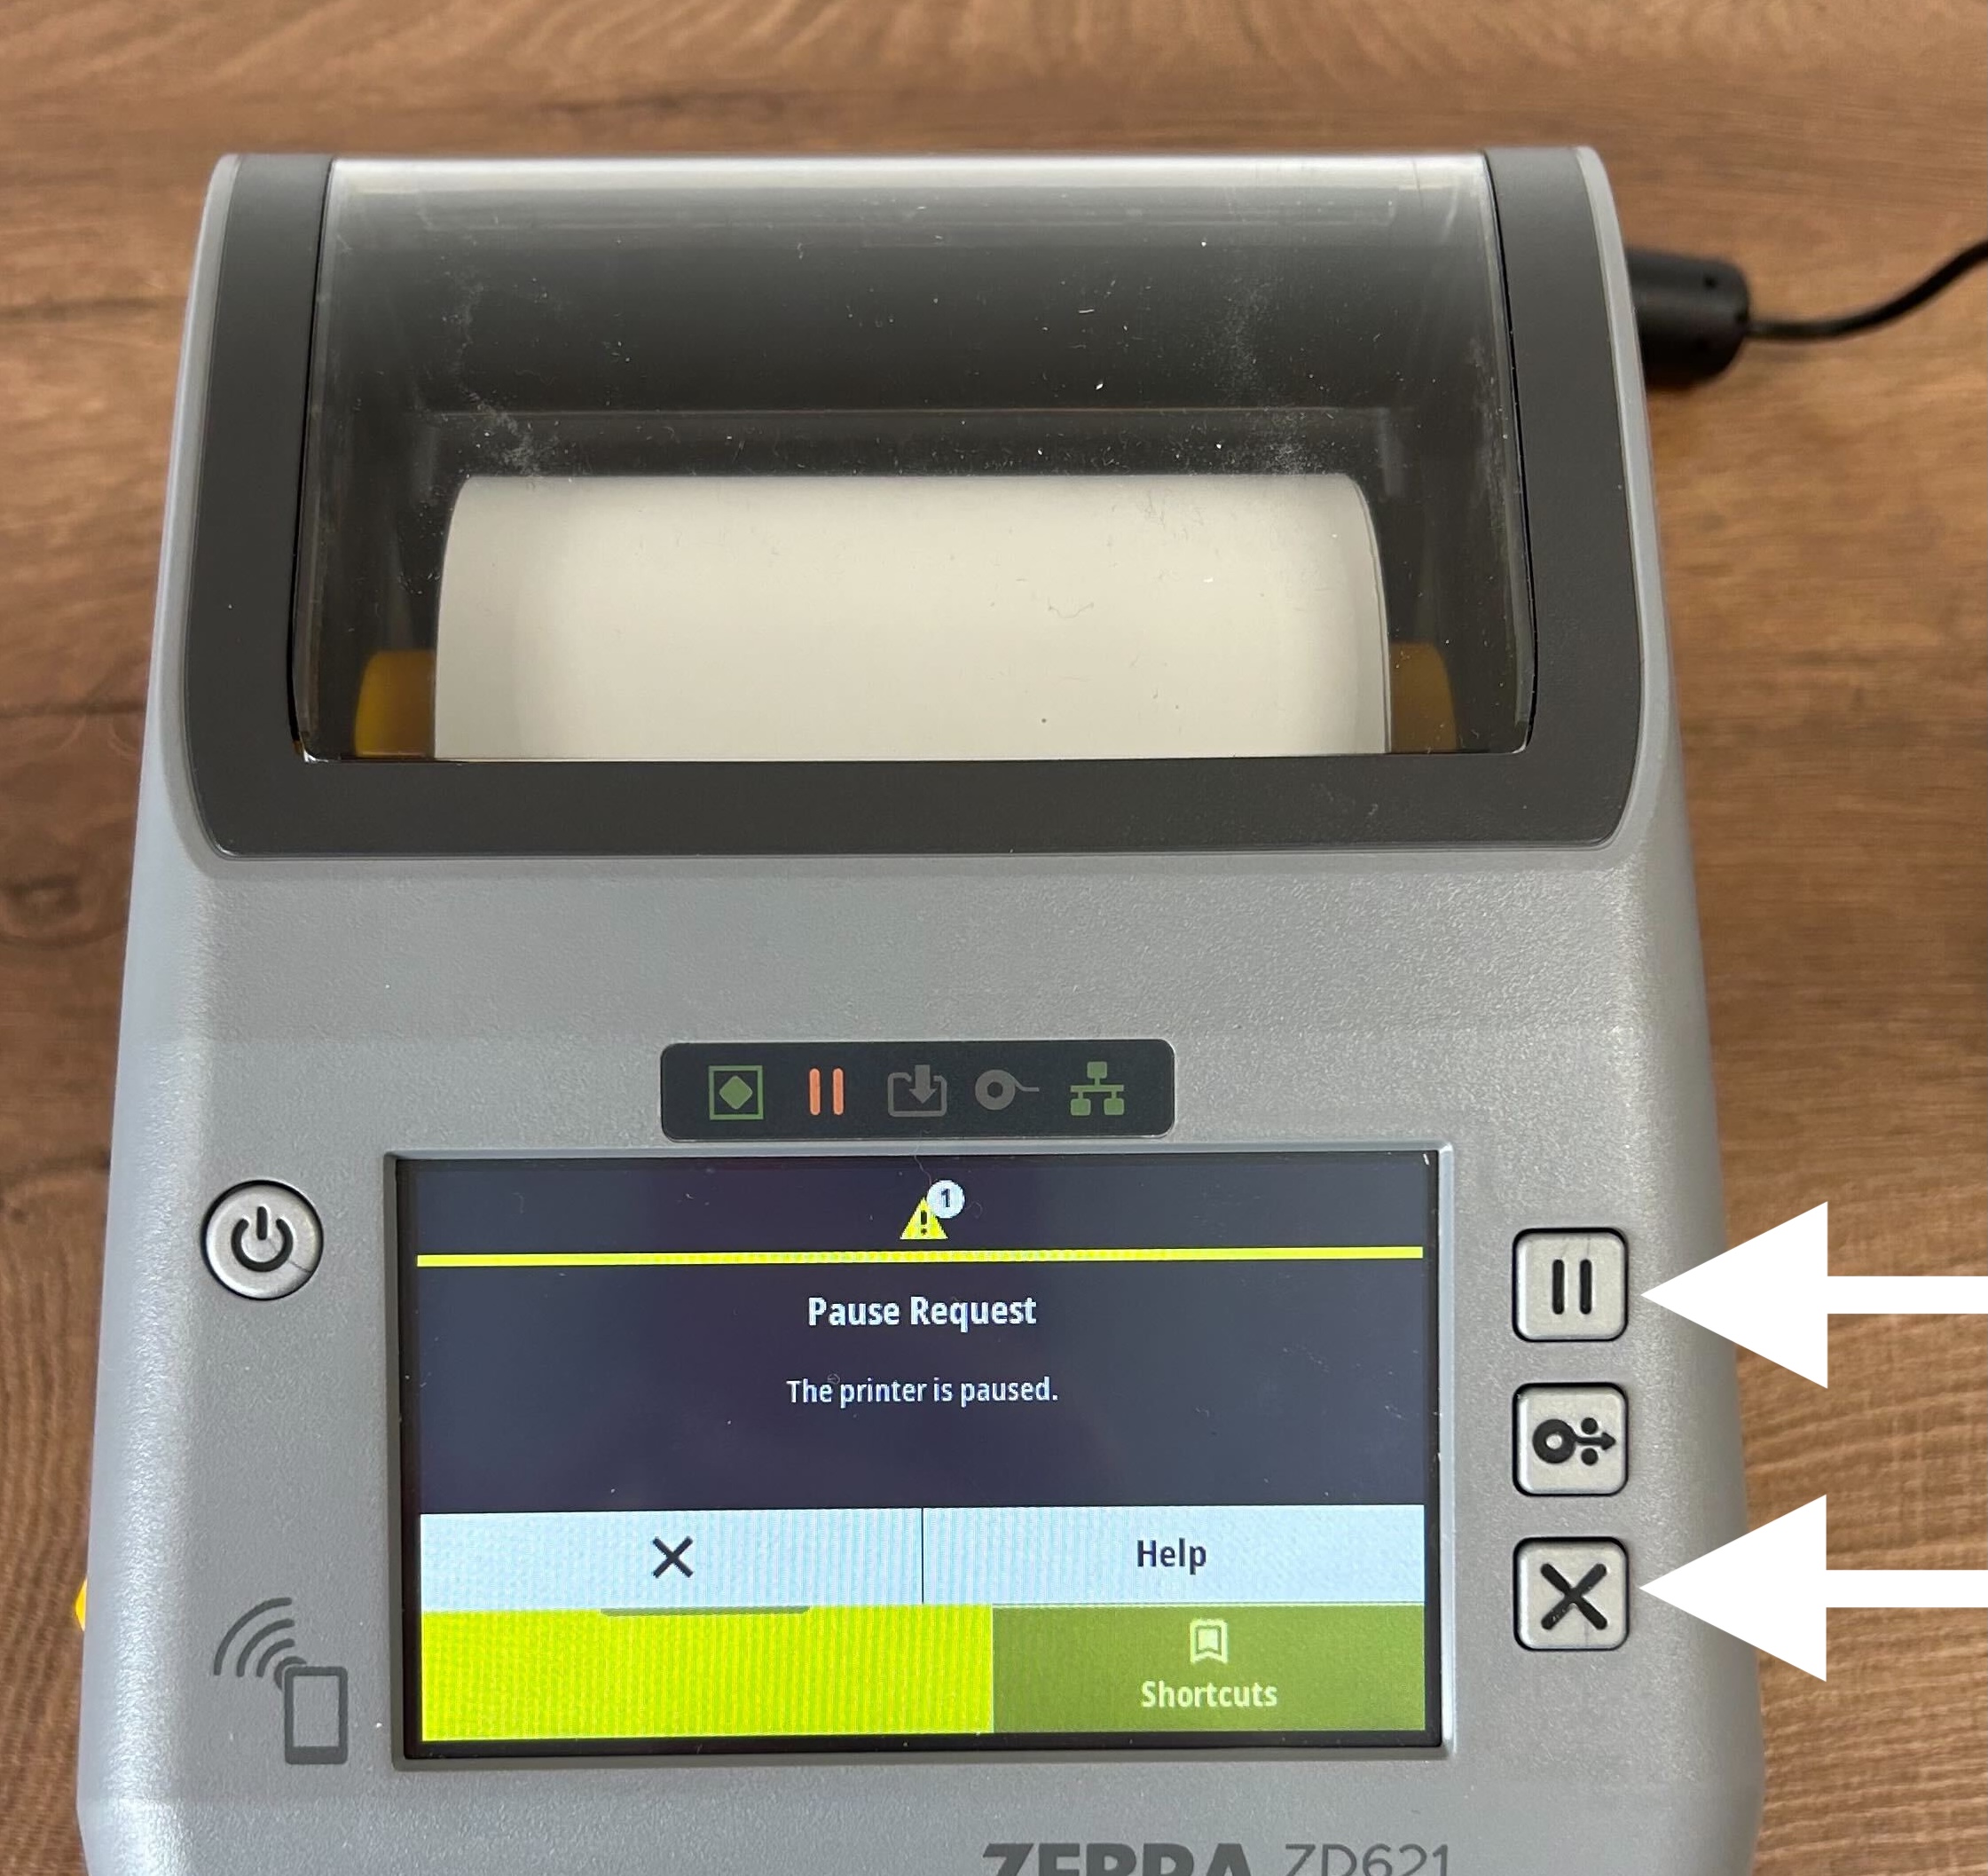
- Step 7. Repeat these steps with the other (backup) printer.
Printing a test badge
| You can use any attendee record for this test, but keep in mind that printing a badge also checks them in. Use a test record, like the attendee record you created for yourself during set-up. |
- Step 1. On the tablet, use the Search bar to find your test attendee record. Then click the Print button.
- Two things should happen:
- • The printer should issue the badge.
- • The Print button should turn green and change to a Re-print button, as shown below:

-
If you don’t see these things, reach out to your Support rep. - Step 2. Click the Re-print button to do a second test.
What’s next
You’re ready to check in attendees and print badges!

