In this article:
- Where is it?
- Filtering the data
- Settings to customize your data exports
- Tracking meeting attendance
- Viewing canceled meetings
Where is it?
To access the list, head to the Meetings tab. Then choose Meetings:

When you work with the Meetings List, depending on the filters you’re using you might get a small set of meetings or a very large one.
You can always export a large set as a spreadsheet, to work with further.
Head to the top right corner of the page to export:

Filtering the data
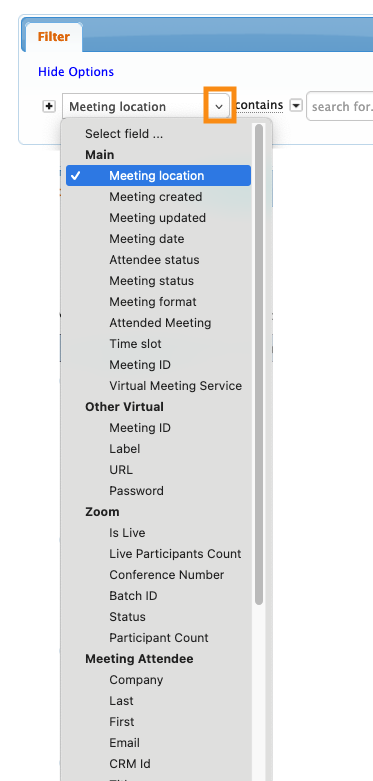
In the Meetings List, you can filter for:
- Aspects of the meetings, such as date/time, location, and so on.
- Aspects of meeting participants, like name or role.
- Whether the participants attended the meeting or not.
- Aspects of virtual meetings, like date/time or attendance.
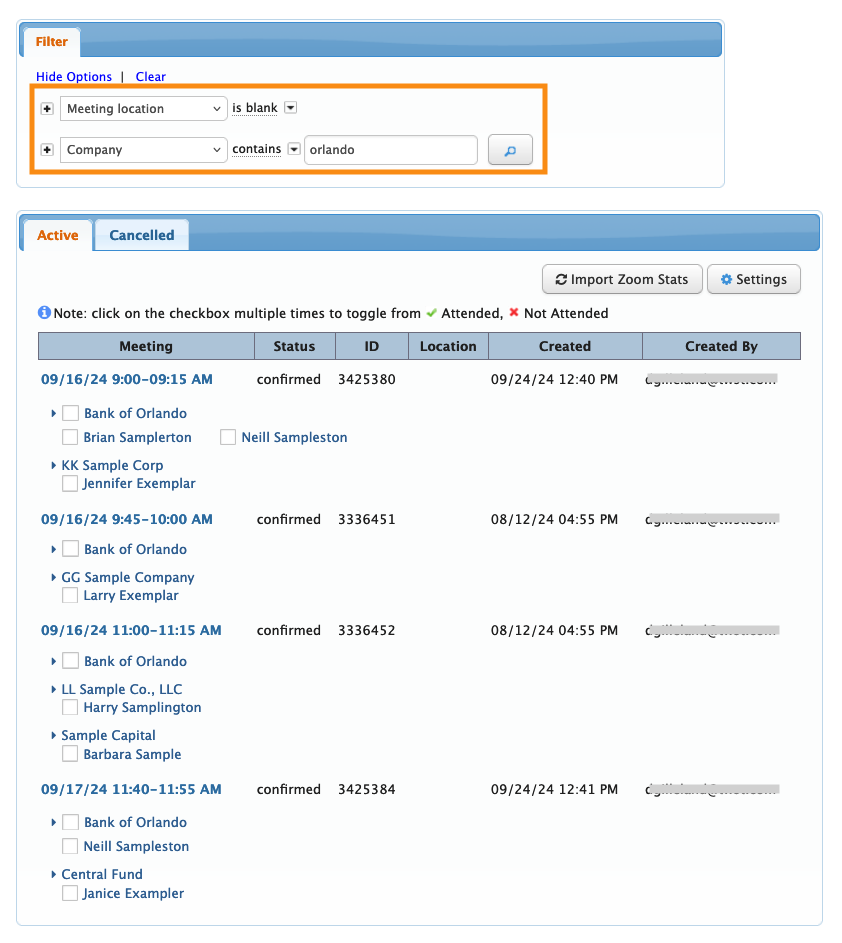
You can also combine filters to locate the exact data you need.
In this example, we want to know if one of our Companies, Bank of Orlando, has any scheduled meetings that don’t yet have a location assigned.
So we’ll filter by Company, and add a Meeting Location filter that’s set to is blank:
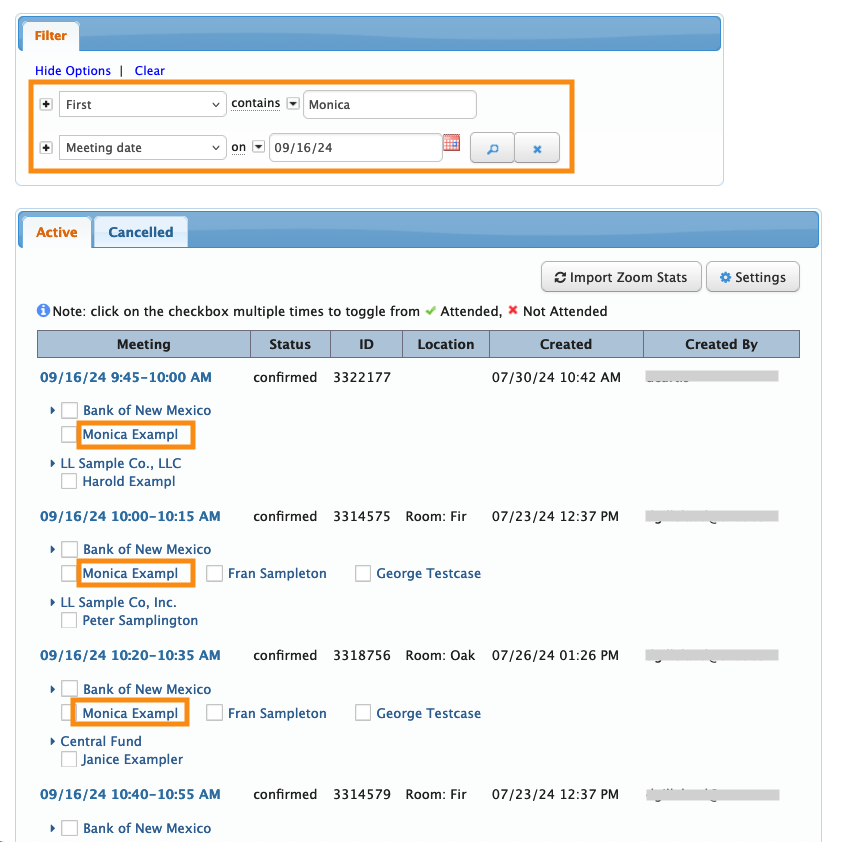
Here’s another example. Let’s say one of our Attendees, Monica Exampl, is having travel issues and will miss the first day of the event. We need to remove her from any meetings she has scheduled for that day.
We’ll use the Meeting date filter, set to the first event day. Then we’ll add a First name filter for Monica. Now we can see all of her meetings that need updating:
| No matter what filters you’re using, the meetings always display in date/time order. |
Need to remove a filter?
- Click the X button to remove one filter.
- Click the Clear link to remove all filters:

Settings to customize your data exports
On screen, the Meetings List always shows the same set of columns - a streamlined display for quick reference.
You can, however, customize how your list exports to spreadsheet form. Click the Settings button to get started:

Settings tab
The first tab of the Settings pop-up has two global settings. You might or might not use these, depending on your event:
- Hide auto-created attendees: This is helpful for events where Company Reps automatically attend all of their Company’s meetings. By default, MeetMax will list each Rep’s meetings, and for events like these that leads to very long reports! Check this box, and we’ll only include the Company’s meetings in reports.
- Single row per meeting on spreadsheet: With this setting enabled, each meeting will appear on one row of your exported spreadsheet, no matter how many participants it has.

If you click either checkbox, be sure to click Submit.
Excel Columns tab
In this tab, you can decide which columns of data to include in your export. You can add columns from the list, or remove any you don't need.
You can also highlight any column and use the arrow buttons to move it. Click Submit to save:

| You can open exported data in any spreadsheet software. |
As an option, you can click the Set As Default checkbox. That makes this configuration of columns standard for you, and also applies it to all other Admins on your team:

Any other Admin can still come to this tab and customize their own display.
Excel Custom Report tab
In this tab, you can save any of your filtered views of the Meetings List.
To save a report, choose New from the menu. Give the report a title, and choose whether to share it with your team. Then click Submit to save:

With that done, you can come back to this tab and access the report any time.
If you update it at any point, you can also Resave the new version:

Tracking meeting attendance
On the Meetings List, you can mark any participant as having attended their meeting, or as a No Show.
Once you’ve located a meeting in the list, click the checkboxes to indicate each participant’s attendance.
Click once for Attended, or twice for Not Attended:

Once you’ve collected some attendance data, you can filter the Meetings List to identify any participants who’ve not attended their scheduled meetings.
Here’s an example, where we’re using the Attended Meeting filter, set to No:
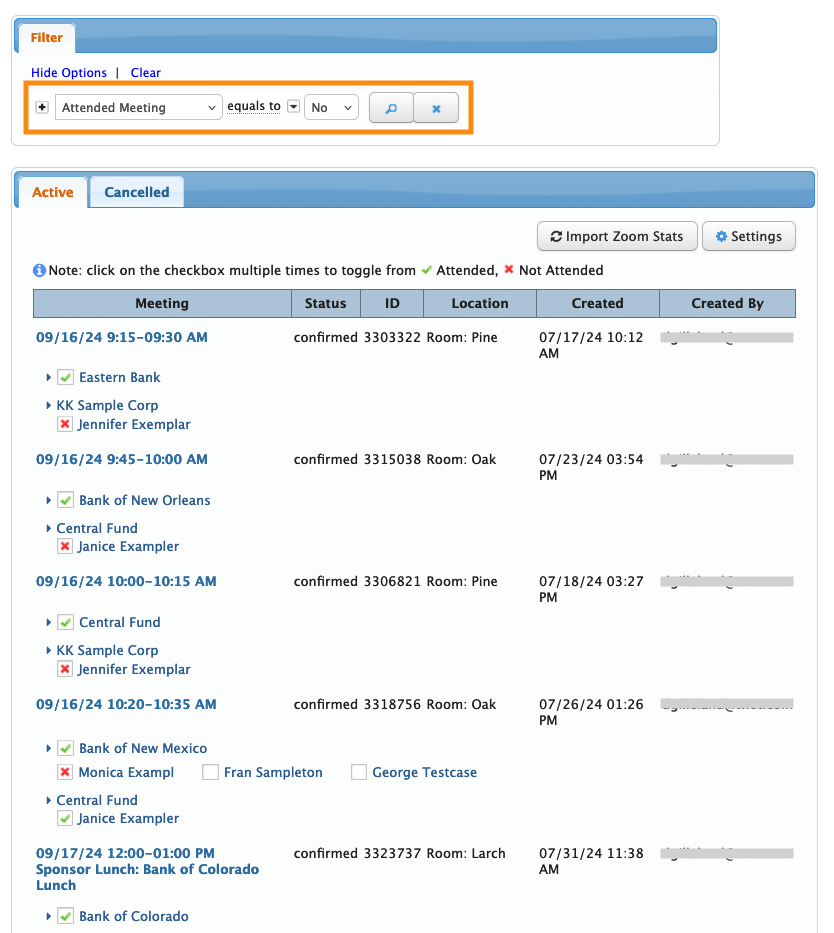
There's one name, Jennifer Exemplar, that appears several times here. So let's add a filter for her name as well:
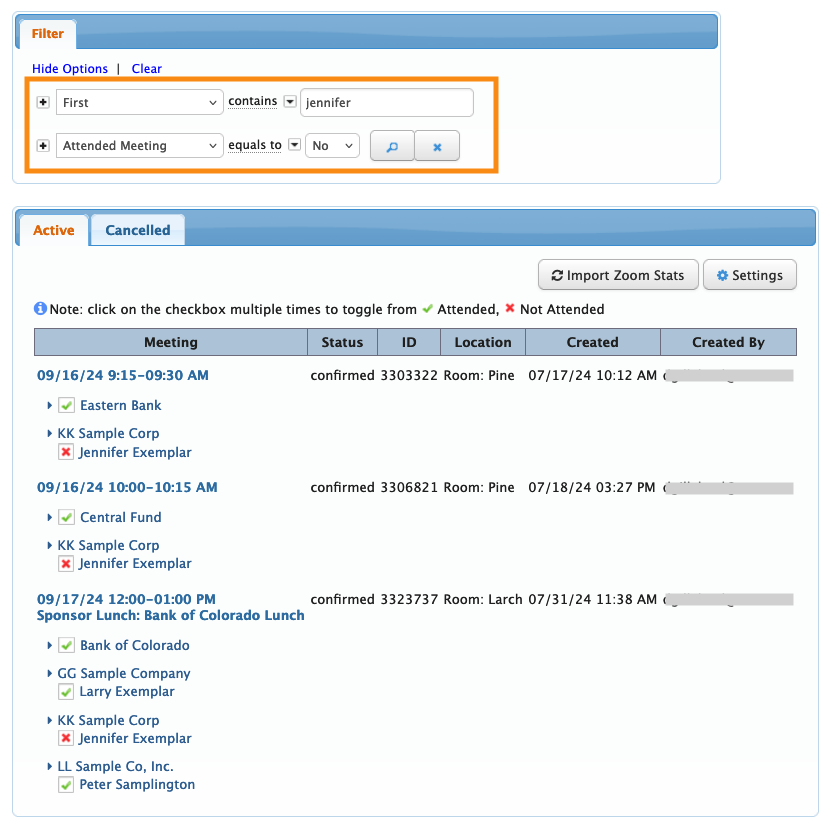
Now we can see all the meetings this Attendee has missed. We can reach out to the Companies who hosted these meetings. We can also reach out to this Attendee to see if something has happened.
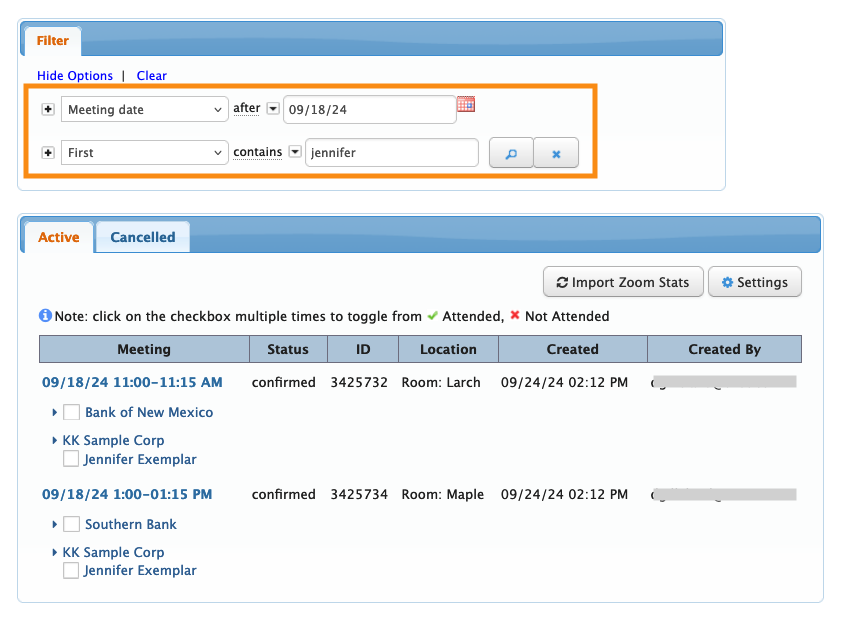
In addition, we could also re-filter the Meetings List to see if Jennifer has any upcoming meetings that we might want to cancel or reschedule.
Here, we’ve added the Meeting date filter, set to after the current event day:
Emailing meeting schedules
Another helpful tool for attendance tracking is the Email Schedule icon. You’ll see it when you hover over any participant’s name:
![]()
You can click this icon to email that individual a copy of their entire meeting schedule. You can even add a personal note if you like.
The schedule format follows any customizations you’ve already set.
Viewing canceled meetings
The Meetings List also has a Canceled tab. Here, you can:
- See all meetings that have been canceled, or run a report
- See who did the cancellation, and find out why.
- Add or update a cancellation reason.

Learn more about the Canceled Meeting List here.


