In this article:
- Where is it?
- Choosing Lead Types to track
- Setting up the Leads report
- What a Company sees
- Adding more data to the Leads report
- Exporting the Leads data
Where is it?
As an Admin, you’ll manage Lead tracking from the Company List:

Companies at your event will log into MeetMax and head to the Leads tab:

Choosing Lead Types to track
MeetMax can track all of these ways an Attendee might signal their interest in a Company:

- Bookmarked: The Attendee bookmarked the Company’s record for later reference.
- Meetings: The Attendee met with the Company. If your event is using Meeting Feedback surveys, this information is also trackable (see below).
- Messaged: The Attendee sent the Company a message via MeetMax.
- Presentation Interest: The Attendee signed up to attend the Company’s presentation.
- Presentation Scan: If your event uses our ScanTracker service, this Lead Type tracks when an Attendee’s QR code is scanned at a Presentation.
- Webcast View: The Attendee viewed one of the Company’s webcast presentations.
- Requested: The Attendee sent a meeting request to the Company.
- Scanned: If your event uses our ScanTracker service, this Lead Type tracks when an Attendee’s QR code was scanned - perhaps while visiting a booth, or attending a 1x1 meeting.
- Viewed: The Attendee viewed the Company’s Profile page.
You might want to track some or all of these Lead Types, depending on your event. In the sections below, we'll show you how to narrow this list to the types you want to track.
Setting up the Leads report
In your Admin account, you’ll configure the list of Lead types that Companies will see.
- Step 1. Head to the Company List:

- Step 2. Go to any Company’s record. Changes you make here will apply to everyone. Use the Action menu to choose Leads:

- Step 3. On the Leads page, click the Settings button:

- Step 4. In the pop-up, you’ll set the Lead Types that will be tracked for your event. Uncheck any box you don’t need. Then click Submit:

-
You can configure your event so that Attendees can opt out of having their contact details shared. If you’re using this option, click the checkbox at the top of this pop-up. That will exclude these Attendees from Lead tracking.
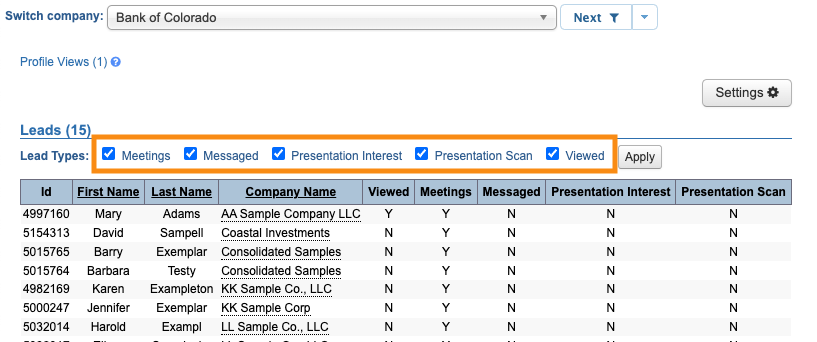
Your Admin view now displays only the Lead types you chose:

What a Company sees
When a Company logs into MeetMax, they’ll head to the Leads tab. It contains all the Attendees who’ve taken one or more of the Lead Types actions.
The visible Lead Types are the same ones you set in your Admin account:

Companies can filter the Leads list - they can check or uncheck the Lead Types boxes, then click Apply:

In the Company Name column, each entry is a link to that Attendee’s profile details:


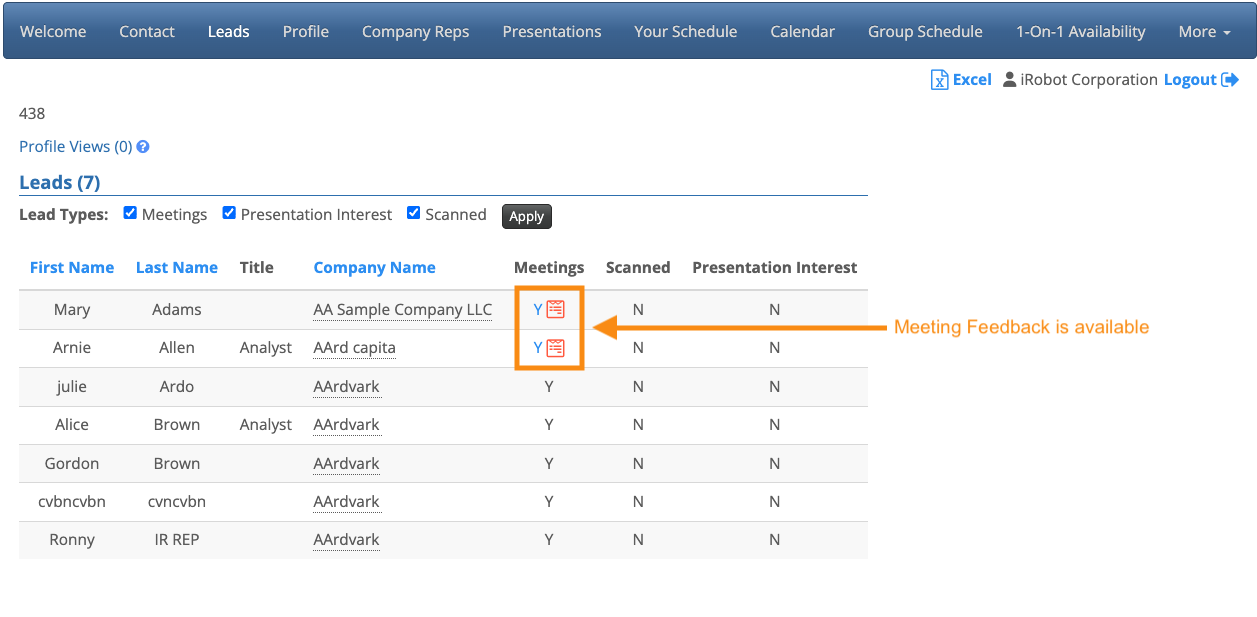
If your event is using the Meeting Feedback feature, Companies will see a clipboard icon in their Meetings leads. These are Attendees who’ve left feedback on their meeting:

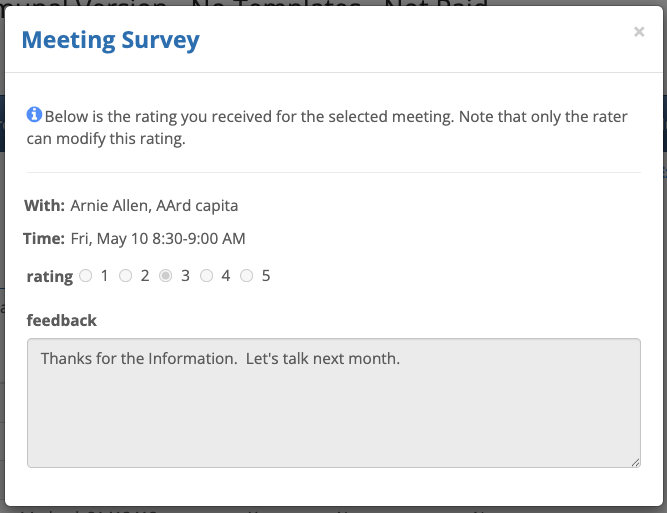
The Company can click any of these icons to see the feedback:

Adding more data to the Leads report
From your Admin account, you can add deeper details to the Leads report.
- Step 1. On the Leads page, click the Settings button:

- Step 2. Next, click on the Columns tab. Here, you can add and remove columns of data. Click Submit to save:

-
No matter which Company’s record you take these steps in, the changes apply to all Companies automatically. - Step 3. You’ll now see the added columns in your Admin view:

- When a Company logs into MeetMax, however, their Leads page still shows the default columns:

- The Company will have access to this extra data when they export their Leads list.
Exporting the Leads data
Both you and the Company can export Leads reports. Exported reports contain all of the data columns you’ve added in your Admin account.
How a Company exports
On the Company’s Leads page, they can click the Excel link to export:

The exported file opens in any spreadsheet software. Now the Company has the data it needs to follow up with the most valuable leads after your event.
How an Admin exports
You can also export any Company’s Leads report from your Admin account.
- Step 1. Head to the Company List page:

- Step 2. Filter the list to find the Company you need. Then use the Action menu to choose Leads:

- Step 3. On the Leads page, head to the top right corner and click the Excel icon:

- You can open the exported file in any spreadsheet software.


