In this article:
- Where is it?
- Why is it useful?
- Setting up to use the Contact Name field
- Adding the Contact Name field to registration forms
- What your team sees
Where is it?
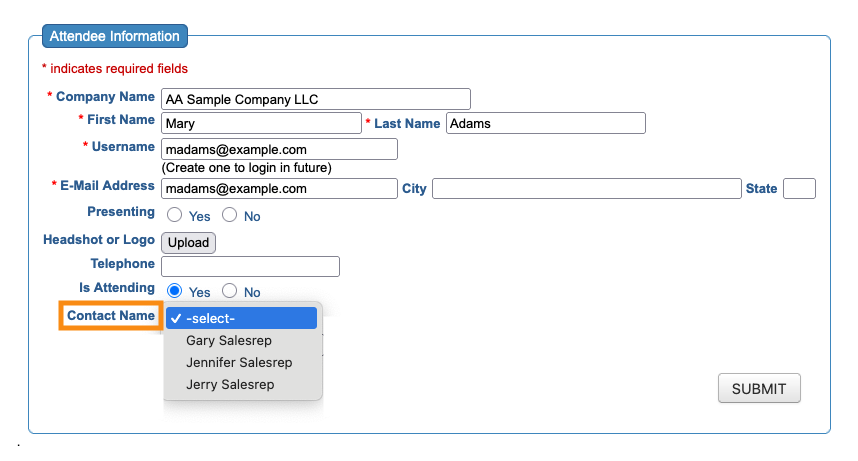
The Contact Name field appears on the Admin version of your Attendee or Company registration forms:
Why is it useful?
In MeetMax, a Client Rep is a member of your internal team. Client Reps can have a range of responsibilities.
For some events, each Attendee is assigned to a single Client Rep. That allows two things to happen:
- Visibility: The Client Rep’s view of MeetMax is restricted to only their assigned Attendees. That makes it easier to monitor registrations, meetings, and engagement.
- Communications: The Client Rep can be cc-ed on any batch email that’s sent to their assigned Attendees.
If your internal team is smaller, and not structured into any specific groups (such as sales territories), the Contact Name field gives you a simple way to assign one Client Rep to an Attendee.
| If your Client Reps are organized into groups, use the Client Rep Group field instead. It lets you assign one group to each Attendee. | |
| If you need to flexibly assign multiple Client Reps to the same Attendee, use the Client Reps field instead. |
Setting up to use the Contact Name field
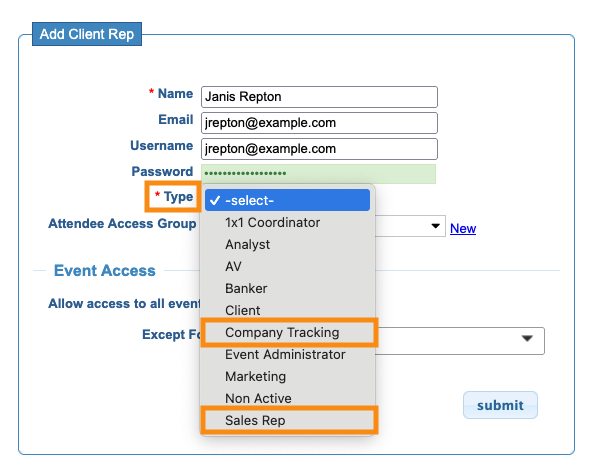
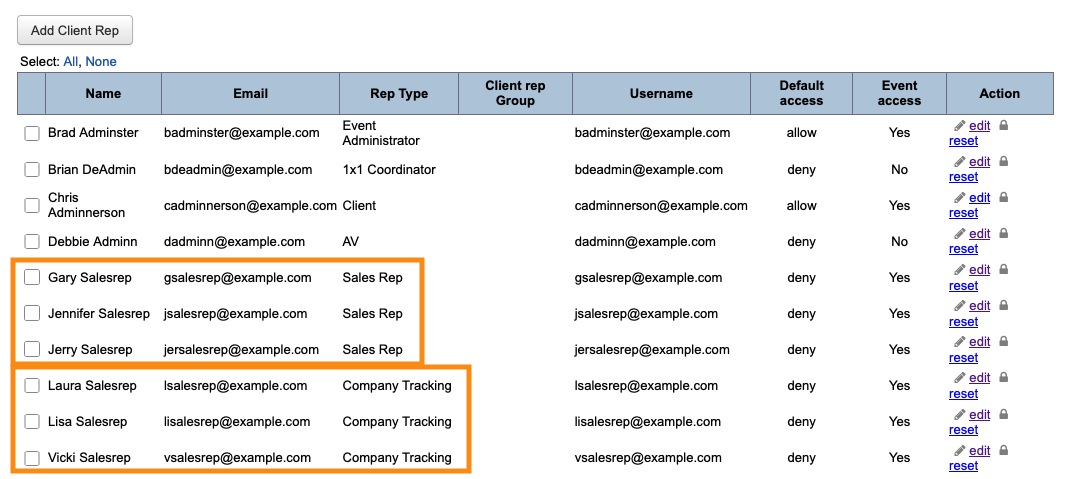
As you’re adding your team of Client Reps to MeetMax, you’ll use the Type field to assign one of these two roles:
- Sales Rep: Client Reps who work with Attendees.
- Company Tracking: Client Reps who work with Companies.
You’ll also need to make sure each of these Client Reps has access to the event.
As you’re adding a Client Rep, you can choose the events you want them to access:
Adding the Contact Name field to registration forms
You’ll add this field to the Admin version of your registration forms. You can add it to the Attendee form, or the Company form, or both - depending on who has assigned Client Reps at your event.
Learn more about using the Form Editor here:
Contact Name is a drop-down field. MeetMax automatically includes all Client Reps who have the correct role and event access.
What your team sees
What your team sees will depend on whether you’re assigning Client Reps to Attendees, or Companies, or both.
In this example, our Client Rep List has three Sales Reps and three people with the Company Tracking role:
In the Admin version of our Attendee registration form, we’s see the reps with the Sales Rep role:

In the Admin version of the Company registration form, we’d see the reps with the Company Tracking role:
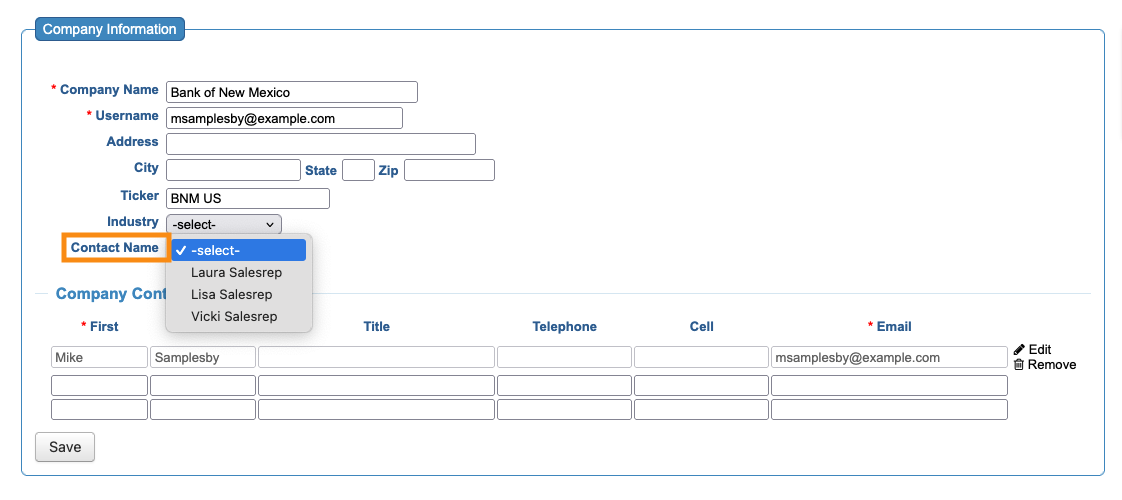
For each Attendee or Company, choose the correct Client Rep from the Contact Name field. Then click either Submit or Save.
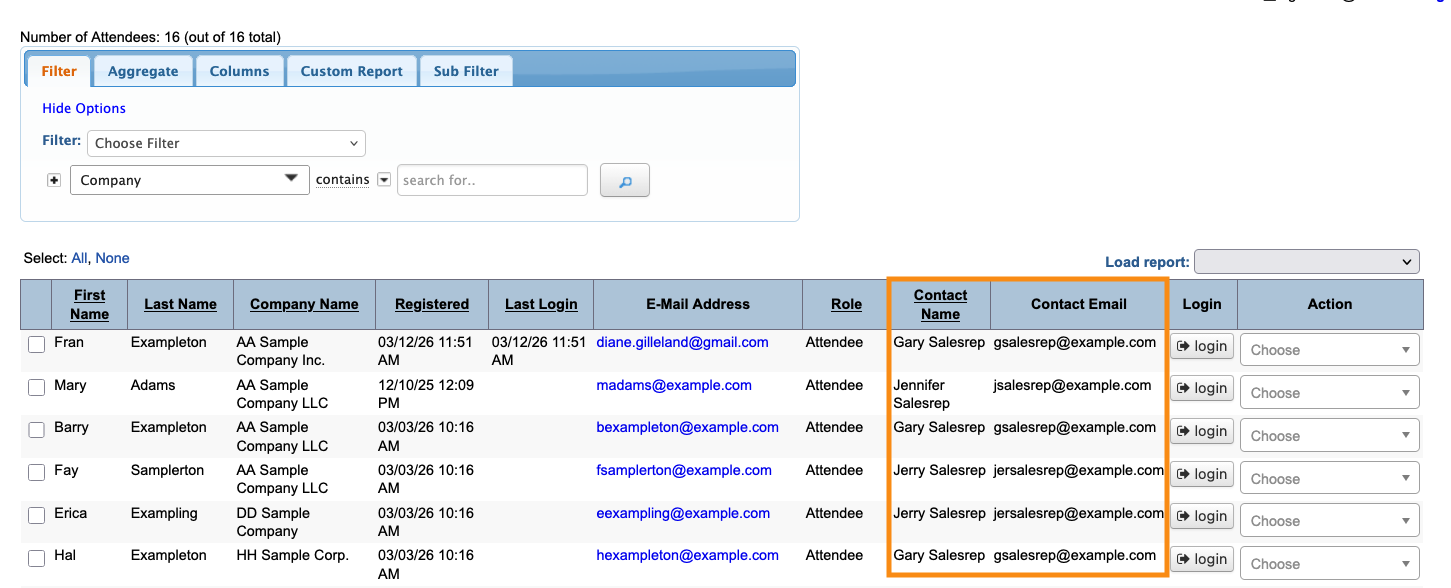
Including Contact Names on the Attendee or Company List
Once you’ve assigned Contact Names to some participants, you can add two new columns to the Attendee List, or Company List, or both:
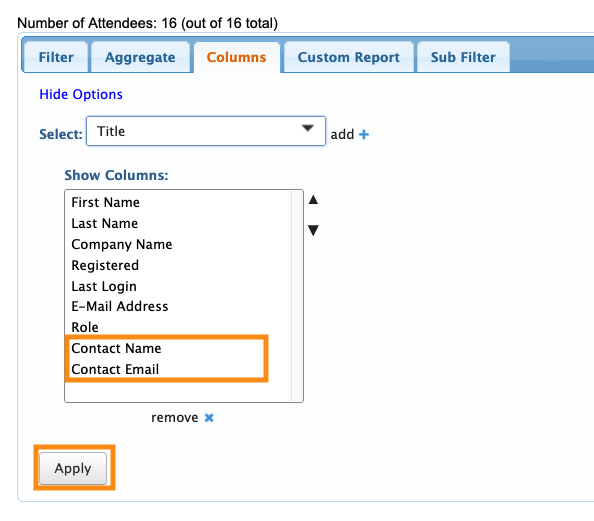
These columns will display the assigned contact for each participant: