
In this article:
- Where is it?
- Formatting your spreadsheet
- Importing the meetings
- Checking the result
- Adding locations to meetings
Where is it?
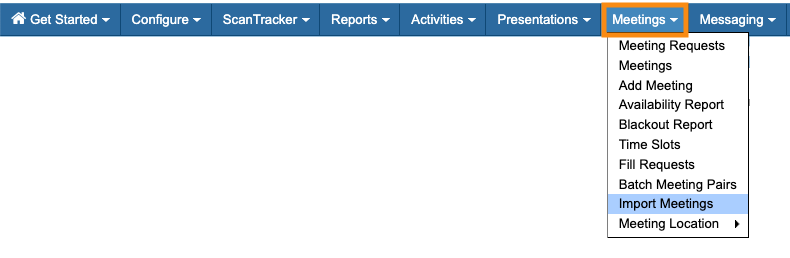
Our Support team can enable this feature for your account. Once that’s done, you’ll find it in the Meetings tab:
| We’re assuming here that you’ve already added or imported your event’s participants to MeetMax. |
Formatting your spreadsheet
Your spreadsheet of meetings must have four columns, with these exact titles:
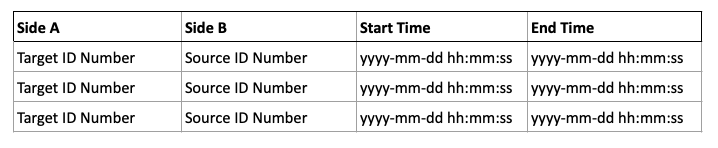
- Side A: Meeting Target (The person hosting the meeting)
- Side B: Meeting Source (The person attending the meeting)
- Start time: Meeting start time, in the format shown above
- End time: Meeting end time, in the format shown above
Participant ID numbers
Every participant in your spreadsheet, Attendee and/or Company, must have a unique identifier number.
You can use any of these options:
- MeetMax ID: MeetMax generates a unique ID number for every registrant at your event.
- CRM ID: If you’re using one of our CRM integrations, you can use the ID numbers it generates. MeetMax imports these along with the user records.
- Manually-assigned ID: If you prefer, you can create your own ID number for each participant. In that case, you’ll need to add a field to the Admin version of your registration form, to capture that data in MeetMax.
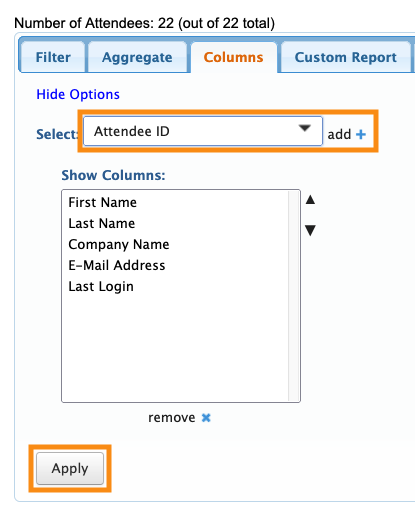
In the Attendee List and Company List, you can head to the Columns tab and add one of these data columns:
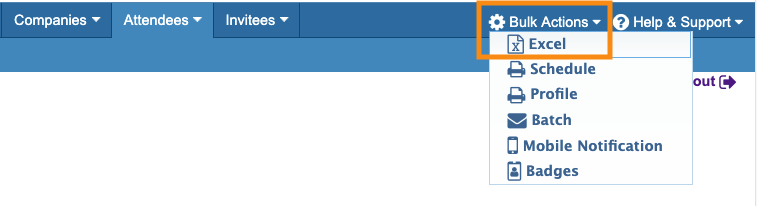
If you’re using the MeetMax ID numbers, you might want to export them the Attendee List or Company List, so you have that data in spreadsheet form.
From the list page, head to the top right corner and choose Bulk Actions, then Excel:
Formatting start and end times
The MeetMax importer can only read times in this format:
yyyy-mm-dd hh:mm:ss
If you’re working in Excel, you’ll need to use the Custom number format in these cells:

If you’re working in Google Sheets, highlight the cells. Then use the Format menu to choose Number, then Custom date and time.
Importing the meetings
When your spreadsheet is ready, export it as a CSV file.
- Step 1. Head to the Meetings tab, then choose Import Meetings:

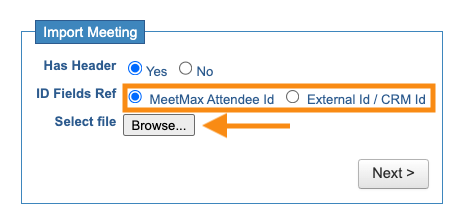
- Step 2. Indicate whether your spreadsheet has a header row or not.
- Then, choose whether you’re using MeetMax-generated participant ID numbers, or numbers you’ve created/from your CRM.
- Click the Browse button to locate the CSV file on your computer:
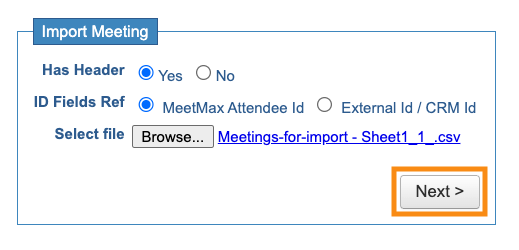
- Step 3. Once your file is added, click Next:
- Step 4. You’ll now check that your four spreadsheet columns are mapped to the correct fields in MeetMax.
- Wherever you see Do not map this field, choose the matching field from the menu. Then click Import Now:
- Depending on the number of meetings you’re importing, it could take a few minutes.
- MeetMax will show you a success message when the upload is complete.
Checking the result
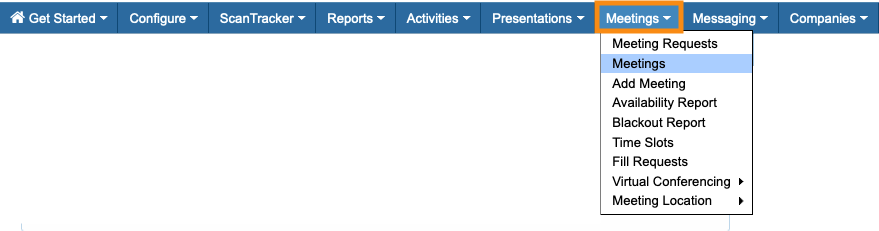
To see the imported meetings, head to the Meetings tab. Choose Meetings:
Learn more about working with the Meetings List here.
| In MeetMax, you have the option for Company Reps at your event to be automatically scheduled for all their parent Company’s meetings. If you’re using this option, you won’t need to include those Company Reps in your spreadsheet for import. MeetMax will automatically schedule them into the correct meetings. If your spreadsheet does include meetings for Company Reps, MeetMax will skip importing them. |
Adding locations to meetings
Once the meetings are imported, you’ll still need to assign meeting locations to them.

