In this article:
- Where is it?
- Adding a location
- Editing a location
- Setting blackout times for a location
- Checking location availability
- Reserving a location manually
Where is it?
You’ll admin your meeting locations from the Meetings menu.
Choose Meeting Location, and then Add Location:

Adding a location
Note: If you need to add many locations at once, you can import them as a list.
- Step 1. On the Add Meeting Location page, choose the Type of location you’re adding.
- The default is Room, but you can also make it a Booth, Pavilion, or Table:

- Need a type of location that’s not on this menu? Choose Other, and enter your type:

- Step 2. Give the location a Name. If you don’t have the exact names for your venue yet, use a placeholder name. You can change it any time:

- Step 3. The Category field lets you set up any classifications you need for your locations.
- You might have Small, Medium, and Large meeting rooms, for example. Or, Single and Double booths. Enter anything you need, or leave it blank:

- Step 4. The Capacity and Priority fields relate to 1x1 meeting scheduling.
- • Capacity sets the number of simultaneous meetings that can happen in this space. A Table might have a capacity of 1 meeting. A Room might accommodate 2 or 3 meetings at once.
- • Priority tells our automated meeting scheduler which rooms to choose first.
- You can leave this at Normal unless you’re assigning multiple meeting rooms to the same Company. Then, setting priorities lets you choose which rooms get booked first.

- Step 5. The Assignment field also relates to 1x1 meeting scheduling. Here are the options:
- • Open (default): Use this setting when the location is available to any participating Company, and is part of your general pool of meeting rooms. Our automated scheduling tool chooses Open rooms to schedule meetings.
- • Reservable: You might have Companies at your event that need a dedicated meeting room. In that case, use this option. That way, this location won’t be used in general automated scheduling. Any Company can reserve this room for its meetings.
- • Private: Locations with this designation aren’t used in automated scheduling. Only a Client Rep (event admin) can assign meetings to this kind of room.

- Step 6. Click Save.
Editing a location
Once you’ve saved your first location, a new Locations page will appear.
To edit any location, head to this page:

In the Action menu, choose Edit:

That takes you back to the location settings, where you can make any changes you need.
Setting blackout times for a location
In MeetMax, “Blackout Times” or “Blackouts” are unavailable times. You can set them for any location, so no meetings can be scheduled there at those times.
Note: Before you can set blackout times, you need to create time slots for your event in general.
To get started, head to the Locations page. Locate the room you want to set blackout times for.
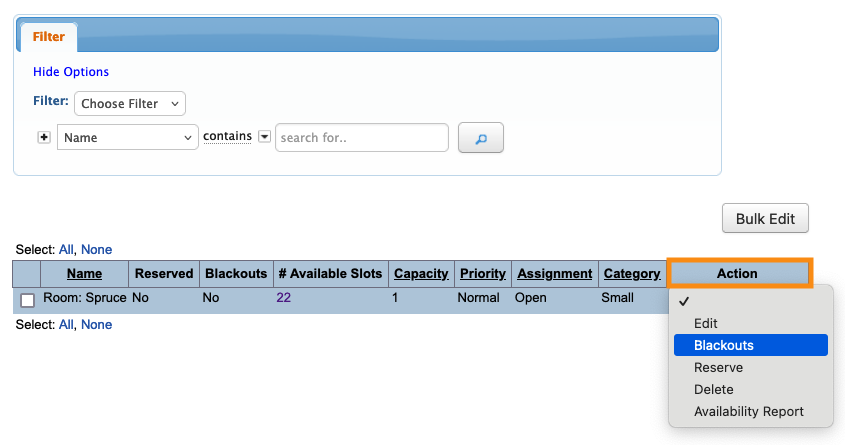
Use the Action drop down menu to choose Blackouts:

From there, click the check boxes for any times you want this location to be unavailable. Then click Save:

Checking location availability
Need to see what time slots are still available for a meeting location?
- Step 1. Head to the Locations page. Find the location you need to check.
- Use the Action drop down menu to choose Availability Report:

- Step 2. A pop-up will appear. Choose the date you need to see availability for, and click View:

- Step 3. You’ll now see a report of this location’s available time slots:

Reserving a location manually
You can reserve a meeting location for any Company or Attendee.
Head to the Locations page. Find the location you need to reserve.
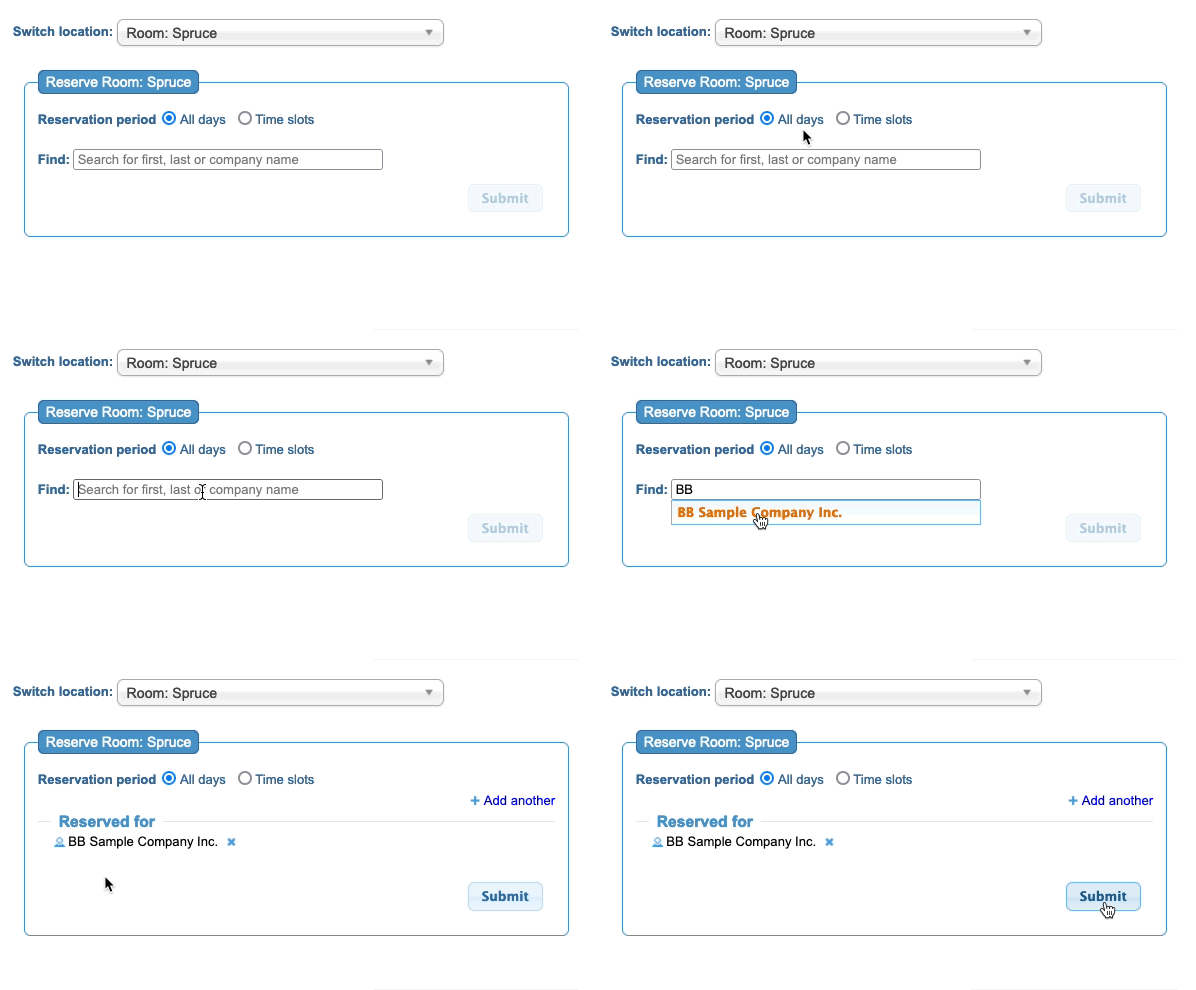
Use the Action drop down menu, and choose Reserve:

Reserving for all event dates
To reserve the location for the entire event, click the All Days button.
Then search for the Company or Attendee name, select them, and click Submit:

Note: If you want to add another Company or Attendee to this reservation, click the Add another link.
Reserving for specific time slots
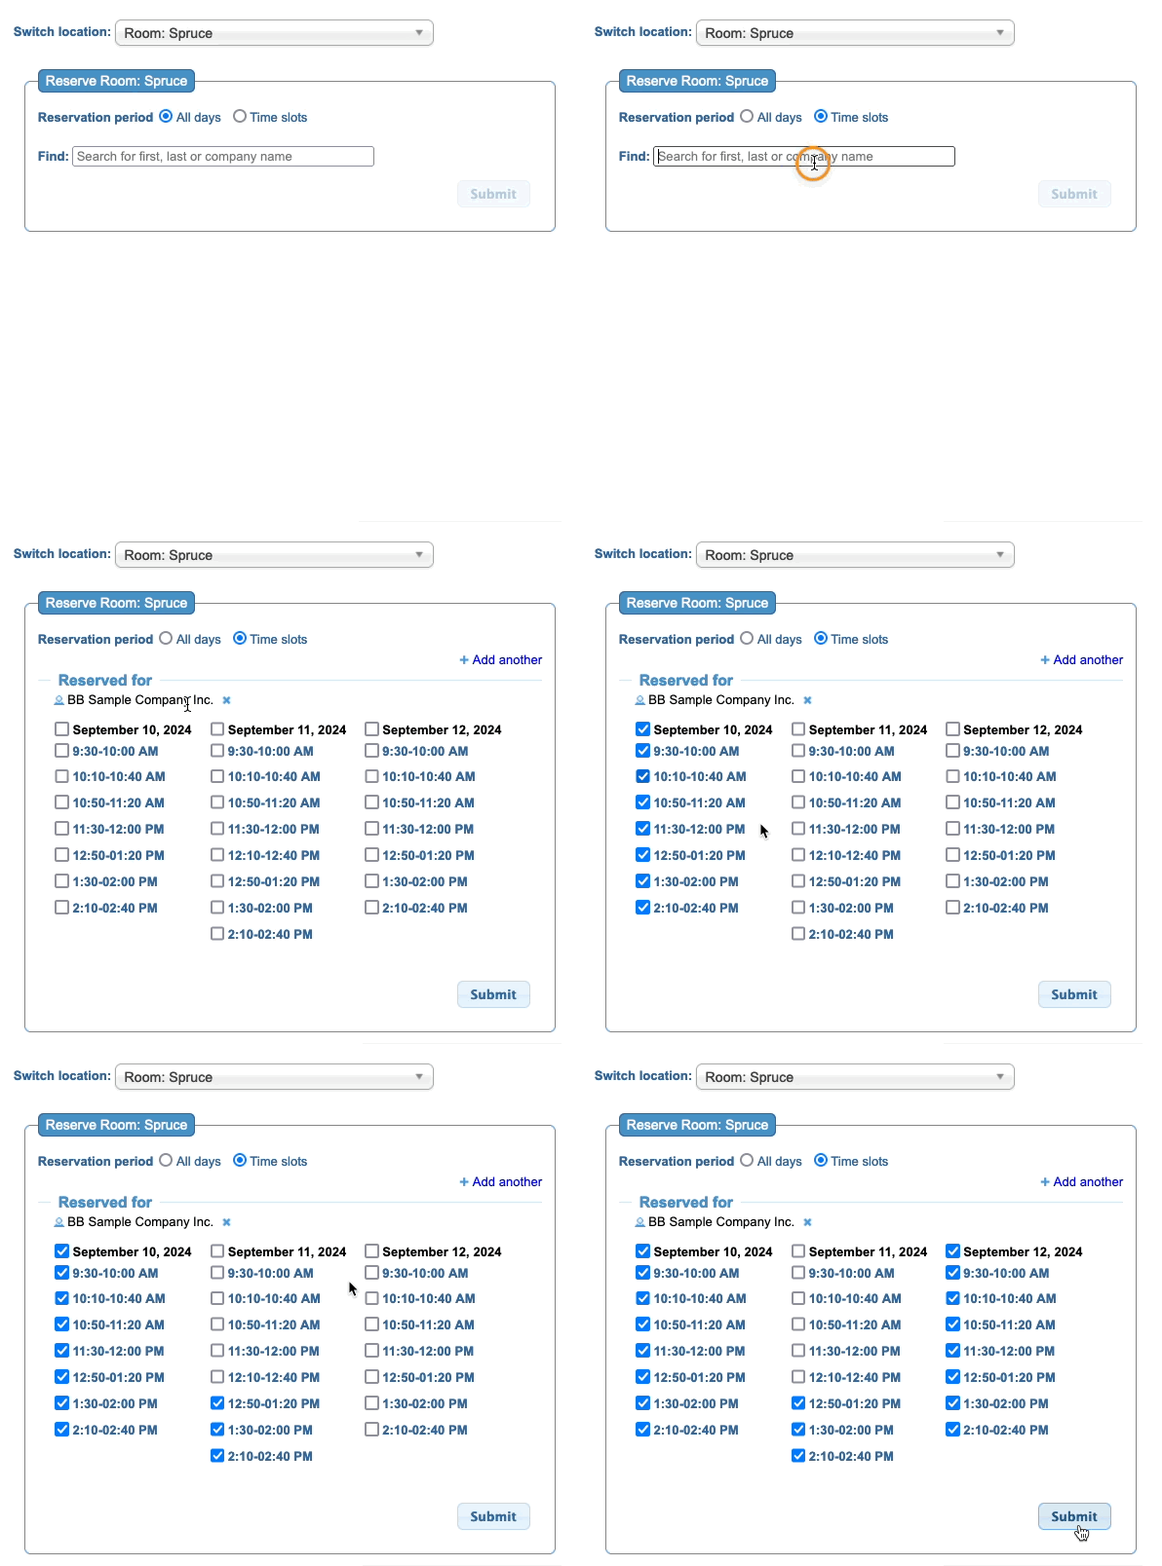
If you want to reserve this location only for specific days and times, click the Time slots button.
Search the Company or Attendee name. The meeting location’s availability will appear, and you’ll choose the dates and times you need.
Click Submit to save:


