Schedule setting: Link to Profile

| We’ll show the Admin view of an Attendee schedule here. Remember, you can also preview what the Attendee sees in their account. |
When to use this setting
This setting is useful if:
- Your event is using Attendee and Company Profiles.
- On schedules, you want participants to be able to click a name and see the attached profile.
How it works
This feature connects the event schedule with the Profile pop-up display.
You can choose which user roles will display profile links. You can add these links to the Attendee or Company schedule, or both.
Here’s what a participant sees in their schedule:
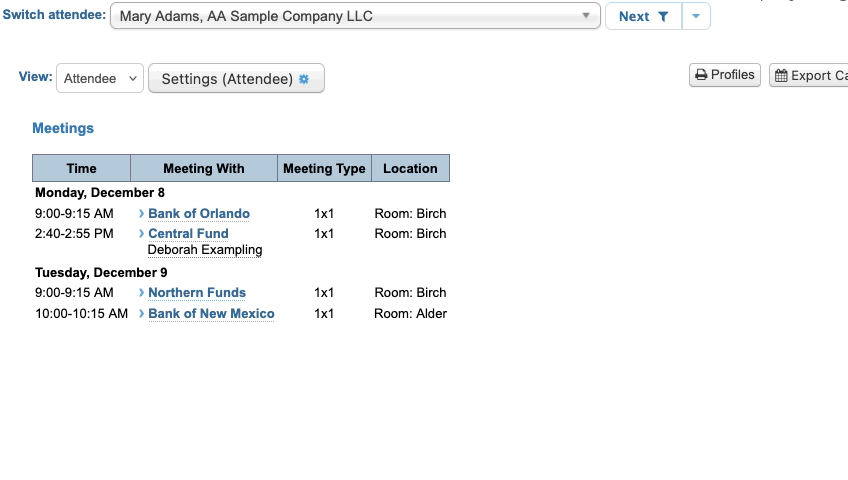
| These clickable links also work from the email version of a schedule.. | |
| There are lots of ways to customize the Profile pop-up. |
Changing the setting
We’ll show the process for Attendee schedules here, but the process is exactly the same for Company schedules. You’d just start in the Company List instead.
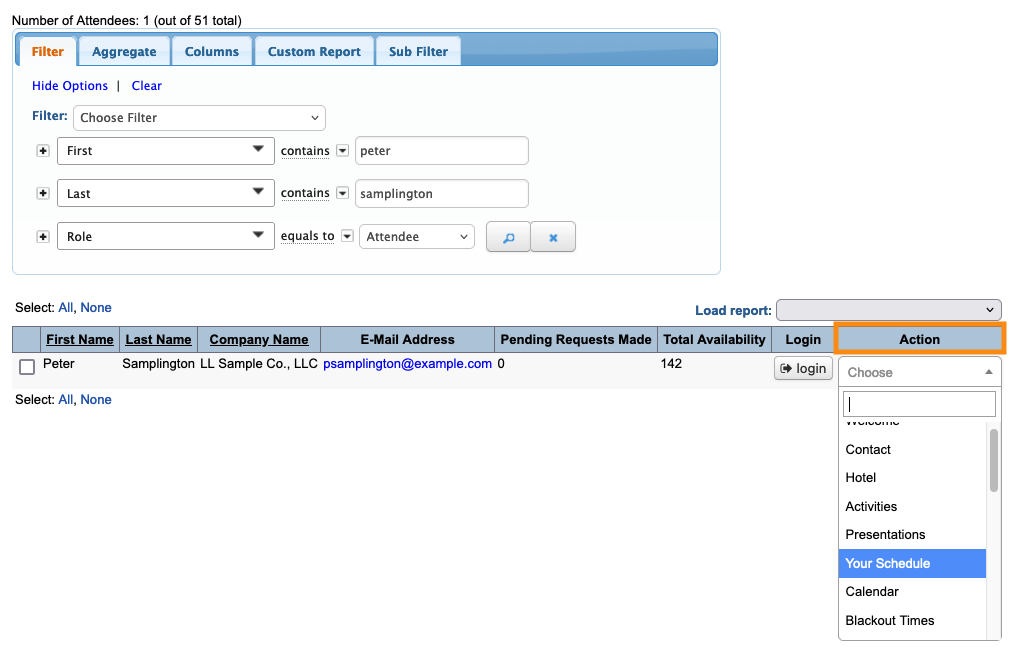
- Step 1. Head to the Attendee List:

- Step 2. Use any Attendee’s record. Changes you save there will apply to all Attendees.
- Use the Action menu to choose Your Schedule:
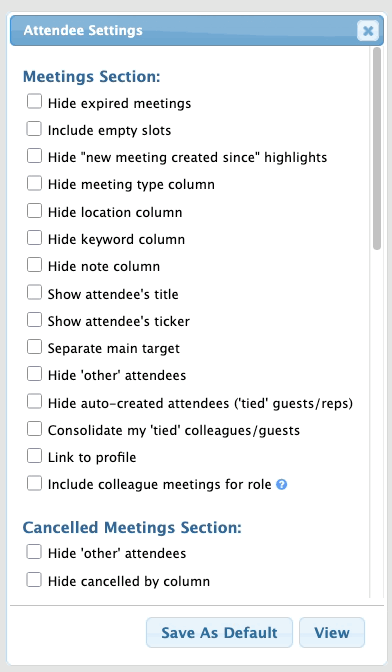
- Step 3. Click the Settings button:

- Step 4. In the Attendee Settings pop-up, check the Link to profile box.
- Choose which user roles will display links to their profiles. (You can use any or all of them.)
- Then click Save as Default:
-
You can use this setting in Moderated and Unmoderated meeting programs.

