Creating a MeetMax webinar

Once you’ve finished the initial set-up, here’s how to create a new webinar session any time.
In this article:
- Where is it?
- Creating the event
- Key settings for webinars
- Creating the webinar session
- Connecting the session to SummitCast
- Delivering the Presenter's Dashboard link
- Best Practices
Where is it?
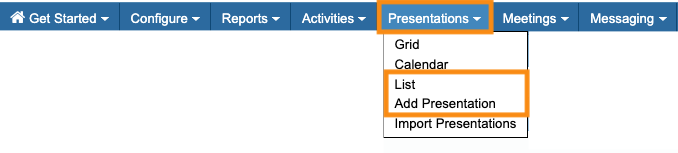
You’ll create and administer self-service webinars from the Presentations tab. You’ll be working on these two pages:
We’re assuming here that:
- Our team has already set up self-service webinars for you.
- You have an event set up in MeetMax for the webinar.
- You've already added your webinar presenter to MeetMax.
Creating the event
We’re assuming here that our team has already helped you set up a Template Event in MeetMax. You can copy this template each time you need to host a new event.
- Each virtual event can contain just one webinar, or many.
- Each virtual event can have webinars alongside other kinds of content, like in-person presentations, activities, meetings, etc. Our Support team will help you enable other content.
Learn how to clone your Template event here.
Key settings for webinars
Once you’ve cloned your Template event, you might want to make adjustments to a few important settings.
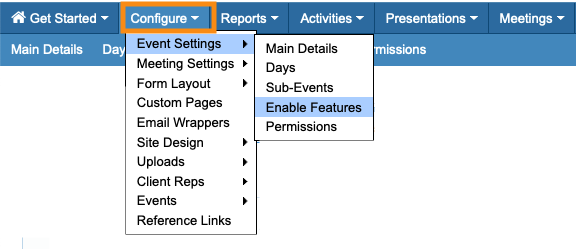
- Step 1. In the event you want to change, head to the Configure tab. Choose Event Settings, then Enable Features:
- Step 2. Scroll to the SummitCast section:
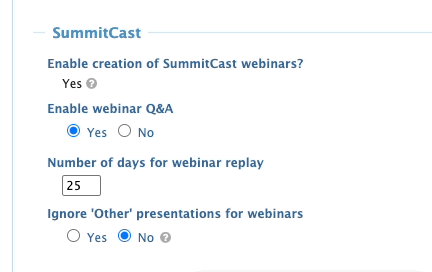
- • Enable creation of SummitCast webinars: You can enable or disable webinars until you first connect a webinar to SummitCast (see below). After that, this setting is fixed.
- • Enable webinar Q&A: Choose whether you want webinar attendees to submit questions. (See how this works here.)
- • Number of days for webinar replay: Choose how long you’d like the webinar video to be available to attendees. To disable replays, enter zero.
- • Ignore ‘Other’ presentations for webinars: If your event will host webinars alongside other presentations, this setting lets you separate those types on presenter and attendee schedules. If you’re hosting only webinars, leave this set to No.
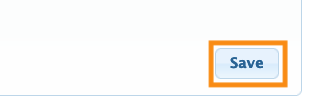
- Step 3. Scroll to the bottom of the page and click Save:
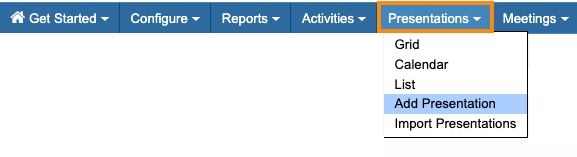
Creating the webinar session
- Step 1. Head to the Presentations tab. Choose Add Presentation:
- Step 2. In the Add Presentation form, fill out these fields:
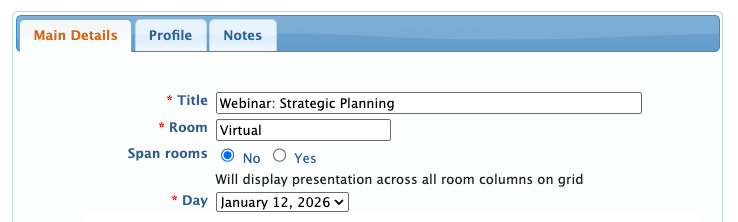
- • Title: The webinar name you enter here will be visible to attendees.
- • Room: Enter Virtual.
- • Span rooms: Leave this set to No.
- • Day: This menu will include all the days of your event. Choose the one for this session.
- Step 3. Use the menus to set a start time and duration for the session:
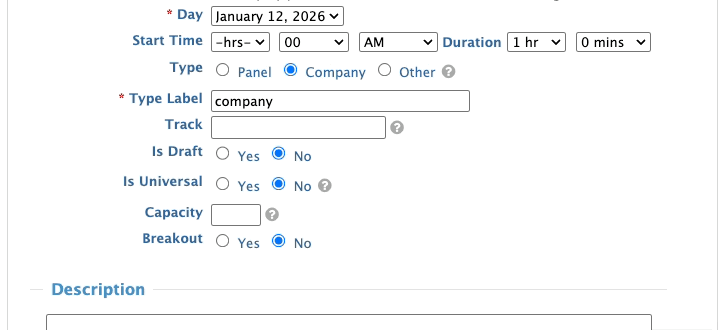
-
The webcast will end at exactly the time you’ve set. If you think there’s a chance of the session running a little longer, be sure to add extra Duration time to cover that. - Step 4. The next set of fields is optional, depending on your event:
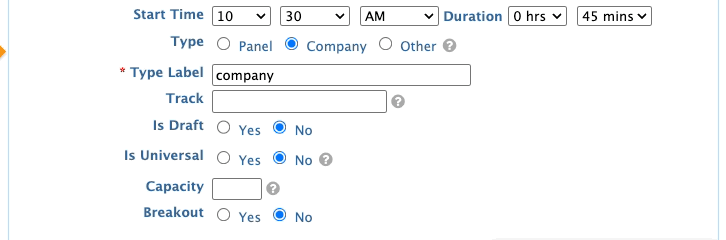
- • Type and Type Label: These settings help you organize your presentations into categories. If your event will only have webinars, you can leave this set to Company.
- • Track: Learn more about using presentation tracks here.
- • Is Draft: If you don’t want this presentation to be visible to others yet, choose Yes.
- • Is Universal: This setting places the presentation on all attendee schedules. If you don’t need that, leave it set to No.
- • Capacity and Breakout: These settings aren’t needed for webinars.
- Step 5. In the Description field, enter the details your attendees will see.
- Step 6. In the Presenters section, start typing the first, last, or company name. You’ll see a list of matching records. Choose the presenter for this session:
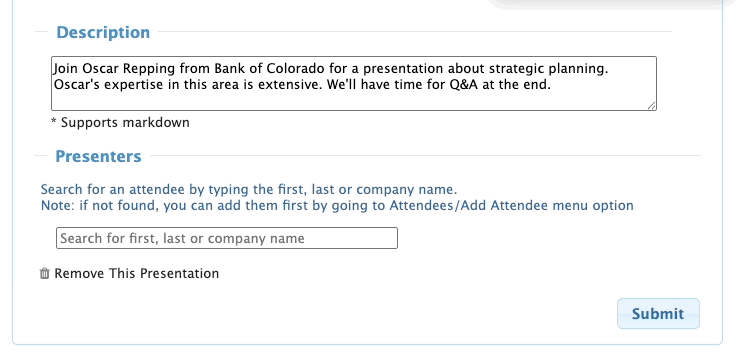
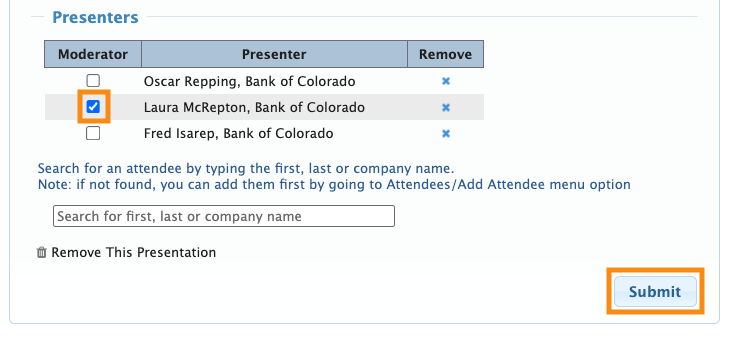
- If your webinar has multiple presenters, repeat this process to add their names as well.
- You can also designate any of them as a Moderator, as shown below.
- Step 7. Click Submit to save:
Connecting the session to SummitCast
Now that you’ve created the session, you’ll connect it to our webcasting partner.
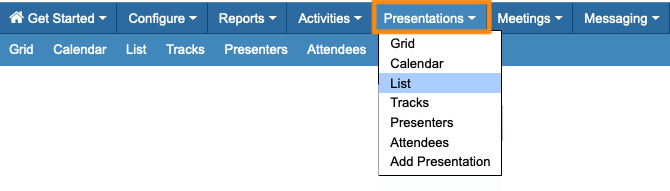
- Step 1. Head back to the Presentations tab. Choose List:
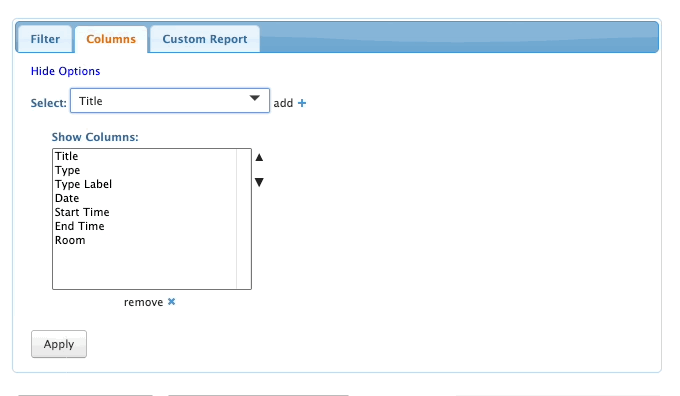
- Step 2. On the Presentations List, You’ll find it useful to add a few columns:
- • Webcast
- • Webcast Title
- • Viewed Webcast
- • Webcast Archive Days
- Head to the Columns tab and add them. Then click Apply:
- Step 3. Return to the Filter tab. Click the Sync SummitCast Videos button:

-
The sync process could take a few minutes. You can leave this tab and continue working elsewhere in MeetMax. - To check progress, return to this page and refresh it. When the sync is done, you’ll see the Last Synced time. Each time you do a new sync, this time updates:

-
You’ll also see the Import View Logs button at this point. You’ll use it later on to track attendance. - Step 4. Once you’ve synced a webinar with SummitCast for the first time, you’ll see some data in the new columns you added earlier:
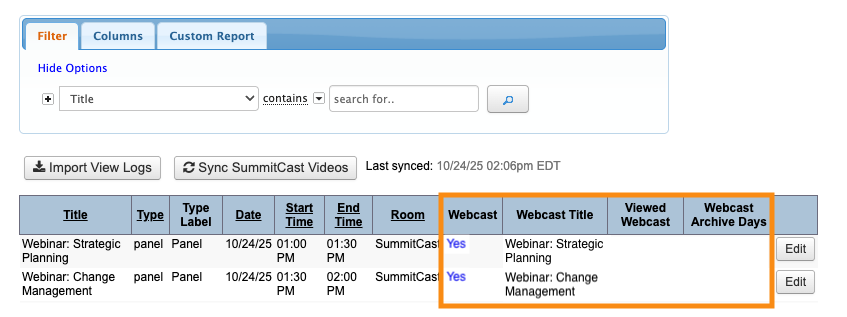
- • Webcast: The Yes link here connects you to the attendee view of the webinar. You can use this to check on the webinar, without being counted in the viewer stats. (Learn more in the section below.)
- • Webcast Title: This is the title SummitCast displays on their player page.
- • Viewed Webcast: After the session, you’ll see the total number of viewers here. (Learn more here.)
- • Webcast Archive Days: For webcasts where you’re allowing replays, this column shows how many days you’ve made replays available.
- At this point, you’re ready to give the presenter their dashboard link.
Delivering the Presenter's Dashboard link
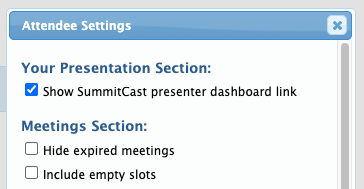
MeetMax places each Presenter’s unique dashboard link on their event schedule.
Here’s how to enable this display:
| Presenters must be logged into their MeetMax accounts to access their dashboard links. You will not have access to the presenter dashboard from your Admin account. |
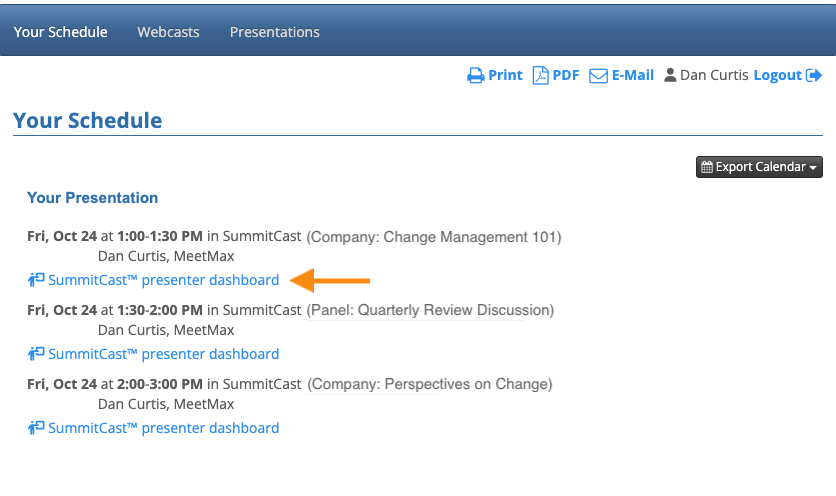
The presenter starts the webinar from their Dashboard. See what that process looks like here.
Best Practices
- When you create a webinar event in MeetMax, you'll set a time zone. It's usually simplest to set the event time zone to the presenter's time zone.
- If you can't do that, MeetMax has a time zone conversion feature that will automatically convert times on MeetMax pages. SummitCast pages, however, always display times in the event's time zone.
- If you make any changes to a webinar in MeetMax, including text or presenter changes, be sure to click the Sync SummitCast Videos button again. That transmits your updates to SummitCast.
- Keep in mind that you can always control what webinar attendees can see in the MeetMax menu bar. Learn more about the Menu Editor here.

