
In this article:
- Where is it?
- What the Locations List shows
- Editing a single booth
- Editing booths in bulk
- Where your changes appear
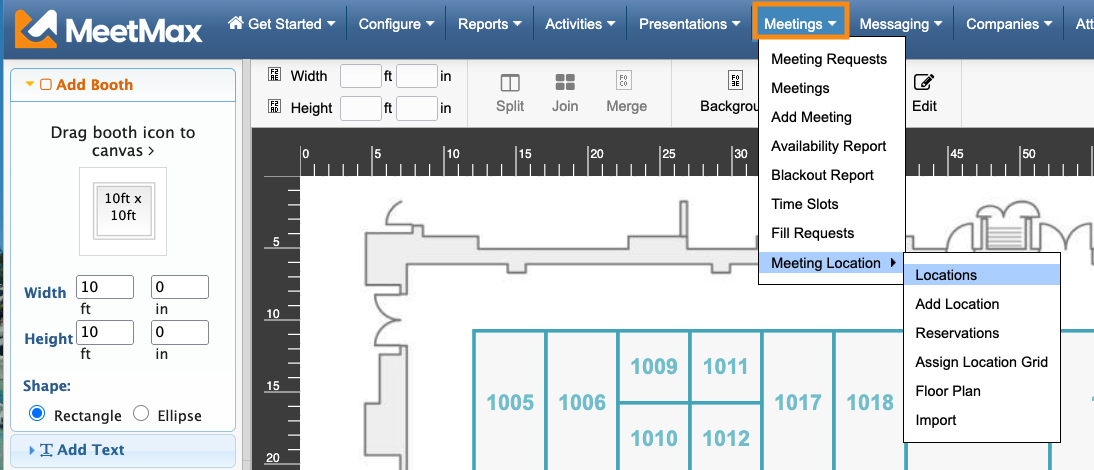
Where is it?
Once you’ve built your Floor Plan, you can head to the Meetings tab. Choose Meeting Location, then Locations:
What the Locations List shows
As we discussed in the article on creating your Floor Plan, each time you add a booth to the map, MeetMax automatically creates a new meeting location with a booth number.
From our sample floor plan above, here’s the Locations List with all the booths created:
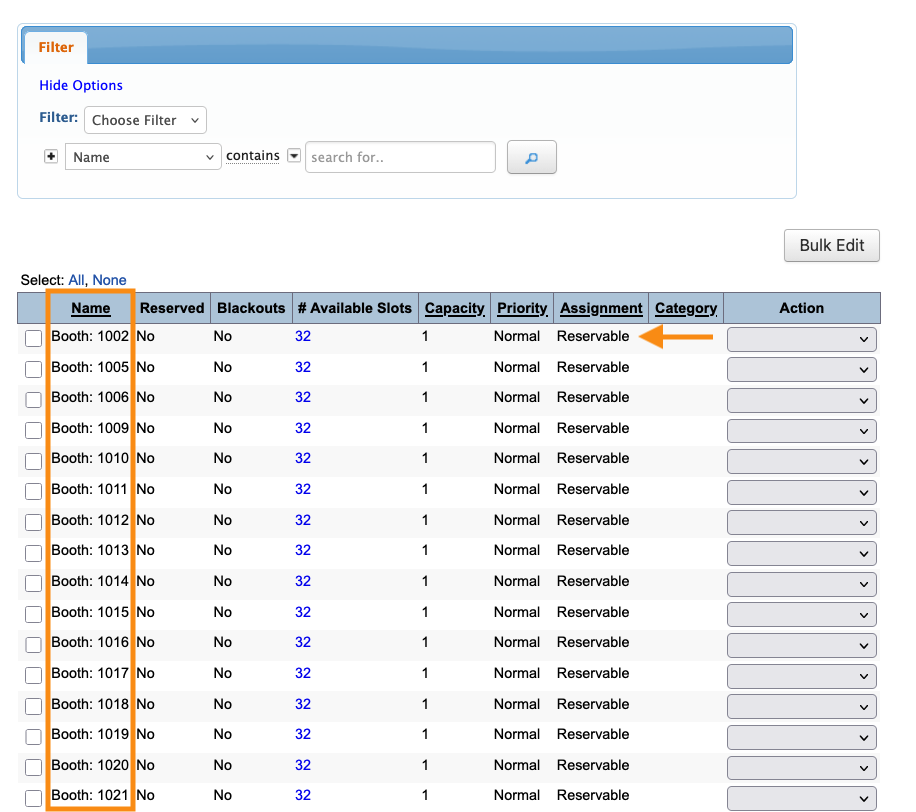
MeetMax automatically sets these locations as Reservable, so you can assign each one to a Company.
Editing a single booth
You can change any details of these auto-created locations.
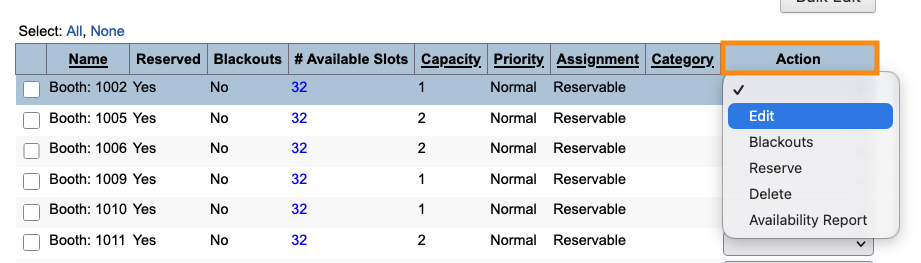
To edit one location, use the Action menu:
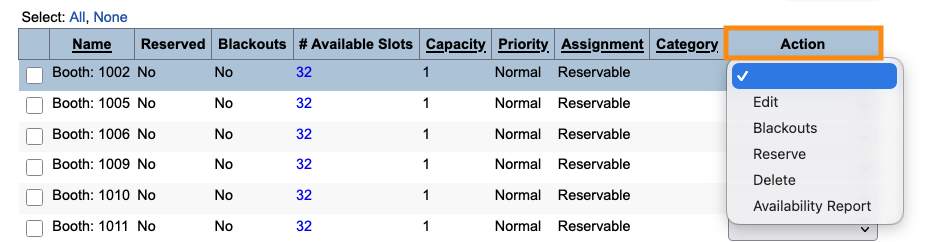
In this menu, you can:
- Edit: Update the booth type, name, and meeting capacity as shown below.
- Set Blackouts, or times when this location isn’t available for 1x1 meetings.
- Reserve this location for a specific Company
- Delete this location
- Availability Report: Get a list of when this location is available for meetings.
To edit one location, use the Action menu to choose Edit:

Here, we’re changing the booth Type, and updating the name.
This larger booth can host up to 3 meetings at once, so we’re changing the Capacity to 3.
Be sure to click Save!
| Depending on your event, booths might or might not be locations for 1x1 meetings. If you won’t have meetings at booths, leave the Capacity set to 1 | |
| Booth Types are optional. For some events, it’s useful to organize booths into different categories. If your event doesn’t need that, leave them all set as Booth. |
Editing booths in bulk
If you need to make the same change to multiple booths, you’ll save time with the Bulk Editor.
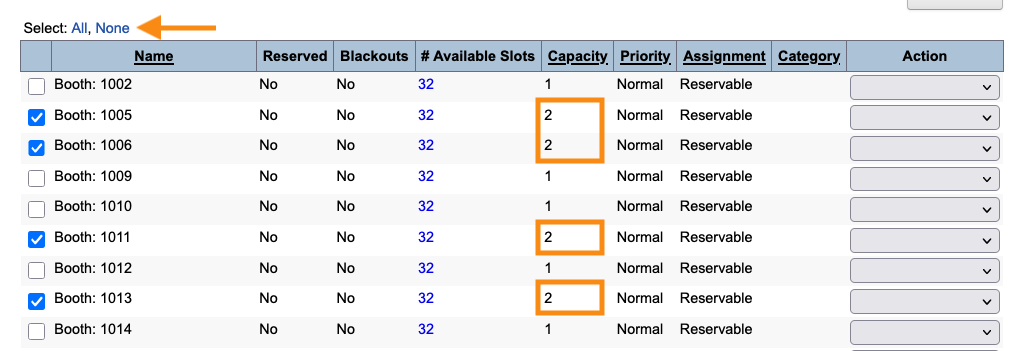
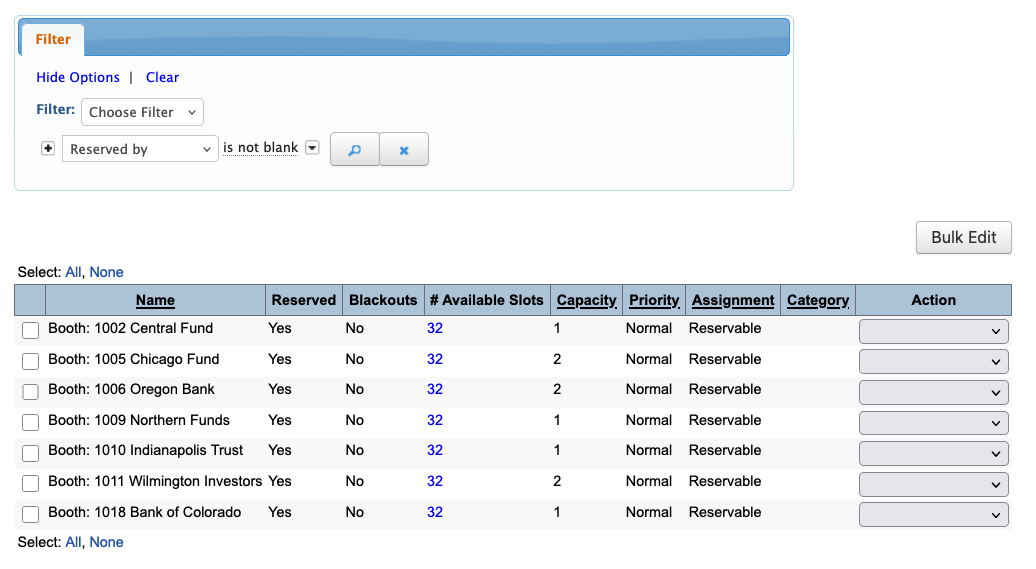
- Step 1. Click the checkboxes to select the booths you want to update.
- Then set the Filter menu to Selected, and click the magnifying glass icon to narrow the list:
- Step 2. Now, click the Bulk Edit button:
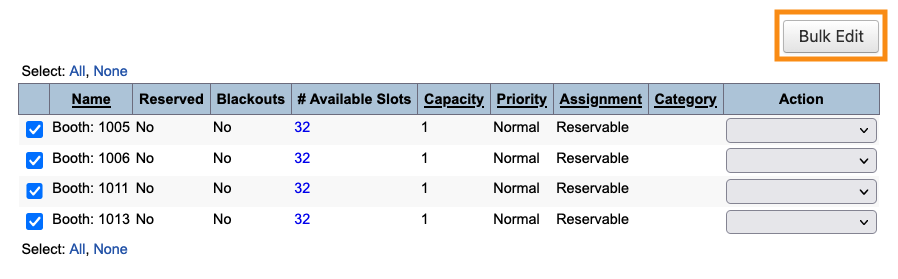
- Step 3. The pop-up shows you how many records are about to be updated. Make sure that matches the number of records you selected above.
- Step 4. Choose which field you want to change for all of these locations.
- In this example, we’re increasing the meeting Capacity. Be sure to click Submit!

- Step 5. The Locations List now reflects your bulk change.
- To remove the selections, click None:
Where your changes appear
Once you’ve built your Floor Plan, you’ll have booth details in two places:
- The Floor Plan that participants see
- The Locations List that event Admins see
Both locations will display the booth numbers that MeetMax generated automatically.
As you reserve booths for Companies, MeetMax adds a pop-up label for your participants, like this:
Changes you make on the Floor Plan won't transmit to the Location List.
If it’s helpful for your Admin team, you might also want to edit the Locations List to display these reserved Companies, as shown below.
- Step 1. Start the process by opening any location to edit:
- Step 2. Leave the booth number in place, and add the Company name:
- Step 3. If you’re updating multiple booths, use the Switch location menu to save time
- Be sure to click Save for each update:
- Step 4. With those changes, the Locations List looks like this:
What’s next?
Now that your booths are in place, you can:
- Reserve booths for Companies at your event
- Make the final Floor Plan to participants

