Creating a Floor Plan

Upload a map of your event venue, then use our interactive tools to add booths. Participants can use this Floor Plan to navigate and explore who’s exhibiting.
In this article:
Where is it?
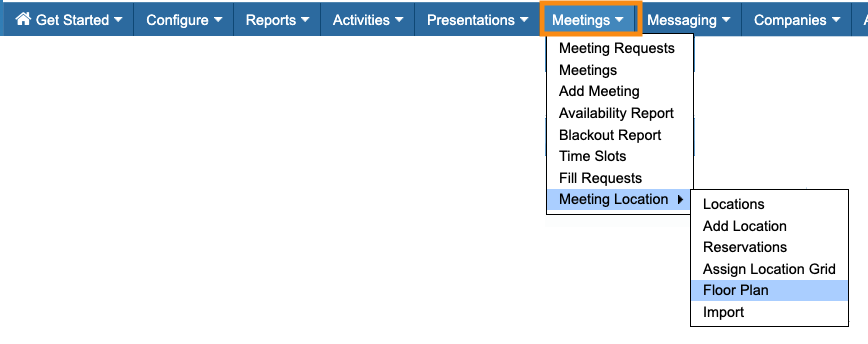
Once it's enabled, you’ll find the Floor Plan in the Meetings tab:
Enabling the Floor Plan
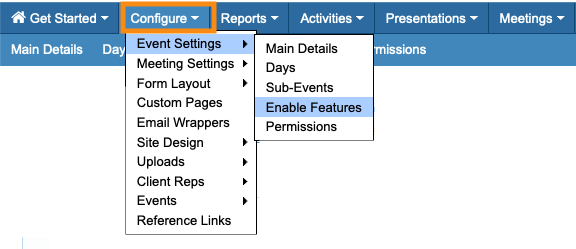
- Step 1. Head to the Configure tab. Choose Event Settings, then Enable Features:
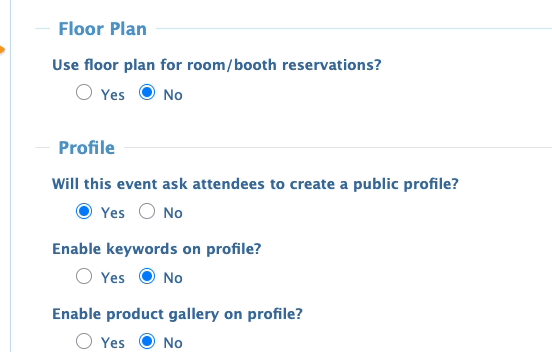
- Step 2. Scroll to the Floor Plan section. When you choose Yes, more settings appear:
- • Show floor plan on registration form: Adds the Floor Plan to the Attendee and Company registration forms. You can display it either Inline, or as a Pop-up.
- • Show floor plan on menu: Enables a Floor Plan tab in the Attendee and Company menu bars. (You can still use the Menu Editor to control when and how it displays.)
- Step 3. Scroll to the bottom of the page and click Save:

Uploading your venue map
As a starting point, you’ll upload a background map of your venue. Once it’s in MeetMax, you’ll draw booths over the top of it. The booths you draw interact with other parts of MeetMax. (More on this below.)
| MeetMax accepts JPG or PNG files. We recommend using a high-quality image. |
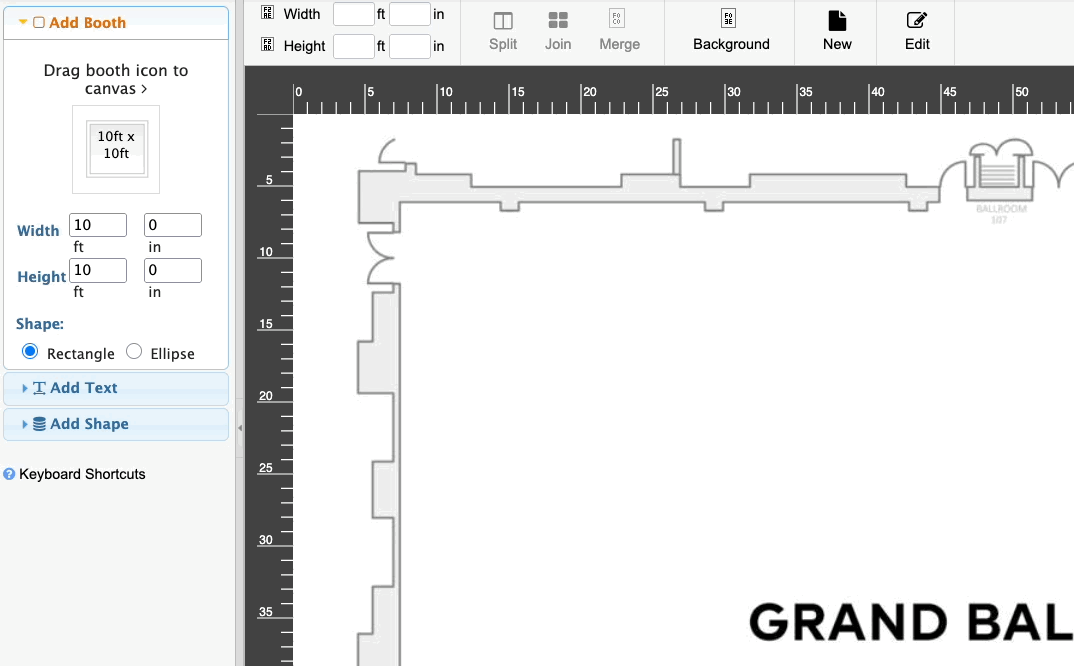
- Step 1. Head to the Meetings tab. Choose Meeting Location, then Floor Plan:

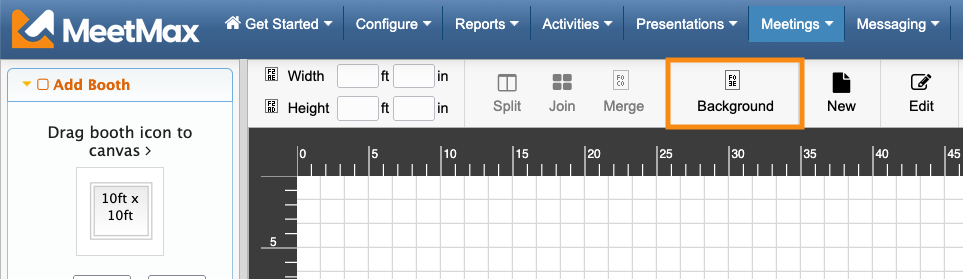
- Step 2. In the Floor Plan builder, click the Background button:
- Step 3. In the pop-up, click Browse. Then locate the file on your computer:
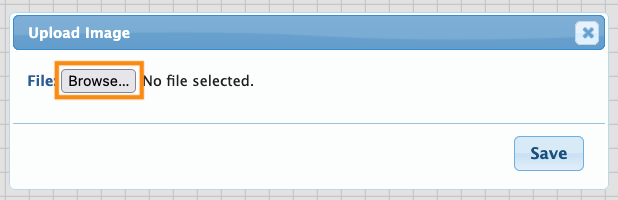
- Step 4. When you add your image, you’ll see a preview. Click Save to start the upload:

- Step 5. With your background image in place, head to the top right corner of the page. Click the Save button again:

-
You’ll see this button appear and disappear as you’re working with your Floor Plan. This button appears whenever there’s a change that needs saving. If you don’t see it, all changes are currently saved.
Adding booths to the map
- Step 1. First, set your default booth size - this is the size most booths at your event will have.
In the left sidebar of the Floor Plan builder, set the booth size and shape: 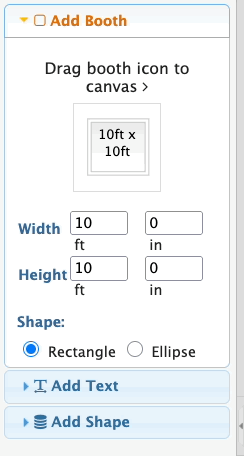
- Don’t worry - you’ll still be able to create booths in other sizes. This default setting just saves you time.
- Step 2. Now, you can click the booth icon, and drag it to any spot on the venue map:
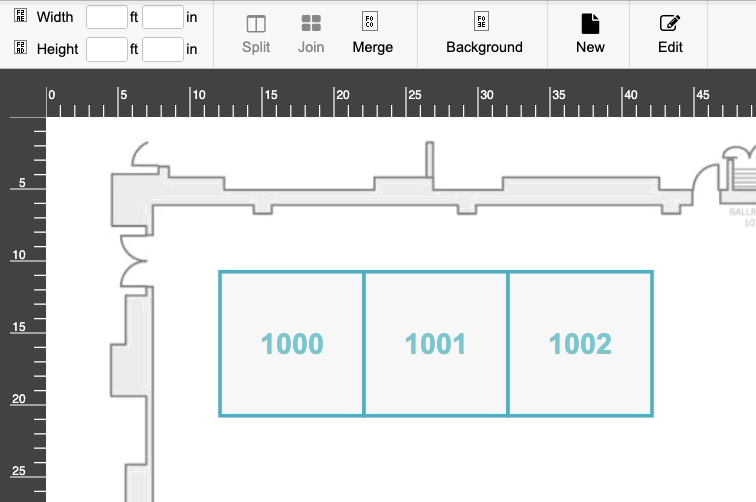
-
See the numbers appearing on each booth? These are default booth numbers. You can change them from the Locations List. - Step 3. Need a double booth? Drag two of the default booths into place.
- Use Ctrl-Click to select them both. Then click the Merge button:
- Step 4. To split a booth into smaller segments, click on it to highlight. Then click the Split button:
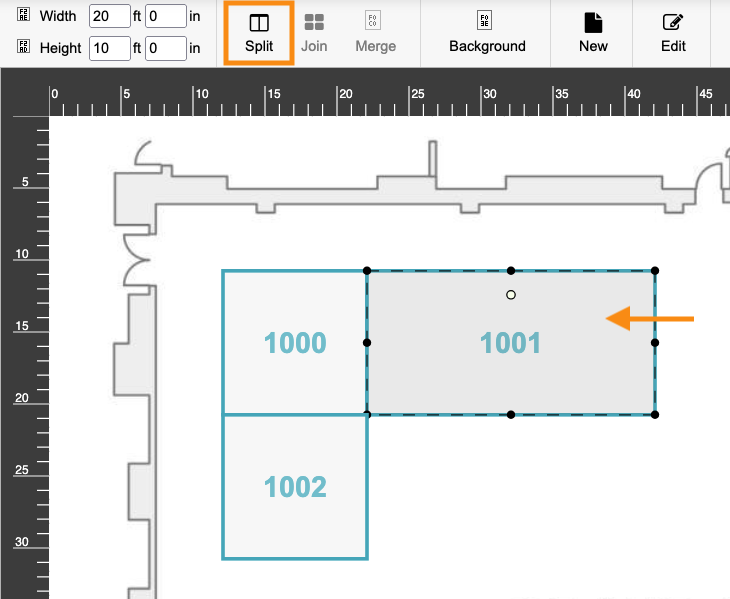
- In the pop-up, enter the dimensions for this split. Then click Split Booth:

- Think in terms of rows and columns in a grid here. In this example, we’re splitting a double booth so that it will take up one row and two columns in our grid:
- Depending on the Row and Column numbers you enter, you can split booths in lots of ways:
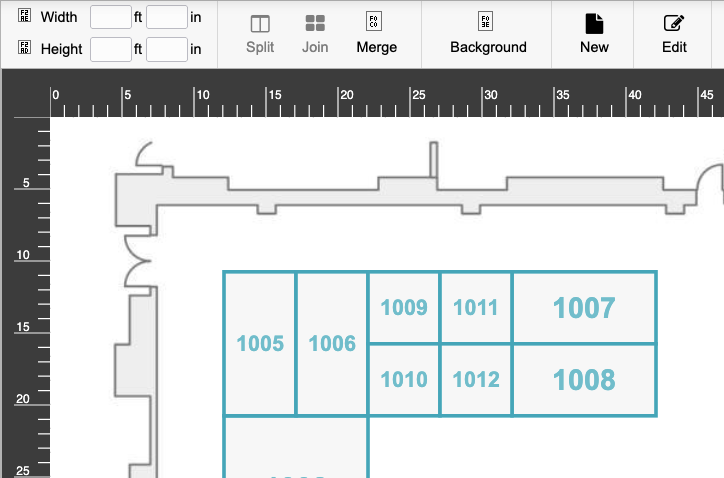
-
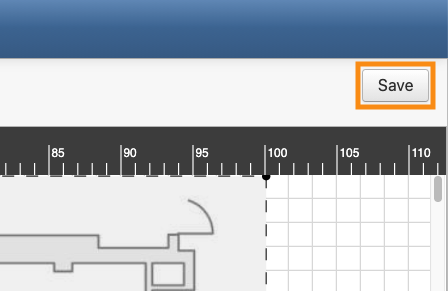
No matter how you configure your booths, MeetMax assigns a default booth number to each one, in the order you add them. You’ll be able to update these labels from the Locations List. - Step 5. Remember, when the Save button appears in the top right corner of the page, be sure to click it:
What’s next?
Now that you have your booths mapped, you can:

