


In this article:
Where is it?
Custom Lists live on Custom Pages. You’ll create these from the Configure tab:

Why is it useful?
For some events, you might want your participants to see a specific list of other participants. You can set any criteria for this list - it can include a wide or narrow range of participants.
Custom Lists work especially well with Custom Fields in your event registration forms:
- The fields sort participants into the groups you need.
- The Custom Lists uses those fields to create displays.
In this article, we’ll use the example of an event for startups. We want to make it easy for Attendees to find the right Companies to meet with.
- We’ve added a custom field to our Company registration form, where Companies can choose their industry as they register.
- For Attendees, we’ll create a Custom List page. It will show all participating Companies, organized by their industry.
Adding a Custom List
- Step 1. Head to the Configure tab. Choose Custom Pages:

- Step 2. Give this page a title. It has two parts:
- • Page: The label you add here will appear in the URL of the new page. Don’t use any spaces.
- • Title: This is the page title that will appear on public menus. It’s a good idea to keep the title short.
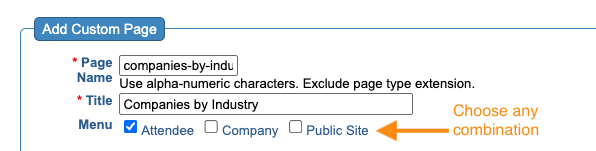
- Step 3. In the Menu field, choose where this page will be visible as shown above.
- • You can add it to the Attendee or Company menu, or both.
- • If you want to share the URL of this page in links (such as in batch emails), click Public Site.
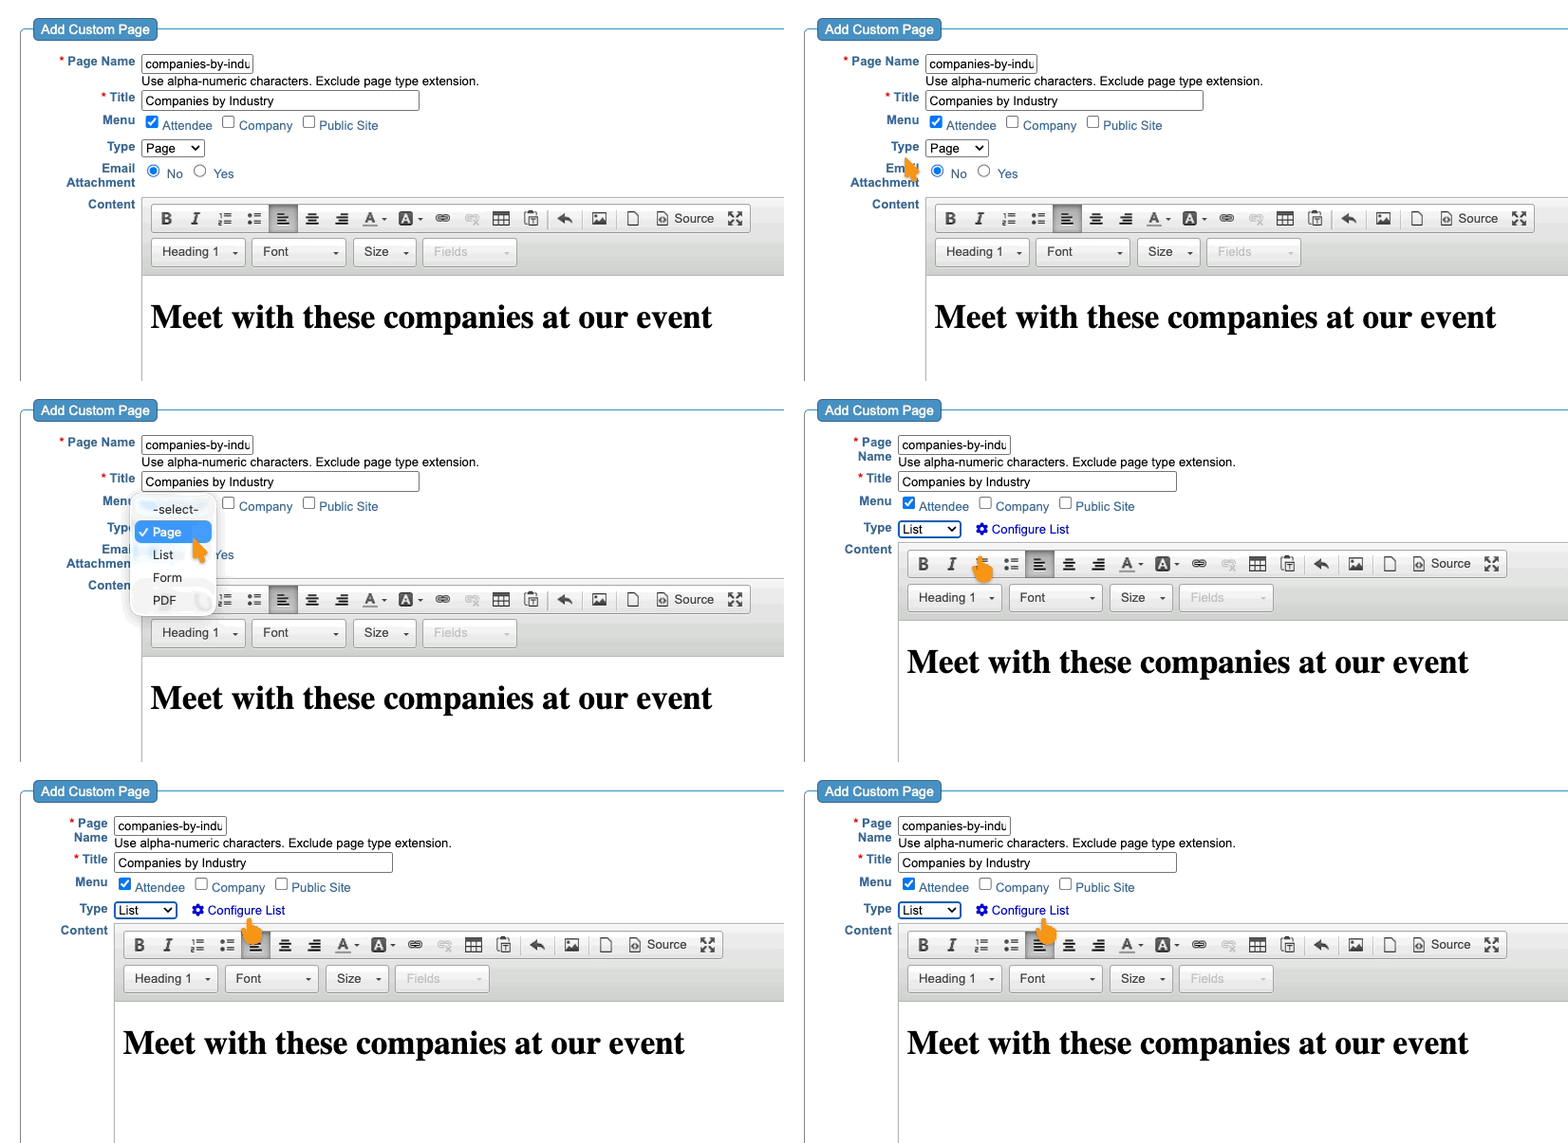
- Step 4. Use the Type menu to choose List.
After that, click the Configure List link:
-
In the Content field, we’ve added a heading. This will display above the custom list on our page. This is an optional step. - Step 5. Now, choose which type of record this list will be based on. You can choose from:
- • Attendees
- • Companies
- • Company Reps
- • File uploads
- For our example, we’re making a Company list:

- Step 6. From here, things will look a lot like other List pages in MeetMax.
- Based on the choice you made in the previous step, you’ll now see filtering options. Add as many filters as you need to form the list you want to display. Learn more about the basics of filters here.
- In this example, we added two filters:
- • Company is set to is not blank, so all Companies will display.
- • We also added a filter for our custom form field, Industry. Then we chose all of our industries, so they’re all available to this list:
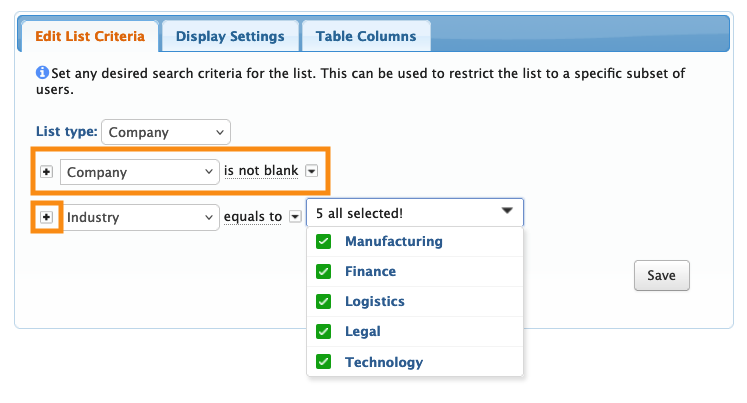
- Be sure to click Save!
At this point, the Custom List page is ready to use. See the next section to customize the page layout.
Adding display settings
Custom Lists are very flexible; you can add or remove many parts of the display.
- Step 1. To access the display settings, head to your list of Custom Pages. Locate the page you need, and click the Edit link:
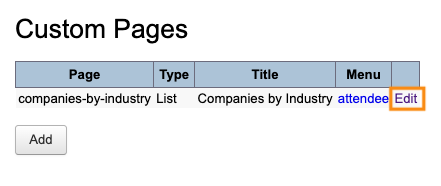
- Step 2. From there, click the Display Settings tab:

- Step 3. There are many customization options here! Learn more about the display settings here.
- For this example, we’ll use the first setting, Group list by. We’ll choose our custom form field, Industry. That will group the list by industry:

What participants see
When you create a Custom List page, MeetMax automatically adds it to any account menus you’ve selected: Attendee, Company, or Public Site. (Remember, you can use the Menu Editor to customize this view.)
The participants you’ve enabled can then log into MeetMax, and see the new page in their menu bar. It has the title you created:

| Participant pages like these will be branded for your event, and contain the menu options you’ve enabled. | |
| We’ve customized the page icon here. |
Below is our finished Custom List, using one of the many display options - a simple table that allows meeting requests:

What’s next?
Now that you have a Custom List page, you can:

