
In this article:
- Which option for your event?
- Manually sending registration confirmations
- Sending a batch email: Self Check-In
- Automatic confirmation emails
- Emailing specific groups
- Verifying delivery
| We’re assuming here that you’ve already added your Attendees to MeetMax. |
Which option for your event?
Depending on your event, you might:
- Manually send a batch of registration confirmations
- Send a batch email, delivering each attendee a unique QR code for self check-in
- Use MeetMax’s automated registration confirmation emails
- Send no email at all
Feel free to skip to the section below that applies to your event.
If you’re not sending email, you can move on to the next article, Managing Check-In.
Manually sending registration confirmations
Once you’ve imported your list of Attendees (and manually added any last-minute registrants), you can send a batch of confirmation emails. Each email contains the attendee’s unique username and confirmation number.
You’ll send these confirmations from the MeetMax batch emailer. Our Support team has already set up email branding and content for you.
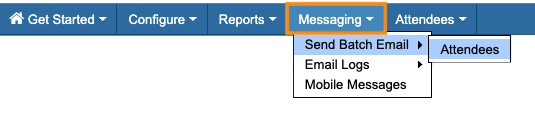
- Step 1. Head to the Messaging tab. Choose Send Batch Email, then Attendees:

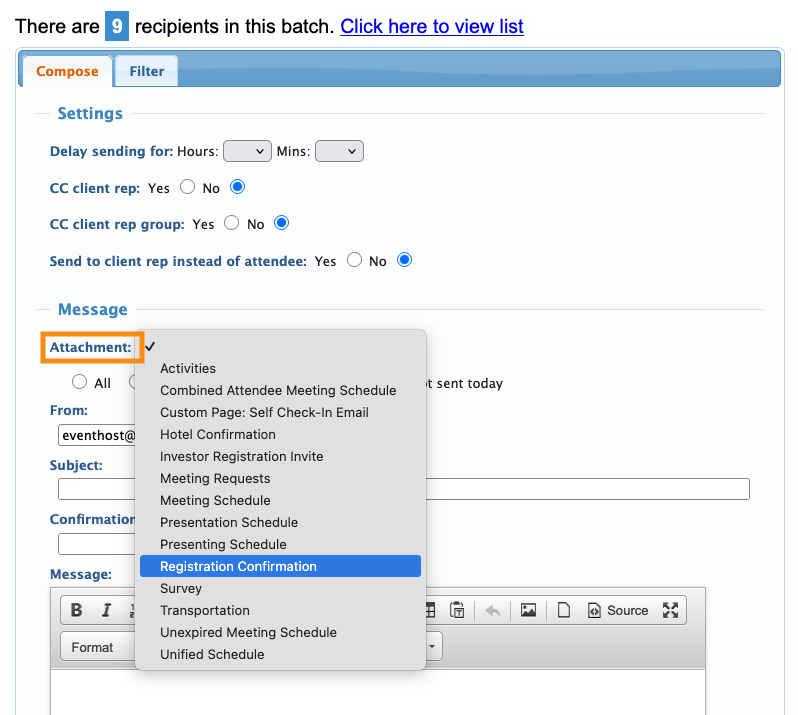
- Step 2. You’re now in the batch emailer. Head to the Attachments menu. Choose Registration Confirmation:
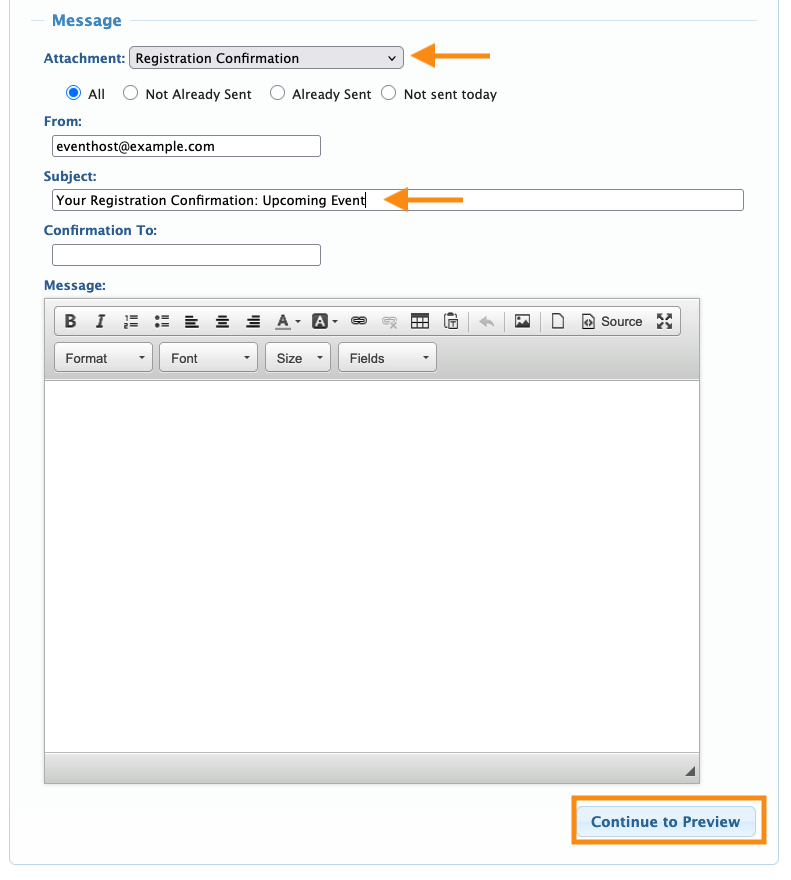
- Step 3. Add a subject line for your email.
- If you’d like a confirmation when the batch has been sent, add your email address in the Confirmation To field.
- Then, click Continue to Preview:
-
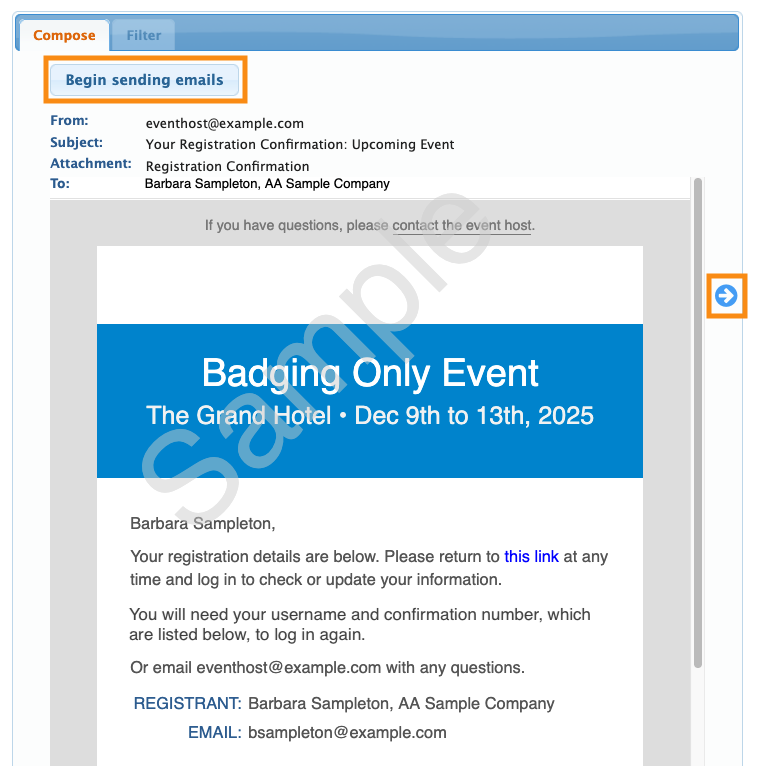
The Attachment contains all of your email’s content, so you won’t need to use the Message field. - Step 4. You’ll see a preview of one email. If you’d like to see previews of more emails in this batch, click the arrow icons to page through.
- If all looks good, click Begin Sending Emails:
- Step 5. By default, MeetMax sends emails in batches of 50. At the end of each batch, you’ll be prompted to start the next one:

More details:
Sending a batch email: Self Check-in
This type of email confirmation contains a unique QR code for each registrant to check themselves in.
Our Support team will create the email, using a Custom Page. You can edit the content of that page as needed.
If you need to add QR codes to any MeetMax email, paste in this code snippet:
[%qrcode%] |
Once you've added all of your Attendees to MeetMax, you’ll send a batch email.
- Step 1. Head to the Messaging tab. Choose Send Batch Email, then Attendees:
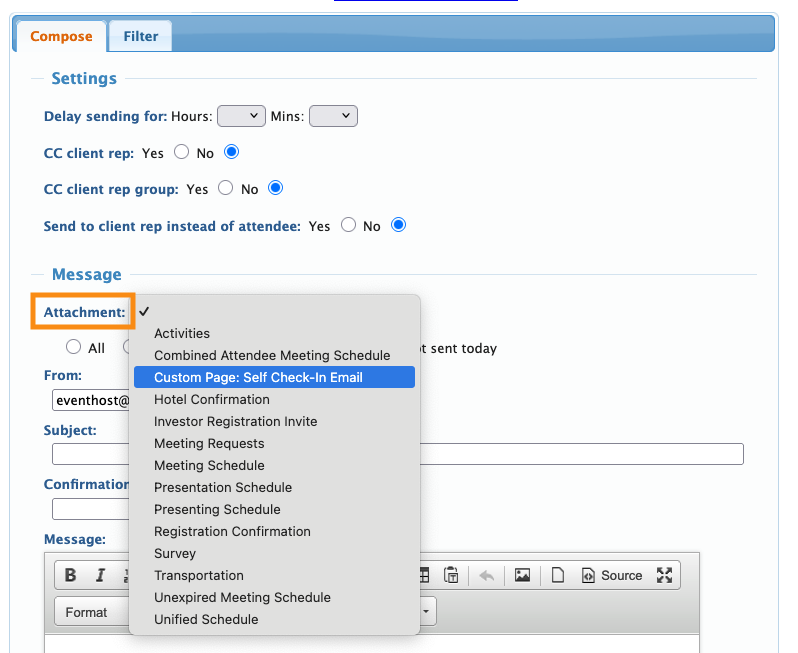
- Step 2. You’re now in the batch emailer. Head to the Attachments menu. Choose the Custom Page option for self check-in. (Our Support team has set this up for you.)
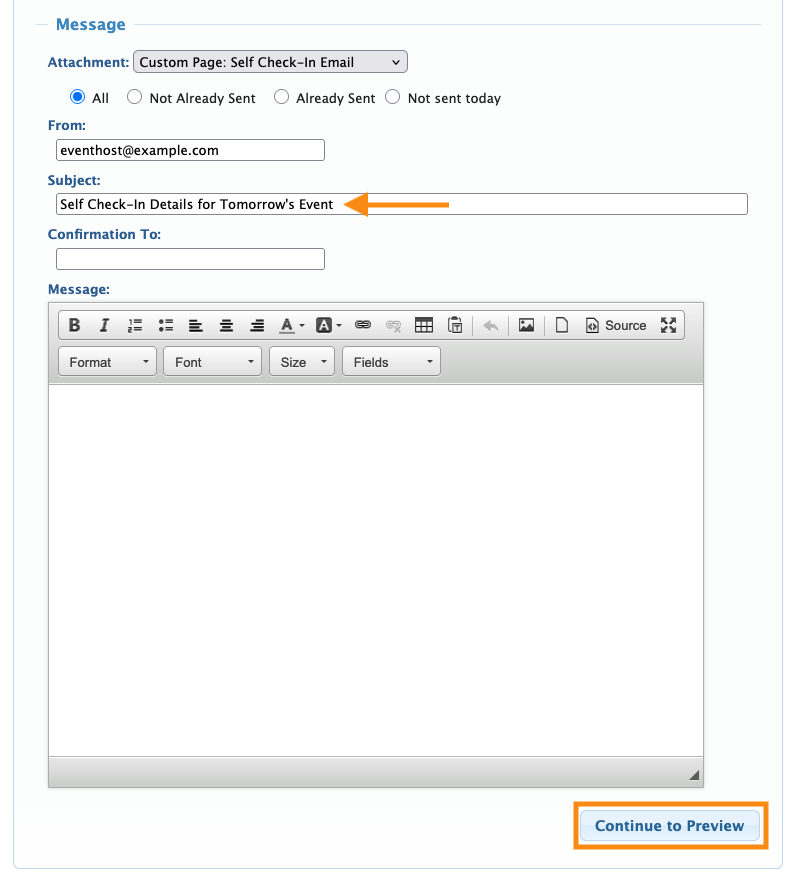
- Step 3. Add a subject line for your email.
- If you’d like a confirmation when the batch has been sent, add your email address in the Confirmation To field.
- Then, click Continue to Preview:
-
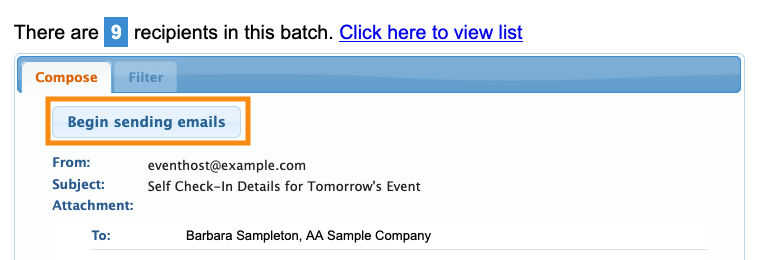
The Attachment contains all of your email’s content, so you won’t need to use the Message field. - Step 4. You’ll see a preview of one email. If all looks good, click Begin Sending Emails:
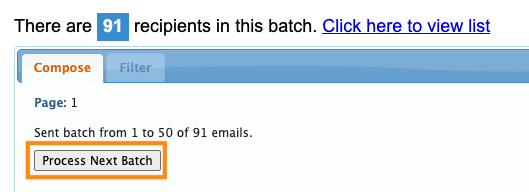
- Step 5. MeetMax sends emails in batches of 50. At the end of each batch, you’ll be prompted to start the next one:
More details:
Automatic confirmation emails
If you’re registering people from a public web page, MeetMax generates a confirmation email automatically. There’s nothing you need to do.
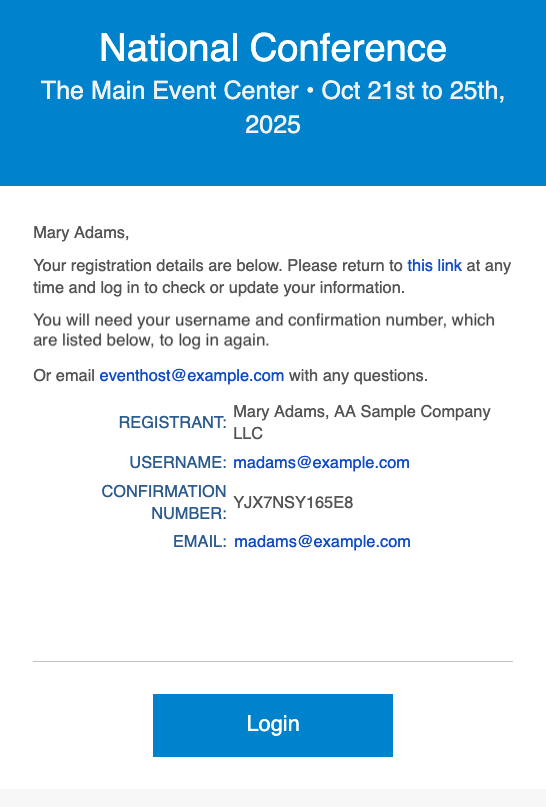
This email contains all the details an Attendee will need to check in at your event:
More details:
Emailing specific groups
For some events, you might need to email a subset of your registered participants. In those cases, you’ll use the Attendee List's Filter tab to narrow your list down:
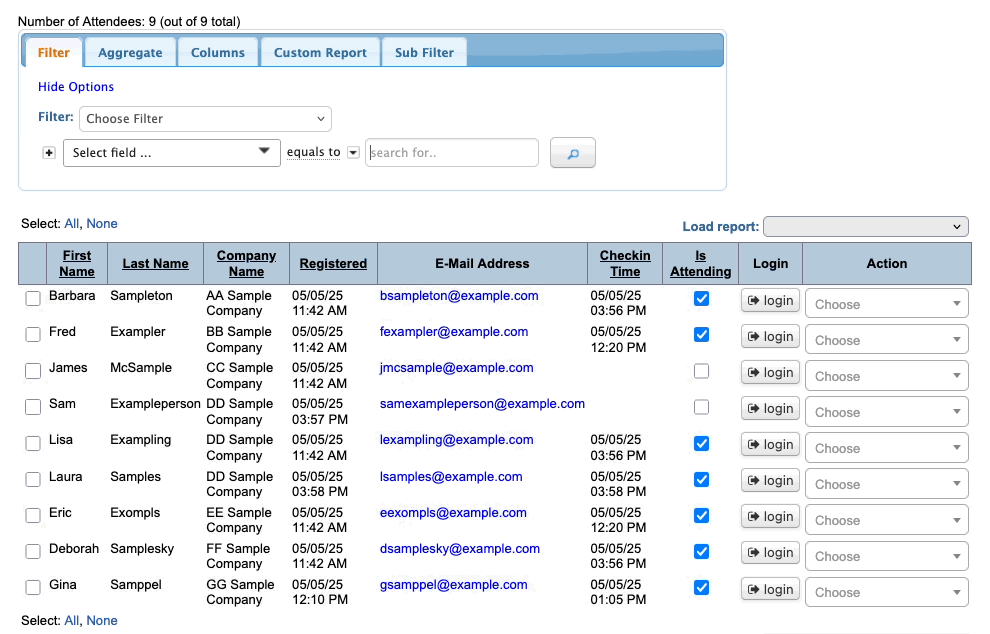
Here are two examples:
- If you’ve had some last-minute attendees register, you might want to send confirmations only to them.
- If you’ve registered people with different user roles, like Attendees and Company Reps, you can filter to send email only to one role.
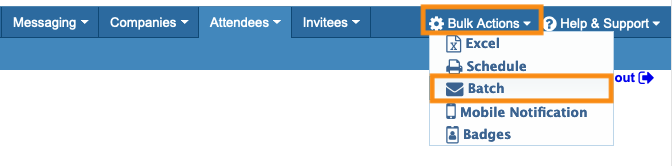
Once you’ve filtered the list to the people you need, head to the top right corner of the page. Click on Bulk Actions, then choose Batch:
You’ll then be in the batch emailer. Follow the steps in the sections above to email this group.
More details:
Verifying delivery
No matter which type of email you send from MeetMax, you can check on its status in the Email Logs. It may take a few minutes after sending to see the delivery information.
Head to the Messaging tab, then choose Email Logs. MeetMax has two options:
![]()
- Emails shows you stats on individual emails you’ve sent (including those sent as part of a batch)
- Batches shows you overall stats on batch emails you’ve sent
More details:

